















YWED5100HC3 Whirlpool Dryer - Instructions
Keep searches simple. Use keywords, e.g. "leaking", "pump", "broken" or "fit".
HEATING ELEMENT open circuit
replacing the heating element was difficult due to the small area to work with and the defective element was difficult to slide out from housing.
Parts Used:
-
Fred from ROCKINGHAM, VA
-
Difficulty Level:A Bit Difficult
-
Total Repair Time:30 - 60 mins
-
Tools:Socket set
2 of 2 people
found this instruction helpful.
Was this instruction helpful to you?
Thank you for voting!
Heating element went out.
Followed the instructions all went good except for the sliding the shield back in it didn't want to go back in but it does fit. Dryer works like new again.
Parts Used:
-
Charles from SALLISAW, OK
-
Difficulty Level:A Bit Difficult
-
Total Repair Time:30 - 60 mins
-
Tools:Nutdriver
2 of 2 people
found this instruction helpful.
Was this instruction helpful to you?
Thank you for voting!
Belt Broken
-
Gus from RIVERSIDE, CA
-
Difficulty Level:Very Easy
-
Total Repair Time:30 - 60 mins
-
Tools:Nutdriver, Pliers
2 of 2 people
found this instruction helpful.
Was this instruction helpful to you?
Thank you for voting!
Part broken in half
Remove screws, dryer sensor on screen. Put sensor back in place. Secure with screws. The way you take it off go in reverse.
Parts Used:

-
Sean from ROCK HILL, SC
-
Difficulty Level:Really Easy
-
Total Repair Time:30 - 60 mins
-
Tools:Screw drivers
3 of 5 people
found this instruction helpful.
Was this instruction helpful to you?
Thank you for voting!
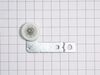
The bearing on the idler pulley went bad, squealing
Took the dryer apart and replaced the idler pulley with bracket and the drive belt
Parts Used:
-
Gerald from Yucaipa, CA
-
Difficulty Level:Really Easy
-
Total Repair Time:30 - 60 mins
-
Tools:Nutdriver, Screw drivers
2 of 2 people
found this instruction helpful.
Was this instruction helpful to you?
Thank you for voting!
Shutting off and had to wait before could turn back on
Followed online video very easy and dryer works like new one....
Parts Used:

-
Allen from KENNETT, MO
-
Difficulty Level:Really Easy
-
Total Repair Time:30 - 60 mins
-
Tools:Screw drivers, Socket set
2 of 2 people
found this instruction helpful.
Was this instruction helpful to you?
Thank you for voting!
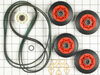
Very loud squeaking!
Couple screws behind the electrical panel at the top and the top pushed back and was able to remove front panel, and then it was pretty easy. Take the two screws on top front, lint trap screws . The lint trap vent needs to come off. Then the belt, drum comes out to access the idler pulley. I did replace two drum wheels, I saw there was 5. I would recommend replacing all of them, they didn’t move well…..
Parts Used:
-
Travis from GARRETT, IN
-
Difficulty Level:Really Easy
-
Total Repair Time:30 - 60 mins
-
Tools:Screw drivers, Socket set
2 of 2 people
found this instruction helpful.
Was this instruction helpful to you?
Thank you for voting!
Repair video made it easy
-
Jack from DINUBA, CA
-
Difficulty Level:Really Easy
-
Total Repair Time:1- 2 hours
-
Tools:Nutdriver, Screw drivers
2 of 2 people
found this instruction helpful.
Was this instruction helpful to you?
Thank you for voting!
Dryer was making noise - thought it was the belt, turned out to be the tensioner.
I followed the video provided by ‘Partselect’; although it was not the exact model it was close enough to get the job done with high confidence.
Parts Used:
-
Steven from CAMARILLO, CA
-
Difficulty Level:Easy
-
Total Repair Time:1- 2 hours
-
Tools:Nutdriver, Screw drivers
2 of 2 people
found this instruction helpful.
Was this instruction helpful to you?
Thank you for voting!
Rollers making a noise.
Removed the top, removed lower front cover, removed the front, removed the belt, removed the drum and the back. Removed and replaced roller support shaft and drum roller’s. Completed all Front and rear support for drum. Replaced drum , replaced drum roller belt and replaced back, completed replacement of the top, front.
Parts Used:

-
Carl from MARION, KY
-
Difficulty Level:Really Easy
-
Total Repair Time:More than 2 hours
-
Tools:Nutdriver, Pliers, Socket set
2 of 2 people
found this instruction helpful.
Was this instruction helpful to you?
Thank you for voting!
Broken belt
Disconnect gas line and vent hose,removed top and back covers to install belt.
Parts Used:
-
Robert from CALIFORNIA, MO
-
Difficulty Level:Very Easy
-
Total Repair Time:Less than 15 mins
-
Tools:Nutdriver
2 of 2 people
found this instruction helpful.
Was this instruction helpful to you?
Thank you for voting!
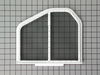
lint screen was not catching lint and sending out the dryer vent
-
Scott from WOODBURY, MN
-
Difficulty Level:Very Easy
-
Total Repair Time:Less than 15 mins
2 of 2 people
found this instruction helpful.
Was this instruction helpful to you?
Thank you for voting!
Screen ripped
-
Cindy from BENZONIA, MI
-
Difficulty Level:Very Easy
-
Total Repair Time:Less than 15 mins
2 of 3 people
found this instruction helpful.
Was this instruction helpful to you?
Thank you for voting!
The lint filter needed replacement due to what is probably normal wear and tear.
I searched for a replacement by entering the model number and serial number of my Kenmore elite dryer. Ordering was extremely simple and it took less than a week to arrive. It fits perfectly.
Parts Used:
-
Donna from CARY, NC
-
Difficulty Level:Very Easy
-
Total Repair Time:Less than 15 mins
2 of 3 people
found this instruction helpful.
Was this instruction helpful to you?
Thank you for voting!
Not heating up
I just took the old element replaced with the new one i order from this site, I save some money was really easy so proud of my self...
Parts Used:
-
braulio from FORT WAYNE, IN
-
Difficulty Level:Very Easy
-
Total Repair Time:30 - 60 mins
-
Tools:Nutdriver, Screw drivers
2 of 3 people
found this instruction helpful.
Was this instruction helpful to you?
Thank you for voting!