















YSF387LEKQ1 Whirlpool Range - Instructions
Keep searches simple. Use keywords, e.g. "leaking", "pump", "broken" or "fit".
broken rear drawer glides

-
Jeff from Manhattan, KS
-
Difficulty Level:Really Easy
-
Total Repair Time:15 - 30 mins
-
Tools:Screw drivers
Was this instruction helpful to you?
Thank you for voting!
Light bulb failure
Received the part the day after ordering. Appreciated the quick service and repair took less than a minute.
Parts Used:

-
Grant from Alexandria, VA
-
Difficulty Level:Really Easy
-
Total Repair Time:Less than 15 mins
Was this instruction helpful to you?
Thank you for voting!
When I originally purchased my stove, there was a large paper describing stove features. It was glued on and when I removed it, it left glue which I could not remove. I s hould have returned stove, but I didn't.
So, after several years of it bothering me, I decided to replace the oven panel. I ordered it one day and it arrived the very next day. It was an easy job to replace. Just remove two screws in back and replace the panel. While I was at it I also replaced the racks. Now I have a brand new oven,thanks to PartsSelect!
Parts Used:


-
Doris from Brookline, MA
-
Difficulty Level:Really Easy
-
Total Repair Time:Less than 15 mins
-
Tools:Screw drivers
Was this instruction helpful to you?
Thank you for voting!
Burner Grate coating was damaged
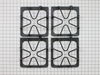
-
Joseph W from Anaheim, CA
-
Difficulty Level:Really Easy
-
Total Repair Time:Less than 15 mins
Was this instruction helpful to you?
Thank you for voting!
Broken Control Knob
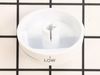
-
Sandra from Birmingham, AL
-
Difficulty Level:Easy
-
Total Repair Time:Less than 15 mins
Was this instruction helpful to you?
Thank you for voting!
Stove kept turning off
Looked up on-line the error problem and what part I needed to fix it. Part arrived very quickly and everything was going fine until I realized the stove had two sensors. Replaced the top sensor now I am getting an error on the bottom sensor. Maybe I replaced the wrong one. I will replace the bottom sensor with the one I took out and see if that does the trick. Very very satisfied with PartsSelect. Good Price, Quick Shipping, Would do business with them again. They are now in my favorites so I can find them again if I need parts.
Parts Used:

-
Richard from Wooster, OH
-
Difficulty Level:Really Easy
-
Total Repair Time:Less than 15 mins
-
Tools:Screw drivers
Was this instruction helpful to you?
Thank you for voting!
Oven shutting off after temp reached 350
Remove the plug from outlet then shutoff gas. Remove the 10 screws hold the back panel of the oven. Unclip the connector of the temperature sensor from the main line. Pull the sensor straightout. Reverse the process install the new sensor. Couldn't be any easier. Oven working great. Calling in a reapairman would have cost $200 for parts and labor.
Parts Used:
-
Ken from Las Cruces, NM
-
Difficulty Level:Really Easy
-
Total Repair Time:Less than 15 mins
-
Tools:Screw drivers
Was this instruction helpful to you?
Thank you for voting!
The old panel becamed worped & the finish was distressed.
Took the old one out and replaced it with the new one, fits perfect.
Parts Used:

-
Mike from Chicago, IL
-
Difficulty Level:Really Easy
-
Total Repair Time:Less than 15 mins
-
Tools:Screw drivers
Was this instruction helpful to you?
Thank you for voting!
The old glide broke
Its was very easy, I unscrewed the old part and screwed on the new one and put the drawer back in place and it works perfect.
Parts Used:

-
Dave from Tampa, FL
-
Difficulty Level:Really Easy
-
Total Repair Time:Less than 15 mins
-
Tools:Screw drivers
Was this instruction helpful to you?
Thank you for voting!
Broken drawer glide
Used a phillips head screwdriver to remove the single screw holding the part in place and put the new one on. Finding the part on this site was a breeze and it arrived quickly. A first rate experience all around.
Parts Used:
-
karen from Thornton, CO
-
Difficulty Level:Really Easy
-
Total Repair Time:Less than 15 mins
-
Tools:Screw drivers
Was this instruction helpful to you?
Thank you for voting!