















YMER8772WS0 Whirlpool Range - Instructions
Keep searches simple. Use keywords, e.g. "leaking", "pump", "broken" or "fit".
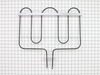
heating element broken
Turn off power--Remove bottom cover inside the oven---Undo three screws holding broken element in place--Remove element by pulling out ,and carefully detach from power connection.Reverse the procedure with the new element.In doing this myself I saved $90 for a repairman to come and diagnose the problem, and another $90 to bring back and install the element which cost $62
Parts Used:
-
Hal from Fort Myers, FL
-
Difficulty Level:Really Easy
-
Total Repair Time:1- 2 hours
-
Tools:Screw drivers
Was this instruction helpful to you?
Thank you for voting!
Broken inner glass
Easy just loosened screws took apart door, removed broken glass and installed new glass.It took longer to clean the stove! Lol!
Parts Used:

-
Joe from Bronx, NY
-
Difficulty Level:Really Easy
-
Total Repair Time:1- 2 hours
-
Tools:Screw drivers
Was this instruction helpful to you?
Thank you for voting!
Light bulb failure
Received the part the day after ordering. Appreciated the quick service and repair took less than a minute.
Parts Used:

-
Grant from Alexandria, VA
-
Difficulty Level:Really Easy
-
Total Repair Time:Less than 15 mins
Was this instruction helpful to you?
Thank you for voting!
Oven shutting off after temp reached 350
Remove the plug from outlet then shutoff gas. Remove the 10 screws hold the back panel of the oven. Unclip the connector of the temperature sensor from the main line. Pull the sensor straightout. Reverse the process install the new sensor. Couldn't be any easier. Oven working great. Calling in a reapairman would have cost $200 for parts and labor.
Parts Used:

-
Ken from Las Cruces, NM
-
Difficulty Level:Really Easy
-
Total Repair Time:Less than 15 mins
-
Tools:Screw drivers
Was this instruction helpful to you?
Thank you for voting!
Stove would not heat up.
-
Tina from E Providence, RI
-
Difficulty Level:Really Easy
-
Total Repair Time:Less than 15 mins
-
Tools:Pliers, Screw drivers
Was this instruction helpful to you?
Thank you for voting!
An Insect got in between the element coil & shorted it out
unplugged the range, removed the cooktop left & right front screws, unplugged left & right plug & unscrewed ground wire. Parts arrived fast & reassembled. . Happy, Happy, Happy! Happy Wife...Happy Life!
Parts Used:

-
Howard from Land O' Lakes, FL
-
Difficulty Level:Really Easy
-
Total Repair Time:Less than 15 mins
-
Tools:Screw drivers
Was this instruction helpful to you?
Thank you for voting!
Broken leveling leg.
This is a no brainer. I am only doing this because you asked. Pull out the stove, tilt it back, remove broken leg, install new leg.
Parts Used:

-
Don from Crestwood, MO
-
Difficulty Level:Really Easy
-
Total Repair Time:Less than 15 mins
-
Tools:Pliers
Was this instruction helpful to you?
Thank you for voting!
Stove kept turning off
Looked up on-line the error problem and what part I needed to fix it. Part arrived very quickly and everything was going fine until I realized the stove had two sensors. Replaced the top sensor now I am getting an error on the bottom sensor. Maybe I replaced the wrong one. I will replace the bottom sensor with the one I took out and see if that does the trick. Very very satisfied with PartsSelect. Good Price, Quick Shipping, Would do business with them again. They are now in my favorites so I can find them again if I need parts.
Parts Used:
-
Richard from Wooster, OH
-
Difficulty Level:Really Easy
-
Total Repair Time:Less than 15 mins
-
Tools:Screw drivers
Was this instruction helpful to you?
Thank you for voting!
Used stove was missing 1 leg.
My used stove had been dropped by the previous owner. While I could live with the minor scratches on one side the wooden shims holding up one corner were annoying. A new leveling leg was less than $2. I used a pair of needle nose pliers to straighten the mounting hole and screwed the new leg in. This used stove was originally $2000 but I bought it for $999. the new leg plus shipping was about $10. What a deal.
Parts Used:
-
Clarence from Monroe, WI
-
Difficulty Level:Really Easy
-
Total Repair Time:Less than 15 mins
-
Tools:Pliers
Was this instruction helpful to you?
Thank you for voting!
element burned out
-
dan from little falls, MN
-
Difficulty Level:Really Easy
-
Total Repair Time:Less than 15 mins
-
Tools:Pliers, Screw drivers
Was this instruction helpful to you?
Thank you for voting!
Heating element would not get red hot
Replaced Infinite control switch in just a few minutes. Unfortunately the new switch had a lose terminal that was not supposed to be in the switch that came from the factory that way. I connected the switch, turned it on, and it instantly shorted the switch out. At that point the lose terminal was real easy to see.
Parts Used:

-
James from Lewisville, NC
-
Difficulty Level:Really Easy
-
Total Repair Time:Less than 15 mins
-
Tools:Screw drivers
Was this instruction helpful to you?
Thank you for voting!
Element Burned Out
Just like the video showed. Removed the pan, removed the old element and installed the new. Just that simple.
Parts Used:
-
WILLIAM from ENGLEWOOD, FL
-
Difficulty Level:Really Easy
-
Total Repair Time:Less than 15 mins
-
Tools:Screw drivers
Was this instruction helpful to you?
Thank you for voting!
Left front 8 inch burner knob control stop regulating heat temprature.
I purchased a new infinite control switch 6". and replace the old one.
Parts Used:
-
Alfred from Ann Arbor, MI
-
Difficulty Level:Really Easy
-
Total Repair Time:15 - 30 mins
-
Tools:Pliers, Screw drivers
Was this instruction helpful to you?
Thank you for voting!
The oven wouldn't warm above 210
Removed 2 screws from the cover with a nut driver found the element was broken. Installed new element by removing 2 screws and installed the new bake heating element. Most ovens do not have the cover like Maytag. The new part arrived 2 days after ordered the oven is working great.
Parts Used:
-
Dave from West Harrison, IN
-
Difficulty Level:Really Easy
-
Total Repair Time:15 - 30 mins
-
Tools:Nutdriver, Screw drivers
Was this instruction helpful to you?
Thank you for voting!
oven temperature did not stay as set
changing the part itself was easy, but the sheet metal covering the whole back of the oven was difficult to remove because of some screws that were stripped. The new sensor solved the problem.
Parts Used:
-
Paul from Cornelius, NC
-
Difficulty Level:A Bit Difficult
-
Total Repair Time:15 - 30 mins
-
Tools:Screw drivers
Was this instruction helpful to you?
Thank you for voting!