















YISE630VS11 Whirlpool Range - Instructions
Keep searches simple. Use keywords, e.g. "leaking", "pump", "broken" or "fit".
No levelers on stove/burnt out oven light
Leveler screw in. Adjust to height of counter top since stove has lip that rest on counter top. Oven lens cover difficult to unscrew. Use rubber glove to get better grip!
Parts Used:


-
Dennis from LAKELAND, FL
-
Difficulty Level:A Bit Difficult
-
Total Repair Time:30 - 60 mins
-
Tools:Wrench (Adjustable)
2 of 2 people
found this instruction helpful.
Was this instruction helpful to you?
Thank you for voting!
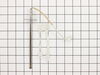
Maytag range had "F3" code display, oven would not work.
Oven sensor replacement was easy. Thermistor was installed in less than 15 minutes. After installation STILL had "F3" error message. Harness was ok, "Clock" or ECU needed to be replaced. "Computer" is obsolete, no spares available, some companies will rebuilt for $400+. Since the stove was going to the landfill I had nothing to lose by taking the "Clock" apart. It has one chip that is probably the power supply and control chip, another chip is an EEPROM with 128 bytes of storage and the last is a darlington chip that controls the relays. Cleaned up everything that looked like it needed cleaning with alcohol. When I reassembled the unit the pins for the thermistor harness felt loose, so I took it apart, again, and found cold solder joints on all four pins. It must have been there all along but plugging and unplugging the harness finally broke out the solder so I could see it. Soldered the pins back in and now it all works. It's worth a try if you're getting the "F3" message. If the relays on your stove aren't working it would be a good idea to replace the darlington chip. Good luck.
Parts Used:
-
phillip from Farmington, NM
-
Difficulty Level:Difficult
-
Total Repair Time:More than 2 hours
-
Tools:Nutdriver, Screw drivers
2 of 2 people
found this instruction helpful.
Was this instruction helpful to you?
Thank you for voting!
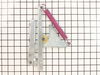
Old hinge spring broke
• Removed the oven door (pulled right off old hinges)
• Removed two screws
• Removed broken hinge
• Placed new hinge in place
• Replaced screws
• Replaced oven door.
• Removed two screws
• Removed broken hinge
• Placed new hinge in place
• Replaced screws
• Replaced oven door.
Parts Used:
-
Steve from LONGVIEW, WA
-
Difficulty Level:Really Easy
-
Total Repair Time:15 - 30 mins
-
Tools:Screw drivers
2 of 2 people
found this instruction helpful.
Was this instruction helpful to you?
Thank you for voting!
Oven door wouldn’t close all the way.
Bought new hinges as that was the obvious problem.
Below is the removal, installation process for new hinges. Turns out in my case there was nothing wrong with the hinges. Problem was still there after installing new ones. I found that the metal in the door that butted against the hinges was fatigued causing looseness. I ended up compressing the metal back into shape with a hammer. Problem solved but money wasted on hinges.
If you replace hinges. Here is what I did.
1. Open door slightly to where it stops in broiler position.
2. Remove the door by pulling up.
3. Remove two screws in front of hinges that hold them in.
4. Pull range out a few inches for access the remove the side fillers that trim out the stove.
5. Reach in from the side and work hinges out.
5. Pop in new hinges and reattach the 2 front holding screws and the side trim screws.
You are done.
Below is the removal, installation process for new hinges. Turns out in my case there was nothing wrong with the hinges. Problem was still there after installing new ones. I found that the metal in the door that butted against the hinges was fatigued causing looseness. I ended up compressing the metal back into shape with a hammer. Problem solved but money wasted on hinges.
If you replace hinges. Here is what I did.
1. Open door slightly to where it stops in broiler position.
2. Remove the door by pulling up.
3. Remove two screws in front of hinges that hold them in.
4. Pull range out a few inches for access the remove the side fillers that trim out the stove.
5. Reach in from the side and work hinges out.
5. Pop in new hinges and reattach the 2 front holding screws and the side trim screws.
You are done.
Parts Used:
-
Michael from BOISE, ID
-
Difficulty Level:Easy
-
Total Repair Time:15 - 30 mins
-
Tools:Nutdriver, Screw drivers
2 of 2 people
found this instruction helpful.
Was this instruction helpful to you?
Thank you for voting!
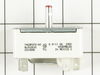
Burner control knob/switch shaft had broken off.
Removed front panel of range, removed switch (2 screws), unclipped wires from back of existing switch. Installed new switch - reverse order of above.
Parts Used:
-
Steve from San Luis Obispo, CA
-
Difficulty Level:Easy
-
Total Repair Time:15 - 30 mins
-
Tools:Screw drivers
4 of 8 people
found this instruction helpful.
Was this instruction helpful to you?
Thank you for voting!
Replace the oven Sensor
The sensor is mounted in the top right side of the oven.An extra long screw driver helps to avoid damage to the sensor when replacing it.The connectors were the opposite to the old sensor and I did not see that there were adapter cables included. It might help to connect or tie these together as I only expected the sensor and did not look for adapters.I had cut the wires and used wire nuts when I found the adapters.The repairs works fine.
Mike
Mike
Parts Used:
-
Michael from Exeter, NH
-
Difficulty Level:Really Easy
-
Total Repair Time:15 - 30 mins
-
Tools:Nutdriver, Pliers, Screw drivers
3 of 5 people
found this instruction helpful.
Was this instruction helpful to you?
Thank you for voting!
After cleaning, F1-1 error flashed and neither oven worked
First I called a repairman and left a message. That was 3 weeks ago. So, I 'googled' the error message and determined what part I thought I needed. Ordered the part on Wednesday evening and it was there when I got home from work on Friday. I unpacked the part, got a phillips screwdriver and then watched the repair video on your website. About 20 minutes later I pushed my stove back in place and the flashing said 'set time'. Then I checked both ovens, and have since used both, and everything works!!
Parts Used:
-
Georgene from Rock City, IL
-
Difficulty Level:Easy
-
Total Repair Time:15 - 30 mins
-
Tools:Screw drivers
3 of 5 people
found this instruction helpful.
Was this instruction helpful to you?
Thank you for voting!
Replacing the bulb in the freezer side
Removed the ice brucket,
Removed the light shield by releasing one screw using a nutdriver.
Replacing the bulb and reinstalled the light shield.
Your web site is one of the best and most helpfull service sites I ever used. Just wish that in the future you will ship parts overseas.
Removed the light shield by releasing one screw using a nutdriver.
Replacing the bulb and reinstalled the light shield.
Your web site is one of the best and most helpfull service sites I ever used. Just wish that in the future you will ship parts overseas.
Parts Used:
-
Yafa (and David) from Bothell, WA
-
Difficulty Level:Easy
-
Total Repair Time:Less than 15 mins
-
Tools:Nutdriver
5 of 11 people
found this instruction helpful.
Was this instruction helpful to you?
Thank you for voting!
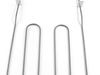
Broil not working, top element looked fried
Remove 6 screws fastening element to top of oven. Remove most of the screws from the back and pull away from oven. Use pliers and pull wires off of element connectors.Remove 2 screws fastening element to rear of oven. Install new element with fastening screws. Re-Install wires and fasten back of oven. Re-install the six screws to fasten element to top of oven.
Parts Used:
-
Richard from Montgomery Village, MD
-
Difficulty Level:Easy
-
Total Repair Time:Less than 15 mins
-
Tools:Pliers, Screw drivers
4 of 8 people
found this instruction helpful.
Was this instruction helpful to you?
Thank you for voting!
Oven would not heat
Spoke to your very helpful staff, who advised me that a likely problem was the oven sensor. I took a chance and ordered the part, which came promptly. Your service video for the part was most helpful in my decision to try the part. Installation was a breeze, but it was the oven controller board that had failed and not the oven sensor. That called for a service professional, who ultimately fixed the problem. Your service though, was excellent and I would highly recommend you to others.
Parts Used:
-
francis from mount holley, VA
-
Difficulty Level:Really Easy
-
Total Repair Time:Less than 15 mins
-
Tools:Screw drivers
2 of 2 people
found this instruction helpful.
Was this instruction helpful to you?
Thank you for voting!
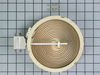
Element burn. Not working.
Element was sent by buyer, As they recommended, when model of stove given to them. It was upper right rear. When element came. First took off old element. ...Match both element , new element did not look exactly the same, small variation. It did not come on.. I moved old element from left side to right side . Old element worked on both side .. tried new element on left side also.. still didn't work.. so I called right away and explained.. new element did not work.. not defective, but, just wasn't the right one.. I had a specialist came and check it out also. I was told wrong element.
Parts Used:
-
Marc from SUNRISE, FL
-
Difficulty Level:Really Easy
-
Total Repair Time:Less than 15 mins
-
Tools:Pliers, Screw drivers
2 of 2 people
found this instruction helpful.
Was this instruction helpful to you?
Thank you for voting!
Oven would over heat and produce a F2 error code on the display. It would not turn off or cool down until I switched the circuit breaker off.
I switched the oven sensor easily enough, but it did not remedy the problem, so we are in the process of replacing the oven since it's about 20 yrs. old.
Parts Used:
-
richard from SAINT MARYS, KS
-
Difficulty Level:Very Easy
-
Total Repair Time:Less than 15 mins
-
Tools:Screw drivers
2 of 2 people
found this instruction helpful.
Was this instruction helpful to you?
Thank you for voting!
Broiler element not heating up
Pulled oven out unplugged the unit unplugged broiler unscrewed broiler from inside repeated the process backwards turned oven back on
Parts Used:
-
Dustin from Springville, CA
-
Difficulty Level:Very Easy
-
Total Repair Time:Less than 15 mins
-
Tools:Nutdriver, Screw drivers
2 of 2 people
found this instruction helpful.
Was this instruction helpful to you?
Thank you for voting!
The oven glass shattered when I dropped water in the heated Glass
I Lifted the oven door from the hinges and removed all the screws to get to the broken glass pane, since the oven door is in layers I taped the screws close to where they belonged, so that I could screw everything together again in the right order..
The last time this happened to me(!!) I brought the door to a repair man and hadto pay 200 dollars , I saved 150 Dollars doing it myself!
The last time this happened to me(!!) I brought the door to a repair man and hadto pay 200 dollars , I saved 150 Dollars doing it myself!
Parts Used:
-
Franziska from Salt Lake City, UT
-
Difficulty Level:A Bit Difficult
-
Total Repair Time:30 - 60 mins
-
Tools:Screw drivers
2 of 3 people
found this instruction helpful.
Was this instruction helpful to you?
Thank you for voting!
Oven Temperature was 50 degrees low
Took screws out of the back on the side the sensor was on, unplugged it & took out the two screws on the inside of the oven to release the sensor. Put new sensor in place with the two screws & used one of the adapters to plug in the new sensor. Put screws back in the back panel & turned on the oven which unfortunately is still 50 degrees low. Need a new clock with computer which is out of stock & unavailable. I was an electrician for 25 years so didn't experience any problems. It was a cheap thing to try.
Parts Used:
-
Eugene from Clinton, IA
-
Difficulty Level:Really Easy
-
Total Repair Time:15 - 30 mins
-
Tools:Screw drivers
2 of 3 people
found this instruction helpful.
Was this instruction helpful to you?
Thank you for voting!