















YAER6303MFS1 Whirlpool Range - Instructions
Keep searches simple. Use keywords, e.g. "leaking", "pump", "broken" or "fit".
Bake Element burned out
I found a video on YouTube and watched it showing how to change the element - then I performed the repair based on the instructions and recommendations in the video. The video had some good recommendations and cautions that helped ensure a successful repair.
Parts Used:

-
Douglas from Elk River, MN
-
Difficulty Level:Really Easy
-
Total Repair Time:Less than 15 mins
-
Tools:Screw drivers
Was this instruction helpful to you?
Thank you for voting!
Oven Was Not Heating As It Should
Removed lower oven rack. Unplugged stove,removed 2 screws holding element in place,pulled element forward unplugged 2 wires. Reversed proc. To reinstall . Very simple. Parts were here in less than 24 hrs using standard shipping. Very good service
Parts Used:
-
larry from springville, AL
-
Difficulty Level:Really Easy
-
Total Repair Time:Less than 15 mins
-
Tools:Screw drivers
Was this instruction helpful to you?
Thank you for voting!
Chared Bake element
Unplug oven, open oven door wide,pull out racks, clean reside that old element left. I used power drill with phillips head bit,pulled out old element, and disconnected wires from clips. Connected new element to wires, and Presto.Turned bake element to 300 deg.and waited only to see it red and ready to cook.
Parts Used:
-
jon from lexington, GA
-
Difficulty Level:Really Easy
-
Total Repair Time:Less than 15 mins
-
Tools:Nutdriver, Screw drivers
Was this instruction helpful to you?
Thank you for voting!
bottom element was burned out
I was 100% happy with the whole process! The part arrived on schedule, it was exactly what I wanted! The best part of the story is I am a 77 year old lady whose husband was out of town and had never done this before. I could not have been happier with the process! Thanks again and I will use PartSelect again!!!
Parts Used:
-
Bobbye from Ethelsviolle, AL
-
Difficulty Level:Easy
-
Total Repair Time:Less than 15 mins
-
Tools:Screw drivers
Was this instruction helpful to you?
Thank you for voting!
Bottom element burnt into two pieces
Unplugged stove, opened door and removed two bolts with a phillips screwdriver. Pulled out old element and pulled off the two wire leads. Replaced with new element and reversed all steps...wallaaaaa.
Parts Used:
-
Maxwell from Springdale, AR
-
Difficulty Level:Easy
-
Total Repair Time:Less than 15 mins
-
Tools:Screw drivers
Was this instruction helpful to you?
Thank you for voting!
Oven was not heating up to temp.
Pulled the oven away from the wall, unplugged the oven. Unscrewed the back panel(2 screws)that covers the pigtail connection. Pulled the two wires that attached to the heating element. Inside the oven i removed the two screws holding the element in place and removed old element. Put the new element in place and returned screws. The two wires clipped effortlessly on the back, returned cover and screws and plugged the oven back in. Tested the oven and returned it to its position, reset the clock and done.
Parts Used:
-
charlie from glenwood springs, CO
-
Difficulty Level:Really Easy
-
Total Repair Time:Less than 15 mins
-
Tools:Screw drivers
Was this instruction helpful to you?
Thank you for voting!
oven temperature did not stay as set
changing the part itself was easy, but the sheet metal covering the whole back of the oven was difficult to remove because of some screws that were stripped. The new sensor solved the problem.
Parts Used:

-
Paul from Cornelius, NC
-
Difficulty Level:A Bit Difficult
-
Total Repair Time:15 - 30 mins
-
Tools:Screw drivers
Was this instruction helpful to you?
Thank you for voting!
top element was burnt out small burn hole in element
removed the screws that were on back side of oven securing panel that covered element terminals disconnected wiring to upper element then went in side oven area removing 4 upper mount screws that were holding upper element in place then removed old element and reinstalled new in same order was removed..
Parts Used:

-
Gregory from kissimmee, FL
-
Difficulty Level:Really Easy
-
Total Repair Time:15 - 30 mins
-
Tools:Screw drivers, Socket set
Was this instruction helpful to you?
Thank you for voting!
Lower element burned out
Went on line to see if the repair could be done by us. Watched repair video and from there on the repair went as smooth as it possibly could.
Parts Used:
-
Sally from Fishers, IN
-
Difficulty Level:Really Easy
-
Total Repair Time:15 - 30 mins
-
Tools:Screw drivers
Was this instruction helpful to you?
Thank you for voting!
Heating element not bringing temp up to specification
-
Tim from Avon, IN
-
Difficulty Level:Easy
-
Total Repair Time:15 - 30 mins
-
Tools:Pliers, Screw drivers
Was this instruction helpful to you?
Thank you for voting!
the boiler went out
Unpluged from electric. I took two bolts out of back of oven attached to boiler. Pulled out and exposed cords the attach to boiler. Slide them off and removed old boiler. Attached cords to new boiler and slide part back in to attach the two bolts back. Plugged oven back in and worked great
Parts Used:
-
Angela from Little Hocking, OH
-
Difficulty Level:Easy
-
Total Repair Time:15 - 30 mins
-
Tools:Screw drivers
Was this instruction helpful to you?
Thank you for voting!
Broiler element EXPLODED!
Yes... it exploded. Ordered the part which was delivered promptly. Installed in about 30 minutes with a helper. Just unscrew the 4 interior screws and a bunch of the screws (10 maybe?) on the back panel. Drop the back panel, remove the electrical connections from the broiler element and have your helper pull it out. Shove the new one in carefully through the insulation, attach the two electrical connections and reattach all the screws. Worked fine but smelled a bit as it burned off the new coating. About a 30 minute project.
Parts Used:
-
Beth from Draper, UT
-
Difficulty Level:Easy
-
Total Repair Time:15 - 30 mins
-
Tools:Screw drivers
Was this instruction helpful to you?
Thank you for voting!
burned out upper element
turn the light on in the oven go to the breaker box and shut off power to the oven when light is out is good indicator remove two screws in back of oven that secure element to back then remove two screws on top inside the oven to almost finish removal. phillips head screwdriver and needle nose pliers and two small spring loaded clamps are all you will need to accomplish thismove the upper element side to side until the connectors are exposed in the back of the stove pull the two wires out about 4 inches should be enough place the spring loaded clamps on each wire so as to not allow them to slip back in the stove body. take the needle nose and while holding the clamp remove the connector from each wire once this is done place the new element in the stove and reconnect the clips on the end off the element move the wires and connectors back into the openings on the stove and replace the two screws replace the two upper screws check all screws for tightness go to the breaker box and turn on the power takes about thirty minutes
Parts Used:
-
jack from kalispell, MT
-
Difficulty Level:Easy
-
Total Repair Time:15 - 30 mins
-
Tools:Pliers, Screw drivers
Was this instruction helpful to you?
Thank you for voting!
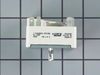
Replacing the Upper Spray Arm, part # PS2581378
The detection of the part and the replacement of the upper spray arm was quite easy, because of its unique shape and function, and also because it was easy to screw in place. I saved the web order page in case this part tends to deteriorate frequently, even though it is the first time it showed this problem since we purchased this appliance.
Parts Used:
-
Vittorio from Wakefield, MA
-
Difficulty Level:Really Easy
-
Total Repair Time:15 - 30 mins
Was this instruction helpful to you?
Thank you for voting!
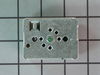
8 Inch electric burner not getting hot
I determined the problem by swapping the 8 inch burner with a 6 inch burner. the 8 inch got hot when connected to the 6 inch wire harness. This told me that the 8 inch burner was good. The 6 inch failed to get hot so I determined the next logical thing was the power to the 8 inch burner. I used a multi meter to determine that power was getting into the control unit but no voltage was getting out. The controller was bad. I ordered a new controller and after unplugging the stove, replaced the controller in about 10 minutes. (Critical part of repair is to unplug unit from wall -220 volts!)
Parts Used:
-
John from Dover, NJ
-
Difficulty Level:Easy
-
Total Repair Time:15 - 30 mins
-
Tools:Pliers, Screw drivers
Was this instruction helpful to you?
Thank you for voting!