















XBS360DM4BB General Electric Range - Instructions
Keep searches simple. Use keywords, e.g. "leaking", "pump", "broken" or "fit".
Total Burn Out Of Original Broiler Element
Remove lower drawer and contents. Unplug unit. Tilt range on its back for easy access. Tie open oven door to forward legs with sturdy rope. Use small socket to remove 2 back screws and 2 forward element hanger screws. Detach broiler element connections from wire clips(2). Insert new element, attach 2 new connections to clips first. Install back socket screws. Install front socket screws for element hanger. Slide in oven shelves. Release oven door rope. Lift range to normal position. Replace lower drawer. Plug 220 in. Test oven element then broiler.
Parts Used:

-
richard from Palm Coast, FL
-
Difficulty Level:Really Easy
-
Total Repair Time:15 - 30 mins
-
Tools:Pliers, Socket set
Was this instruction helpful to you?
Thank you for voting!
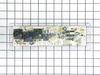
Range top burners work, but Oven would not. Click flashed and made a clicking noise when trying to turn on the oven, but shut off
My Range had the issue I mentioned here. I put off the repairs for a long time, but Thanksgiving was around the corner and we needed a working oven. I had made a previous call to repair man and was quoted $75.00 for a service call to come and check the issue. Before calling a repair man back, I decided to pull the rear cover off the range to see how complicated it would be to repair. I removed the rear cover and found that everything was connected to this "Oven Electronic Control" except for the top elements (explaining why they still worked and the oven didn't). This made it seem that this part would surely have to be causing the issue. I did a search on Google and found this company and the part that I needed. The cost of the part was less than the service call for a repair man would have been. I ordered the part and paid for next day delivery. The part shipped on Monday and arrived on Tuesday. For the installation, I had to identify the wiring because the connector layout was a little different. When I looked closely I found that the terminals were numbered the same as the old part. I replaced wire for wire, put it all back together and tried it out. It worked like a champ. I was thrilled to have been able to find the part with schematics on this web site and it was the correct part and fixed the problem. I was also thrilled that I saved a couple hundred dollars fixing it myself and that it was so easy. I would highly recommend this company for the ease of use of finding the part on their web site, the reasonable price and their prompt processing and delivery.
Parts Used:
-
James from Hope Mills, NC
-
Difficulty Level:Really Easy
-
Total Repair Time:15 - 30 mins
-
Tools:Nutdriver, Pliers, Screw drivers
Was this instruction helpful to you?
Thank you for voting!
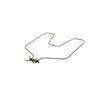
Oven would not reach bake temp.
Used the TS guide, because I had no idea what the problem was. That was easy step by step. Thanks. Gave me a list of two parts that could fix the problem. Picked the higher percentage part (97%). Followed the simple install instructions and it was successful. One problem I did encounter was the two wires that it connected to were short. Removed the back center plate to gain access to the wires. I was able to extend them enough to make the connections to the bake element. If not for that the repair would have only taken maybe 10 minute's.
Parts Used:
-
Thomas from Rogersville, TN
-
Difficulty Level:Easy
-
Total Repair Time:15 - 30 mins
-
Tools:Nutdriver, Pliers
Was this instruction helpful to you?
Thank you for voting!
Mother board was blown
-
Kenneth from Bradenton, FL
-
Difficulty Level:Easy
-
Total Repair Time:15 - 30 mins
Was this instruction helpful to you?
Thank you for voting!
Bottom Heating Element not heating up.
I miss diagnosed the situation at first. When the top element only heated up I thought the control was the problem. Wrong. Apparently both elements heat up during initial start up. It turned out that the bottom element was not working so it needed to be replaced rather then the control. Now both are replaced and the oven is now back to original status. Entire repair cost about $80. I saved over $100 by attempting this myself. Easy fix. Obviously I am not a pro. My local hardware store had a generic heating element that worked just fine and only cost $22. Two screws to repair after removing the back panel. Remember to pull the plug before you begin and after the repair put all panels back on before plugging back in. Pizza anyone?
Parts Used:
-
Wallace from Demorest,, GA
-
Difficulty Level:Really Easy
-
Total Repair Time:15 - 30 mins
-
Tools:Nutdriver, Screw drivers
Was this instruction helpful to you?
Thank you for voting!
Blew the electronic Control Board
It was easy to replace it. Just remove the screws and unplug each wire and plug them back. The problem was to take off the plate cover that has the printed letters on. The plate cover cost more than the Electronic Control Board.
Parts Used:
-
PETE from MANCHACA, TX
-
Difficulty Level:Really Easy
-
Total Repair Time:15 - 30 mins
-
Tools:Pliers, Screw drivers
Was this instruction helpful to you?
Thank you for voting!
oven control panel was blacked out..no clock no start.
Took out the old control module and removed the sticker and reattached sticker to new part and installed the plugs, put the screws back in and it started working, thankyou so much.
Parts Used:
-
Pam from Daphne, AL
-
Difficulty Level:Easy
-
Total Repair Time:15 - 30 mins
-
Tools:Screw drivers
Was this instruction helpful to you?
Thank you for voting!
Bake Element burnt out
-
Greg from Chicopee, MA
-
Difficulty Level:Really Easy
-
Total Repair Time:Less than 15 mins
-
Tools:Socket set
Was this instruction helpful to you?
Thank you for voting!
Broiler Element Replacement
There were two small screws at the back of the stove (this was the part that intimidated me. At first glance it doesn't look like it should be removed). But you just have to unscrew them, disconnect the wires behind them (this part can be done by hand), and pull the element out. The new element slides right in! Just make sure the power to the stove is disconnected either by breaker or by unplugging it. I'm not sure if it matters, but I made sure to connect the wires to the same side of the element that they were removed from.
Parts Used:
-
Emily from Snoqualmie Pass, WA
-
Difficulty Level:Really Easy
-
Total Repair Time:Less than 15 mins
-
Tools:Nutdriver
Was this instruction helpful to you?
Thank you for voting!
Heating element not working
Saw the brief video and as stated took less than five minutes to replace. It took longer to clean up the floor under the oven than to replace heating element.
Parts Used:
-
Stuart from Yelm, WA
-
Difficulty Level:Really Easy
-
Total Repair Time:Less than 15 mins
-
Tools:Nutdriver
Was this instruction helpful to you?
Thank you for voting!
burned out
-
mary from morton, WA
-
Difficulty Level:Really Easy
-
Total Repair Time:Less than 15 mins
-
Tools:Nutdriver
Was this instruction helpful to you?
Thank you for voting!
Bad control board
Removed top back plate of oven. unpluged all of the wiring plugs on the control board. Removed two screws on the control board. Removed face plate from old control board and put it on the new control board. Atteched new board with the two screws. Connected all of the plugs to new board ( all plugs are color coded to board). Re-installed oven back plate. Pluged oven in. Works great.
Parts Used:
-
Daryl from Savannah, TN
-
Difficulty Level:Really Easy
-
Total Repair Time:Less than 15 mins
-
Tools:Nutdriver, Pliers
Was this instruction helpful to you?
Thank you for voting!
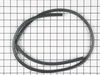
Replace oven gasket
I used the pliers to remove the old pins, and popped then new pins in place...super simple!
Parts Used:
-
Jenny from Muskego, WI
-
Difficulty Level:Really Easy
-
Total Repair Time:Less than 15 mins
-
Tools:Pliers
Was this instruction helpful to you?
Thank you for voting!
lower burner quit working.
easy, less then 15 min. but take off door first makes alot easier. and don't forget to unplug, like i did. just a few sparks but no damage thank god.
Parts Used:
-
Robert from Rock Falls, IL
-
Difficulty Level:Easy
-
Total Repair Time:Less than 15 mins
-
Tools:Nutdriver, Screw drivers
Was this instruction helpful to you?
Thank you for voting!
the bottom element of the oven was broken
attached the element,pushed it back in the pocket,put the plate back on, screwed the nut and bolt back on and was done in less than 4 minutes!!
Parts Used:
-
DAVID from PARIS, MI
-
Difficulty Level:Really Easy
-
Total Repair Time:Less than 15 mins
Was this instruction helpful to you?
Thank you for voting!