















WSZ57L18DM02 Whirlpool Range - Instructions
Keep searches simple. Use keywords, e.g. "leaking", "pump", "broken" or "fit".
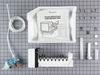
It was my first time to install a ice maker.
I first read the instruction manual then I watched the installation video. My water line to it was 3/8. Went to the local ACE Hardware to purchase a short peace of 1/4 copper tubing and the fittings to connect them together. It makes ice every 55 minutes.
Parts Used:
-
Gary from MACOMB, OK
-
Difficulty Level:Easy
-
Total Repair Time:1- 2 hours
-
Tools:Nutdriver, Screw drivers, Wrench (Adjustable), Wrench set
3 of 3 people
found this instruction helpful.
Was this instruction helpful to you?
Thank you for voting!
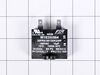
Capacitor shorted out due to power surge.
Access back of unit, lower left corner. Remove wire capacitor retention clip. Unplug cold capacitor, plug in replacement, reinstall wire retention clip, test.
Parts Used:
-
J. David from BRENTWOOD, TN
-
Difficulty Level:Easy
-
Total Repair Time:30 - 60 mins
-
Tools:Pliers, Screw drivers
3 of 3 people
found this instruction helpful.
Was this instruction helpful to you?
Thank you for voting!
Getting Ice Maker to sit in place prior to tightening screws.
Don not completely remove holding icemaker screws. Unit slips over screws and drops down into place and the use nutdriver to tighten in place. Rest of unit was sound and wasn’t replaced.
After icemaker is installed wait for a while and unit self activated and creates ice cubes.
After icemaker is installed wait for a while and unit self activated and creates ice cubes.
Parts Used:
-
George from POWELL, OH
-
Difficulty Level:Easy
-
Total Repair Time:15 - 30 mins
-
Tools:Nutdriver
3 of 3 people
found this instruction helpful.
Was this instruction helpful to you?
Thank you for voting!
Installed a Ice Maker
-
Don from HOUMA, LA
-
Difficulty Level:Very Easy
-
Total Repair Time:15 - 30 mins
-
Tools:Nutdriver, Screw drivers
3 of 3 people
found this instruction helpful.
Was this instruction helpful to you?
Thank you for voting!
Freezer Bulb failed
-
Kevin from SWANVILLE, ME
-
Difficulty Level:Very Easy
-
Total Repair Time:Less than 15 mins
3 of 5 people
found this instruction helpful.
Was this instruction helpful to you?
Thank you for voting!
OLDER Ice Maker on the fritz
Grat help on the phone. We saw repair on YouTube. my wife and I worked it together. It was child's play!! It went beautifully. we were able to "chill out" with ice aplenty!!Thanks...eric
Parts Used:
-
Eric S from Boca Raton, FL
-
Difficulty Level:Really Easy
-
Total Repair Time:15 - 30 mins
-
Tools:Nutdriver, Wrench set
6 of 14 people
found this instruction helpful.
Was this instruction helpful to you?
Thank you for voting!
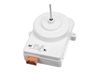
fan motor needed replacing
System not cooling. removed back cover and notice fan not rotating. Looked up unit and found diagram. Ordered motor which was received in less than 5 business days.
Replacement was super easy. Just unscrewed from frame, pulled off fan, put fan on new motor and remounted back in frame. Took 10 minutes tops.
Replacement was super easy. Just unscrewed from frame, pulled off fan, put fan on new motor and remounted back in frame. Took 10 minutes tops.
Parts Used:
-
Joe from ALBANY, GA
-
Difficulty Level:Very Easy
-
Total Repair Time:15 - 30 mins
-
Tools:Screw drivers
2 of 2 people
found this instruction helpful.
Was this instruction helpful to you?
Thank you for voting!
ordered a new ice maker, new refrigerator did not come with one.
I watched the video that was included with my on line order, it was helpful, although different model shown . I would say it was not difficult to install, the enclosed instructions were a bit confusing.
Parts Used:
-
Scott from ROCHESTER, NY
-
Difficulty Level:Easy
-
Total Repair Time:30 - 60 mins
-
Tools:Nutdriver, Screw drivers, Wrench (Adjustable)
2 of 2 people
found this instruction helpful.
Was this instruction helpful to you?
Thank you for voting!
ice maker
-
Ann from MC CUNE, KS
-
Difficulty Level:Really Easy
-
Total Repair Time:30 - 60 mins
2 of 2 people
found this instruction helpful.
Was this instruction helpful to you?
Thank you for voting!
install ice maker with all parts for refridgerator with no ice cube hardware on it.
-
Vincent from THE VILLAGES, FL
-
Difficulty Level:Really Easy
-
Total Repair Time:1- 2 hours
-
Tools:Nutdriver, Pliers, Screw drivers, Socket set, Wrench (Adjustable)
2 of 2 people
found this instruction helpful.
Was this instruction helpful to you?
Thank you for voting!
not freezing
remove inside cover. meit ice collected, remove old part and install new part. about 1 hr.
Parts Used:
-
William from SCOTTSDALE, AZ
-
Difficulty Level:Really Easy
-
Total Repair Time:30 - 60 mins
-
Tools:Nutdriver, Screw drivers
2 of 3 people
found this instruction helpful.
Was this instruction helpful to you?
Thank you for voting!
Freezer temp could not get above 28*
1st; Remove all shelving
2nd; Phillips screws,= remove bottom cover, and bottom vent
3rd; Sensor is straight up- plug & play (see pic)!
DO NOT MAN-HANDLE.!
4th; Re-install vent & cover 'SLOWLY'.!
Please buy a "Freezer" thermometer. Good freezers work
around (+5* to -10*) even with food.
2nd; Phillips screws,= remove bottom cover, and bottom vent
3rd; Sensor is straight up- plug & play (see pic)!
DO NOT MAN-HANDLE.!
4th; Re-install vent & cover 'SLOWLY'.!
Please buy a "Freezer" thermometer. Good freezers work
around (+5* to -10*) even with food.
Parts Used:
-
Michael from PRESTON, MD
-
Difficulty Level:Really Easy
-
Total Repair Time:30 - 60 mins
-
Tools:Screw drivers
2 of 3 people
found this instruction helpful.
Was this instruction helpful to you?
Thank you for voting!
Cracked bin
Remove existing bin by lifting up and out of refrigerator door. IInstall new bin by sliding into the door and pressing down onto the "clips" or attachments in the door. Done.
Parts Used:

-
Cynthia from SHERMAN, TX
-
Difficulty Level:Very Easy
-
Total Repair Time:Less than 15 mins
3 of 6 people
found this instruction helpful.
Was this instruction helpful to you?
Thank you for voting!
none
-
Joseph from BONITA SPGS, FL
-
Difficulty Level:Really Easy
-
Total Repair Time:Less than 15 mins
-
Tools:Screw drivers
2 of 3 people
found this instruction helpful.
Was this instruction helpful to you?
Thank you for voting!
Countertop Dishwasher - Non Whirlpool
Since I have All Whirlpool appliances in the home, the only one not a Whirlpool was a counter top dishwasher that looks exactly like it could be a Whirlpool and so not to be the odd unit out, I labeled it with with a Whirlpool logo nameplate on the face of the door. Now everything matches perfectly and all in the same exact color white too.
Just measured and marked where the plate was to be located, cleaned that part of the surface, peeled the backing and carefully placed the logo name plate in place and pressed it on. Voila. Done and looks original as well. Call me the big, deep fakearooski.
Just measured and marked where the plate was to be located, cleaned that part of the surface, peeled the backing and carefully placed the logo name plate in place and pressed it on. Voila. Done and looks original as well. Call me the big, deep fakearooski.
Parts Used:

-
Peter from PLEASANT PR, WI
-
Difficulty Level:Very Easy
-
Total Repair Time:Less than 15 mins
2 of 3 people
found this instruction helpful.
Was this instruction helpful to you?
Thank you for voting!