















WRF540CWHB02 Whirlpool Refrigerator - Instructions
Keep searches simple. Use keywords, e.g. "leaking", "pump", "broken" or "fit".
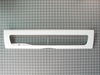
chef's pantry lid was cracked
A jar was dropped on the chef's pantry lid and cracked the lid. I unhinged one side of the lid from the pantry drawer by gently pushing outward on one of the hinge pins. The lid slid out easily. I then reversed the process using the new lid and it went in smoothly. Be sure to align the lid so it rests on the shoulder of the pantry drawer. Simple task, no tools, and less than 5 minutes effort. The replacement part was perfect.
Parts Used:
-
Darrell from Yakima, WA
-
Difficulty Level:Really Easy
-
Total Repair Time:Less than 15 mins
4 of 5 people
found this instruction helpful.
Was this instruction helpful to you?
Thank you for voting!
Broken clips on old part
-
Rose from OCOEE, FL
-
Difficulty Level:Really Easy
-
Total Repair Time:Less than 15 mins
3 of 3 people
found this instruction helpful.
Was this instruction helpful to you?
Thank you for voting!
The rubber liner around the refrigerator door was splitting and cracking
I watched the video and it took away my trepidation. I did what it said and it went right in!!
Parts Used:
-
Judy from BALD KNOB, AR
-
Difficulty Level:Very Easy
-
Total Repair Time:Less than 15 mins
3 of 3 people
found this instruction helpful.
Was this instruction helpful to you?
Thank you for voting!
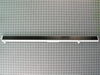
One of the plastic fasteners had broken so the entire part needed replacing.
Turned off power, Removed screw, disconnected wire harness and removed old rail from door, Connected new wire harness and attached new rail to door, replaced screw. Restored power. Done.
Parts Used:
-
lane from EVERETT, WA
-
Difficulty Level:Very Easy
-
Total Repair Time:Less than 15 mins
-
Tools:Socket set
3 of 3 people
found this instruction helpful.
Was this instruction helpful to you?
Thank you for voting!
noise damper motor rattle
Very easy to fix . It was harder to empty the contents out or the refrigerator than to repair . The diagrams on this site were very helpful in identified the part. and it was delivered in 5 days.
Parts Used:
-
JOSEPH from LTL EGG HBR, NJ
-
Difficulty Level:Very Easy
-
Total Repair Time:Less than 15 mins
-
Tools:Screw drivers
3 of 3 people
found this instruction helpful.
Was this instruction helpful to you?
Thank you for voting!
difficult to reach mounting screws without removing top freezer rack
Loosen the 2 mounting screws on the top about 2 turns; take the one mounting screw on the bottom all of the way out. The top part of the ice maker drops down on the loose top screws. That holds the ice maker while installing the bottom screw. No need to shut off water to the ice maker, just shut off electricity to refrigerator.
Parts Used:
-
Beverly from RIO RANCHO, NM
-
Difficulty Level:A Bit Difficult
-
Total Repair Time:30 - 60 mins
-
Tools:Nutdriver
3 of 3 people
found this instruction helpful.
Was this instruction helpful to you?
Thank you for voting!
Capacitor shorted out due to power surge.
Access back of unit, lower left corner. Remove wire capacitor retention clip. Unplug cold capacitor, plug in replacement, reinstall wire retention clip, test.
Parts Used:
-
J. David from BRENTWOOD, TN
-
Difficulty Level:Easy
-
Total Repair Time:30 - 60 mins
-
Tools:Pliers, Screw drivers
3 of 3 people
found this instruction helpful.
Was this instruction helpful to you?
Thank you for voting!
Pivot axle for the cripser door was broken off.
I brought you the exploded view of the crisper parts on your website and proceeded accordingly. Besides the three nuts holding the end cap to the frig interior wall the temperature adjustment linkage had to be disassembled on reassemblied on the new replacement end cap. Plastic linkage parts present the problem of breakage, so one must be careful during the disassembly process. Some other type of fasteners for the linkage assembly (screw and nut, ball and socket) would be prefereable. All and all, its a machine. Wtith exploded view, what could go wrong?
Parts Used:

-
ROY from NEW YORK, NY
-
Difficulty Level:Easy
-
Total Repair Time:30 - 60 mins
-
Tools:Nutdriver, Screw drivers
5 of 9 people
found this instruction helpful.
Was this instruction helpful to you?
Thank you for voting!
Icemaker quit making ice
removed the freezer door, removed the two shelves and removed three screws from the icemaker, unplugged the wiring harnest. Installed the new icemaker in reverse procedure.
Parts Used:
-
Phillip from JASPER, AL
-
Difficulty Level:Really Easy
-
Total Repair Time:30 - 60 mins
-
Tools:Nutdriver
4 of 6 people
found this instruction helpful.
Was this instruction helpful to you?
Thank you for voting!
Evaporator motor failed.
Remove lower freezer door from mounting frame (4 screws). Remove inner shelving and shelving brackets, Total of six screws, three on each side on lower brackets and 4 screws, 2 on each side on upper brackets. Remove ice cube maker (4 screws). Remove thermometer frame from back cover and slide thermometer out of frame. Remove 4 screws from back cover and remove cover. Slide thermometer through hole in back cover. Remove 4 screws from evaporator motor housing. Gently pull plastic fan off of motor shaft. Remove motor from housing and install new motor. Reinstall all parts in the order removed.
Parts Used:

-
Richard from Circle, MT
-
Difficulty Level:Easy
-
Total Repair Time:30 - 60 mins
-
Tools:Nutdriver
3 of 3 people
found this instruction helpful.
Was this instruction helpful to you?
Thank you for voting!
Needed a new gasket for the right side door
Watched the video on this site, followed the instructions to lay the gasket flat and warm it with a hair dryer, removed the old gasket, and popped the new one in. Easy!
Parts Used:
-
Mary Lou from RNCH DE TAOS, NM
-
Difficulty Level:Very Easy
-
Total Repair Time:15 - 30 mins
3 of 3 people
found this instruction helpful.
Was this instruction helpful to you?
Thank you for voting!
Right door seal was torn at top of door
I followed the remove and replace instructions in the Part Sect video when I ordered the seal. Pulled out the old seal by hand and installed the new seal. No tools needed, very easy. Took 10 minutes at most.
Parts Used:
-
Richard from MIDDLETOWN, MD
-
Difficulty Level:Really Easy
-
Total Repair Time:Less than 15 mins
3 of 3 people
found this instruction helpful.
Was this instruction helpful to you?
Thank you for voting!
Fridge had a clicking noise
Unscrew decorative plastic cover. Unsnap old damper assembly and disconnect wire connector. Snap in the new assembly and plug in the wires. Replace decorative cover.
Parts Used:
-
Theodore from JACKSON, WI
-
Difficulty Level:Very Easy
-
Total Repair Time:Less than 15 mins
-
Tools:Screw drivers
3 of 3 people
found this instruction helpful.
Was this instruction helpful to you?
Thank you for voting!
Replacing leaking freezer door gasket
When the gasket is delivered it will be folded. You will need to unfold it and leave it on a flat surface for several days. Keep it as square as possible, and heat the kinked portions with a hair dryer on high heat and slow fan while molding kinked portions with your hands for 30 to 60 seconds at a time. Do that 2-3 times per day. When it looks 90% uniform with the non kinked portions, you can install it. Installation takes less than 10 minutes. Clean the metal edge of the freezer well. I recommend taking the door annd frame off (This is remarkably easy. THe door and frame pretty much lifts up and out after you hold the rail clips inward) because the lower edge is so close to the floor. The just pulll off the old gasket. There are no screws or clips. Starting in any corner, press new gasket into place. Go around the perimeter several times to make sure it is pushed in fully and evenly. Then reinstall the door and frame.
Parts Used:

-
Joseph from OCEAN SPRINGS, MS
-
Difficulty Level:Easy
-
Total Repair Time:30 - 60 mins
3 of 3 people
found this instruction helpful.
Was this instruction helpful to you?
Thank you for voting!
Raplaced switch
Repair went well,took about five to ten minutes to disconnect the power from the fridge removed the defective switch installed the new one ,reconnected the power,,,and Let there be light and there was light!
Parts Used:

-
Winston A from Brooklyn, NY
-
Difficulty Level:Really Easy
-
Total Repair Time:Less than 15 mins
-
Tools:Pliers
5 of 9 people
found this instruction helpful.
Was this instruction helpful to you?
Thank you for voting!