















WM30460W Jenn-Air Microwave Oven Combo - Instructions
Keep searches simple. Use keywords, e.g. "leaking", "pump", "broken" or "fit".
Oven would not hold temperature, not turn on, and would shut off during use.
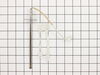
Extremely simple repair to make. Move stove away from wall and disconnect power. Remove the oven racks. Remove the rear sheet metal panel covering the wiring harnesses. Caution: Sharp edges and corners on sheet metal.Sensor is located in upper left corner on rear oven wall. Using a long-shafted #2 Philips screwdriver, remove the two Philips head screws and gently pull the sensor 1" away from the oven wall. At this point, it will help to have an assist from someone while you are behind the range. Have the assistant gently tug on the sensor while you watch for wires moving on the rear of the range. After locating the sensor wires, gently disconnect the plastic connector clip. Note: plastic connectors become brittle with age and exposure to heat Move to front of range and gently remove sensor from rear wall by pulling the wiring through the oven wall. Before inserting the new sensor wire through the oven wall, "dry fit" the wiring connectors to see that the new sensor is a correct connection. Make connection, and secure the sensor to the rear oven wall with the two screws. Install racks, reinstall rear sheet metal panel, and connect the power. Set the oven baking temperature to a moderately low temp, 300 - 350 deg. to test the new sensor.
Parts Used:
-
John from Arvada, CO
-
Difficulty Level:Very Easy
-
Total Repair Time:Less than 15 mins
-
Tools:Nutdriver, Screw drivers
1 person
found this instruction helpful.
Was this instruction helpful to you?
Thank you for voting!
Did not illuminate
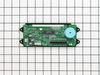
1) Unplug Appliance
2) Remove stove front (4 hex-head screws)
(Note: support front while removing screws)
3) disconnect (3) wiring harnesses
(Note: exercise care when revoving "data bus", release with small "dogs" on each side of plug.)
4) Remove Clock assembly (2 hex-head screws)
5) Replace Clock assembly (2 hex-head screws)
6) Reconnect (3) wiring harnesses (reseat bus plug dogs)
7) Reattach stove front (4 hex-head screws)
8) Plug appliance in to power outlet
Note: Before the repair, all functions and displays worked just fine, they just weren't illuminated so you couldn't read any thing. It really steams me that I had to pay $141 to replace a 50 cent light.
2) Remove stove front (4 hex-head screws)
(Note: support front while removing screws)
3) disconnect (3) wiring harnesses
(Note: exercise care when revoving "data bus", release with small "dogs" on each side of plug.)
4) Remove Clock assembly (2 hex-head screws)
5) Replace Clock assembly (2 hex-head screws)
6) Reconnect (3) wiring harnesses (reseat bus plug dogs)
7) Reattach stove front (4 hex-head screws)
8) Plug appliance in to power outlet
Note: Before the repair, all functions and displays worked just fine, they just weren't illuminated so you couldn't read any thing. It really steams me that I had to pay $141 to replace a 50 cent light.
Parts Used:
-
Ronald C. from Cave Junction, OR
-
Difficulty Level:Easy
-
Total Repair Time:Less than 15 mins
-
Tools:Nutdriver
1 person
found this instruction helpful.
Was this instruction helpful to you?
Thank you for voting!
Oven door was locked, couldn't set oven temps
Got a bent metal coathook to temporarily release the oven door, removed the screws from the old probe, inserted the new one, and hooked it up, using the one of the plug adapters provided. Problem solved! The oven door latch was now disengaged, the oven would now accept temperature inputs, and the rear cooling fan (which wouldn't shut off) now turned off. That's a lot of things working better for less than $50!
Parts Used:
-
William from Nashville, TN
-
Difficulty Level:Easy
-
Total Repair Time:15 - 30 mins
-
Tools:Screw drivers
1 person
found this instruction helpful.
Was this instruction helpful to you?
Thank you for voting!
Clock would restart and controlls would stop working
This is the second clock I have had to put in this unit in about that many years. The first time I disassembled far to many things. This time I knew to only unscrew the front panel and side triangle plates. The process was much faster the second time. I hope this is not a chronic problem though.
Parts Used:
-
Craig from lexington, KY
-
Difficulty Level:Easy
-
Total Repair Time:15 - 30 mins
-
Tools:Screw drivers, Wrench set
1 person
found this instruction helpful.
Was this instruction helpful to you?
Thank you for voting!
Bottom (bake) is not heating, broiler is working
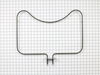
I replaced the heating element but that didn’t help. So then I replaced the oven sensor and that didn’t work either. Both were pretty easy to do but I’ve now spend $170 and my oven still isn’t working. I called number listed and got a recording that all agents were busy and there was a high call volume so I can’t get any help.
Parts Used:
-
Amy from MCKINNEY, TX
-
Difficulty Level:Really Easy
-
Total Repair Time:15 - 30 mins
-
Tools:Screw drivers
1 person
found this instruction helpful.
Was this instruction helpful to you?
Thank you for voting!
Broken oven door hinge
My daughter & I followed the instructions in your video and had fun repairing the door. The video showed exactly how to do the repair. I hope I don't need any appliance parts very soon but I will certainly pull up your web site if I do. Thanks for an excellent instruction video.
John - Hot Springs Village, AR
John - Hot Springs Village, AR
Parts Used:
-
John from HOT SPRINGS, AR
-
Difficulty Level:Very Easy
-
Total Repair Time:15 - 30 mins
-
Tools:Screw drivers
1 person
found this instruction helpful.
Was this instruction helpful to you?
Thank you for voting!
Self cleaning inoperable, display very dim/unreadable
First, DISCONNECT POWER or you can turn your panel into an arc welder. After that removed four screws that hold front panel in place and 2 screws that hold the display in place. disconnect ribbon cable and two other cables. Reverse operation for assembly.
For the self cleaning problem, replace door lock switch by pulling forward, use needle nose to remove & replace connector. Push into place. Very easy. Total 10 minutes for both jobs
For the self cleaning problem, replace door lock switch by pulling forward, use needle nose to remove & replace connector. Push into place. Very easy. Total 10 minutes for both jobs
Parts Used:
-
Matthew from Littleton, CO
-
Difficulty Level:Really Easy
-
Total Repair Time:Less than 15 mins
-
Tools:Nutdriver
1 of 2 people
found this instruction helpful.
Was this instruction helpful to you?
Thank you for voting!
very dim lights and numbers
Popped it in and now we have a well lighted control panel AND a night light for the kitchen. Just wish Jen air would design a longer lasting part!!!
Parts Used:
-
David from Valley Springs, CA
-
Difficulty Level:Really Easy
-
Total Repair Time:Less than 15 mins
-
Tools:Screw drivers, Wrench set
1 of 2 people
found this instruction helpful.
Was this instruction helpful to you?
Thank you for voting!
After doing an oven self clean cycle, oven temp couldnt be set correctly, heat element was warm,not hot
After trying to set the bake temp after the self cleaning, it would not heat up. I Googled the model number,selected your link because it mentioned my symptom,and said usually it is the temp sensor in the oven that gets damaged by the high self cleaning heat. Your site had a place to enter my model number. You provided a great exploded view of the parts, showing me my sensor,then you provided the part number of the kit i needed,and filled out the order form with payment method. Less than a week later I got my part with instructions. Your video showed me the two screws I remove from the front ,and I pulled the old part out and uplugged it's connector. Replacement was easy, and oven was fixed! Thank you for a great site! You held my hand through it all!
Parts Used:
-
Philip from Winter Haven, FL
-
Difficulty Level:Really Easy
-
Total Repair Time:Less than 15 mins
-
Tools:Screw drivers
1 of 2 people
found this instruction helpful.
Was this instruction helpful to you?
Thank you for voting!
broken glass inside oven door;
My husband ( a superior handy man) very easily replaced the glass on the inside of the oven door and further replaced the hinges which had sprung yrs ago when I rested a 30+ lb turkey on the door. He removed the oven door and it was obvious to him how to repair the problem. The oven is back to heating correctly.
Parts Used:
-
Ken from Bozeman, MT
-
Difficulty Level:Easy
-
Total Repair Time:30 - 60 mins
-
Tools:Screw drivers
2 of 5 people
found this instruction helpful.
Was this instruction helpful to you?
Thank you for voting!
Oven would not heat
Flipped off breaker and removed oven door and pulled built in stove out so the back panel could be removed. Unplugged the sensor then removed the two screws securing the old sensor inside the oven and installed new sensor. Put stove back together and installed back into counter top, re-installed oven door, flipped on the breaker and oven works like new.
Parts Used:
-
Ralph from Nicholasville, KY
-
Difficulty Level:Easy
-
Total Repair Time:30 - 60 mins
-
Tools:Screw drivers
1 of 2 people
found this instruction helpful.
Was this instruction helpful to you?
Thank you for voting!
Top oven element works, but bottom element works only intermittently
Replaced the long Oven Sensor but have not resolved the root problem. Oven still will not reach required temperature. Bottom element becomes red hot, but turns off and will not start again.
Parts Used:
-
Bruce from Glencoe, MN
-
Difficulty Level:Really Easy
-
Total Repair Time:15 - 30 mins
-
Tools:Screw drivers
2 of 5 people
found this instruction helpful.
Was this instruction helpful to you?
Thank you for voting!
F1-1 and F3-1 error code
Very easy to repair, but you have to be able to pull your stove out. Two screws in the oven and then remove part of back cover of oven and one plug from there. Simple to do, but did not fix our problem. We are waiting repair now from service company as it looks like it needs a control panel. Worth trying yourself to fix the problem. Inexpensive part and easy to install. Also be sure to turn power off your oven to reset the control panel as this may fix the problem - try this first and also after installing new part - like rebooting a computer...
Parts Used:
-
Barbara from Lakeville, MA
-
Difficulty Level:Really Easy
-
Total Repair Time:15 - 30 mins
-
Tools:Screw drivers
2 of 5 people
found this instruction helpful.
Was this instruction helpful to you?
Thank you for voting!
The panel display was fading/dimming.
I shut down power at the circuit breaker, removed the stove knobs, unscrewed the underneath screws of the front panel, pulled off the panel, and the electronic board/panel was there.
I unhooked the wires (3 sets), and used the socket to remove the electronic board from the front panel. I put it all back together. Very easy-- less than 15 minutes!
I unhooked the wires (3 sets), and used the socket to remove the electronic board from the front panel. I put it all back together. Very easy-- less than 15 minutes!
Parts Used:
-
James from Clarksville, MD
-
Difficulty Level:Really Easy
-
Total Repair Time:Less than 15 mins
-
Tools:Screw drivers, Socket set
1 of 2 people
found this instruction helpful.
Was this instruction helpful to you?
Thank you for voting!
We had no clock, timer, temperature display.
Removed 8 screws and replaced the part (also did a good cleaning while we were in there)! Easy breezy!!!
Parts Used:
-
Marcee from Houston, TX
-
Difficulty Level:Really Easy
-
Total Repair Time:Less than 15 mins
-
Tools:Screw drivers
1 of 2 people
found this instruction helpful.
Was this instruction helpful to you?
Thank you for voting!