















WLP34900 Whirlpool Range - Instructions
Keep searches simple. Use keywords, e.g. "leaking", "pump", "broken" or "fit".
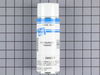
Both outside door handles turned very beige
Everything worked perfectly---thanks to the suggestion of your call center agent. She suggested that since the replacement door handles were no longer available, I should consider repainting them--it worked like a charm. Please tell her she was a life saver. We rent that house in Fl and my returning tenants had complained about the discoloring refer handles. Thank you
Parts Used:
-
Howard from Boynton Beach, FL
-
Difficulty Level:Easy
-
Total Repair Time:30 - 60 mins
-
Tools:Nutdriver
23 of 72 people
found this instruction helpful.
Was this instruction helpful to you?
Thank you for voting!
The inside oven glass cracked down the middle
I was able to remove the door by opening it partially and lifting it up while jiggling it. Once off, I laid it with the inside up on a table and the screws along the bottom facing outward so I could access them easily. I removed the various screws and porcelain covers and sides feel of easily. The inside panel lifted off exposing the inner glass and frame. The screws and clips had to be sprayed with penetrating oil to remove them. The frame lifted off and the cracked glass was removed. I was careful to wipe away all the fluid used to loosen the frame clips. Assembly was the reverse of this being careful to let pieces fit nicely without force. It would have cost me $39 to have the repair performed assuming I could get the door off. A Phillip's head screwdriver was not adequate to remove the frame clips. You needed a correctly-fitting square drive.
Parts Used:

-
Phillip from Fort Wayne, IN
-
Difficulty Level:A Bit Difficult
-
Total Repair Time:15 - 30 mins
-
Tools:Screw drivers
Was this instruction helpful to you?
Thank you for voting!
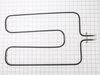
Lower bake element failed
Removed the right side panel, lifted up insulation, removed element and replaced with new.
Parts Used:
-
Susan from Blackstone, MA
-
Difficulty Level:Easy
-
Total Repair Time:15 - 30 mins
-
Tools:Screw drivers
Was this instruction helpful to you?
Thank you for voting!
Oven would turn on but not heat
Looked online and found it was probably the igniter which wasn't firing. An incredibly gratifying and easy experience with the self-fix. Worked on the first try just like new.
Parts Used:

-
Christopher from Houston, TX
-
Difficulty Level:Really Easy
-
Total Repair Time:15 - 30 mins
-
Tools:Pliers, Screw drivers
Was this instruction helpful to you?
Thank you for voting!
My inner glass on the oven door got cracked from spilling something cold on it, while it was hot.
Removed the door. Took out all the screws. Removed the glass that was cracked. Put in the new piece. Put the screws back in place. Put the door back on and it was a done deal.
Parts Used:
-
Mary Ann from Colorado Springs, CO
-
Difficulty Level:Really Easy
-
Total Repair Time:15 - 30 mins
-
Tools:Screw drivers
Was this instruction helpful to you?
Thank you for voting!
Kitchenaid gas oven would not heat
The stove burners and oven broiler worked fine so it was obviously something with the oven ignition. My oven is 14 years old so it made sense that the ignition would wear out. I followed the instructions provided on the PartSelect website for this repair and it worked perfectly. Very easy fix!
Parts Used:
-
Jon from Chicago, IL
-
Difficulty Level:Really Easy
-
Total Repair Time:15 - 30 mins
-
Tools:Screw drivers
Was this instruction helpful to you?
Thank you for voting!
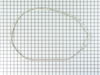
broken interior glass in door
pulled door up and out. Disassembled door. removed old glass and rope gasket. installed new glass and gasket.
Parts Used:
-
sally from franklin, MI
-
Difficulty Level:Easy
-
Total Repair Time:15 - 30 mins
-
Tools:Screw drivers
Was this instruction helpful to you?
Thank you for voting!
Oven would not light.
Open oven door. Remove covers from burner tube. Remove 2 screws holding igniter. Remove panel from back of range. Unplug 2 wires attached to igniter. Pull wires thru inside of oven. Reverse process to install new igniter.
Parts Used:
-
Craig from Gettysburg, PA
-
Difficulty Level:Really Easy
-
Total Repair Time:15 - 30 mins
-
Tools:Screw drivers
Was this instruction helpful to you?
Thank you for voting!
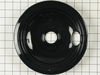
I only had one working burner, oven o.k.
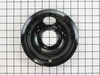
New electric stove was out of my price range. I ordered one electric burner and 3 drip bowls. looked at part select instructions and repaired 2 that didn't work. Now next month I'll order one more part to fire up the last burner. Also following their clear instructions and I'll have a full working electric stove for a little over 100.00 dollars, as opposed to a new one at over 900.00.Thank you for your help.
Parts Used:
-
anita from SANTA FE, NM
-
Difficulty Level:Really Easy
-
Total Repair Time:15 - 30 mins
Was this instruction helpful to you?
Thank you for voting!
Range was operating intermittently.
The repair was so easy. The part came in a box and as I expected it was an exact match. I closed my eyes...counted to three and behold the part was installed. I don't think that installation could have gone any better. I would buy again from this company if I needed parts for any appliance.
Parts Used:
-
Chapel Construction from Caledonia, WI
-
Difficulty Level:Easy
-
Total Repair Time:15 - 30 mins
-
Tools:Screw drivers
Was this instruction helpful to you?
Thank you for voting!
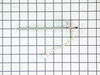
oven would not heat past 170 degrees
Pulled the oven out from the counters and unplugged the electrical cord. Unscrewed the three screws holding the center back panel on and removed the panel. Located the temperature probe in the upper left part of the oven and followed the wiring to where it was connected. Unconnected the wire from the connector. Removed the screw holding the probe and pulled it out from the oven. Put the new part on and screwed it to the oven. Connected the wiring to the connector. Put the panel into the holding brackets and screwed in the three screws. Plugged in the oven and put it back against the wall. Turned on the oven, set a temperature and watched to see if it stopped at the set temperature. Bake3d dinner and ate it.
Parts Used:
-
Clarke from San Diego, CA
-
Difficulty Level:Really Easy
-
Total Repair Time:Less than 15 mins
-
Tools:Screw drivers
Was this instruction helpful to you?
Thank you for voting!
Oven Drawer Roller Snapped Off

-
Kimberly from Sandusky, OH
-
Difficulty Level:Really Easy
-
Total Repair Time:Less than 15 mins
-
Tools:Screw drivers
Was this instruction helpful to you?
Thank you for voting!
Oven Light bulb and gasket needed replaced
Removed the light cover - unscrew the bulb - place the gasket on the base of the light cover - replace the bulb - replace the light cover
Parts Used:


-
Steven from Carnegie, PA
-
Difficulty Level:Really Easy
-
Total Repair Time:Less than 15 mins
Was this instruction helpful to you?
Thank you for voting!
Inner Oven Door Was Cracked
Step 1. Always ensure appliance is unpluged from power source. 2 Remove oven door by open slighly and lift up be sure your hands are up from hinges they can snap back and injure fingers. 3. Have a cover on a flat surface and have a diagram of oven door, 4. Remove bottom screws and slide out top glass and side rails. 5 Remove top cover and insulation over glass. Beware of any jagged glass. 6. Incert new glass. 7. Be sure when replacing insulation and cover that cover in under tabs to ensure glass is firmly held in place repeat steps in reverse order. Took just 20 minutes to repair. I used a small electric screw driver.
Parts Used:
-
Richard from Melbourne, FL
-
Difficulty Level:Really Easy
-
Total Repair Time:15 - 30 mins
-
Tools:Screw drivers
Was this instruction helpful to you?
Thank you for voting!
Oven would not heat up/slight smell of gas
Replacing the igniter took care of the problem. I just wish I had made better notes about how the wire were routed. It would have saved time as I re-assembled everything. Th ejob itself was really easy.
Parts Used:
-
Michael from Woodinville, WA
-
Difficulty Level:Easy
-
Total Repair Time:15 - 30 mins
-
Tools:Pliers, Screw drivers
Was this instruction helpful to you?
Thank you for voting!