















WLP32810 Whirlpool Range - Instructions
Keep searches simple. Use keywords, e.g. "leaking", "pump", "broken" or "fit".
Bulb Replacement
I pulled down the wire around the glass cover. . . Released on end of the wire from its holder being careful to not let the glass cover drop. Unscrewed the bulb and replaced with replacement. Easy, easy.
Parts Used:

-
Judith from Phoenix, AZ
-
Difficulty Level:Really Easy
-
Total Repair Time:Less than 15 mins
0 of 2 people
found this instruction helpful.
Was this instruction helpful to you?
Thank you for voting!
broken glass
I refered to what I had read on repair stories of broken glass...then went to fixing mine and before I new it I was done and glass replaced...it was very easy as long as you watch what you are doing when u take it apart and replace things the same as they were removed......thank you
Parts Used:

-
Rowenna from yukon, OK
-
Difficulty Level:Really Easy
-
Total Repair Time:15 - 30 mins
-
Tools:Screw drivers
0 of 2 people
found this instruction helpful.
Was this instruction helpful to you?
Thank you for voting!
Both outside door handles turned very beige
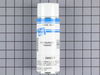
Everything worked perfectly---thanks to the suggestion of your call center agent. She suggested that since the replacement door handles were no longer available, I should consider repainting them--it worked like a charm. Please tell her she was a life saver. We rent that house in Fl and my returning tenants had complained about the discoloring refer handles. Thank you
Parts Used:
-
Howard from Boynton Beach, FL
-
Difficulty Level:Easy
-
Total Repair Time:30 - 60 mins
-
Tools:Nutdriver
23 of 72 people
found this instruction helpful.
Was this instruction helpful to you?
Thank you for voting!
Door wouldn't close tight
First of all I couldn't believe parts arrived next day. Parts solved the problem I was reluctant to believe new hinges would solve the problem. I installed the hinges in about 1 hour but I had door apart previously so I knew what I was doing. Now my wife is speaking to me again and she threw the wooden spoon away that she used to hold door closed. Just spent $100 dollars and saved $1600 thanks guys.
Parts Used:

-
Dale from Port Tobacco, MD
-
Difficulty Level:Really Easy
-
Total Repair Time:30 - 60 mins
-
Tools:Screw drivers
Was this instruction helpful to you?
Thank you for voting!
range installer broke a screw off & busted the plastic piece

-
Christina from West Des Moines, IA
-
Difficulty Level:Easy
-
Total Repair Time:30 - 60 mins
-
Tools:Pliers, Screw drivers
Was this instruction helpful to you?
Thank you for voting!
The inside oven glass cracked down the middle
I was able to remove the door by opening it partially and lifting it up while jiggling it. Once off, I laid it with the inside up on a table and the screws along the bottom facing outward so I could access them easily. I removed the various screws and porcelain covers and sides feel of easily. The inside panel lifted off exposing the inner glass and frame. The screws and clips had to be sprayed with penetrating oil to remove them. The frame lifted off and the cracked glass was removed. I was careful to wipe away all the fluid used to loosen the frame clips. Assembly was the reverse of this being careful to let pieces fit nicely without force. It would have cost me $39 to have the repair performed assuming I could get the door off. A Phillip's head screwdriver was not adequate to remove the frame clips. You needed a correctly-fitting square drive.
Parts Used:
-
Phillip from Fort Wayne, IN
-
Difficulty Level:A Bit Difficult
-
Total Repair Time:15 - 30 mins
-
Tools:Screw drivers
Was this instruction helpful to you?
Thank you for voting!
My inner glass on the oven door got cracked from spilling something cold on it, while it was hot.
Removed the door. Took out all the screws. Removed the glass that was cracked. Put in the new piece. Put the screws back in place. Put the door back on and it was a done deal.
Parts Used:
-
Mary Ann from Colorado Springs, CO
-
Difficulty Level:Really Easy
-
Total Repair Time:15 - 30 mins
-
Tools:Screw drivers
Was this instruction helpful to you?
Thank you for voting!
I only had one working burner, oven o.k.
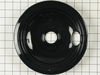
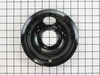
New electric stove was out of my price range. I ordered one electric burner and 3 drip bowls. looked at part select instructions and repaired 2 that didn't work. Now next month I'll order one more part to fire up the last burner. Also following their clear instructions and I'll have a full working electric stove for a little over 100.00 dollars, as opposed to a new one at over 900.00.Thank you for your help.
Parts Used:
-
anita from SANTA FE, NM
-
Difficulty Level:Really Easy
-
Total Repair Time:15 - 30 mins
Was this instruction helpful to you?
Thank you for voting!
Wheel broke off oven drawer
I got the new wheel and screwed it in by hand. It took like 4 minutes total between taking out the drawer, screwing the new wheel on, and putting the drawer back in
Parts Used:

-
Matthew from Plainview, NY
-
Difficulty Level:Really Easy
-
Total Repair Time:Less than 15 mins
Was this instruction helpful to you?
Thank you for voting!
broken interior glass in door
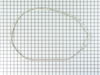
pulled door up and out. Disassembled door. removed old glass and rope gasket. installed new glass and gasket.
Parts Used:
-
sally from franklin, MI
-
Difficulty Level:Easy
-
Total Repair Time:15 - 30 mins
-
Tools:Screw drivers
Was this instruction helpful to you?
Thank you for voting!
oven bottom element stopped heating.
Removed back panel on stove and found no continuity in bake element indicating a break in the element circuit. Also tested electrical supply up to the element and found that we had electricity up to the element when the oven was turned on. Went on line and ordered the bake element and it was on my doorstep in 48 hours. Remove 2 screws inside oven and disconnect wires from the rear and install new element and plug the 2 wires into it, replace rear panel ( 3screws) and turn electricity back on to the stove and you are back in business.
Parts Used:

-
Frederick from Fort Worth, TX
-
Difficulty Level:Really Easy
-
Total Repair Time:15 - 30 mins
-
Tools:Screw drivers
Was this instruction helpful to you?
Thank you for voting!
Oven Drawer Roller Snapped Off
-
Kimberly from Sandusky, OH
-
Difficulty Level:Really Easy
-
Total Repair Time:Less than 15 mins
-
Tools:Screw drivers
Was this instruction helpful to you?
Thank you for voting!
Oven Light bulb and gasket needed replaced
Removed the light cover - unscrew the bulb - place the gasket on the base of the light cover - replace the bulb - replace the light cover
Parts Used:

-
Steven from Carnegie, PA
-
Difficulty Level:Really Easy
-
Total Repair Time:Less than 15 mins
Was this instruction helpful to you?
Thank you for voting!
Light lens broke when self clean cycle was used
I searched Whirlpool, Sears and random appliance stores and Part Select was the only company to have the lens available. All other manufacturers said the lens was no longer manufactured as a stand alone piece and I would have to buy the entire light assembly. Thank you Parts Select!!!!!
Parts Used:

-
James from Buford, GA
-
Difficulty Level:Really Easy
-
Total Repair Time:Less than 15 mins
Was this instruction helpful to you?
Thank you for voting!
Lower Oven Element for Whirlpool Oven
Removed the element by using a basic screw driver...two screws. Detached the slip on wire attachments (don't know what they are called). Re-attached new element and screws. Very simple. I was hoping elements were a little cheaper, but I was impressed with the speed that Part Select delivered my new element. I'll use them again.
Parts Used:
-
Gerald from Castroville, TX
-
Difficulty Level:Really Easy
-
Total Repair Time:Less than 15 mins
-
Tools:Screw drivers
Was this instruction helpful to you?
Thank you for voting!