















WHP54803 Whirlpool Range - Instructions
Keep searches simple. Use keywords, e.g. "leaking", "pump", "broken" or "fit".
Replaced defunct bake element in oven
The part came in 2 days even though I chose the least expensive shipping method. The hardest part was unscrewing the old screws that held the old bake element in place. We soaked them in WD40, and after a while were able to unscrew them. The new element slid in place and works just fine.
Parts Used:

-
Marcia from Atlanta, GA
-
Difficulty Level:Easy
-
Total Repair Time:15 - 30 mins
-
Tools:Screw drivers
Was this instruction helpful to you?
Thank you for voting!
My inner glass on the oven door got cracked from spilling something cold on it, while it was hot.
Removed the door. Took out all the screws. Removed the glass that was cracked. Put in the new piece. Put the screws back in place. Put the door back on and it was a done deal.
Parts Used:

-
Mary Ann from Colorado Springs, CO
-
Difficulty Level:Really Easy
-
Total Repair Time:15 - 30 mins
-
Tools:Screw drivers
Was this instruction helpful to you?
Thank you for voting!
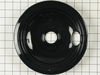
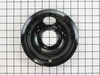
I only had one working burner, oven o.k.
New electric stove was out of my price range. I ordered one electric burner and 3 drip bowls. looked at part select instructions and repaired 2 that didn't work. Now next month I'll order one more part to fire up the last burner. Also following their clear instructions and I'll have a full working electric stove for a little over 100.00 dollars, as opposed to a new one at over 900.00.Thank you for your help.
Parts Used:
-
anita from SANTA FE, NM
-
Difficulty Level:Really Easy
-
Total Repair Time:15 - 30 mins
Was this instruction helpful to you?
Thank you for voting!
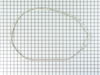
broken interior glass in door
pulled door up and out. Disassembled door. removed old glass and rope gasket. installed new glass and gasket.
Parts Used:
-
sally from franklin, MI
-
Difficulty Level:Easy
-
Total Repair Time:15 - 30 mins
-
Tools:Screw drivers
Was this instruction helpful to you?
Thank you for voting!
oven bottom element stopped heating.
Removed back panel on stove and found no continuity in bake element indicating a break in the element circuit. Also tested electrical supply up to the element and found that we had electricity up to the element when the oven was turned on. Went on line and ordered the bake element and it was on my doorstep in 48 hours. Remove 2 screws inside oven and disconnect wires from the rear and install new element and plug the 2 wires into it, replace rear panel ( 3screws) and turn electricity back on to the stove and you are back in business.
Parts Used:
-
Frederick from Fort Worth, TX
-
Difficulty Level:Really Easy
-
Total Repair Time:15 - 30 mins
-
Tools:Screw drivers
Was this instruction helpful to you?
Thank you for voting!
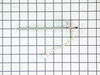
oven would not heat past 170 degrees
Pulled the oven out from the counters and unplugged the electrical cord. Unscrewed the three screws holding the center back panel on and removed the panel. Located the temperature probe in the upper left part of the oven and followed the wiring to where it was connected. Unconnected the wire from the connector. Removed the screw holding the probe and pulled it out from the oven. Put the new part on and screwed it to the oven. Connected the wiring to the connector. Put the panel into the holding brackets and screwed in the three screws. Plugged in the oven and put it back against the wall. Turned on the oven, set a temperature and watched to see if it stopped at the set temperature. Bake3d dinner and ate it.
Parts Used:
-
Clarke from San Diego, CA
-
Difficulty Level:Really Easy
-
Total Repair Time:Less than 15 mins
-
Tools:Screw drivers
Was this instruction helpful to you?
Thank you for voting!
Oven Drawer Roller Snapped Off

-
Kimberly from Sandusky, OH
-
Difficulty Level:Really Easy
-
Total Repair Time:Less than 15 mins
-
Tools:Screw drivers
Was this instruction helpful to you?
Thank you for voting!
Oven Light bulb and gasket needed replaced
Removed the light cover - unscrew the bulb - place the gasket on the base of the light cover - replace the bulb - replace the light cover
Parts Used:


-
Steven from Carnegie, PA
-
Difficulty Level:Really Easy
-
Total Repair Time:Less than 15 mins
Was this instruction helpful to you?
Thank you for voting!
Bake element had broken causing the oven not to heat up.
removed the screws that secured the lower element. Disconnected the old element from wire contacts. Inserted the new element into the wire contacts.
Parts Used:
-
Darryl from Wildwood, MO
-
Difficulty Level:Really Easy
-
Total Repair Time:Less than 15 mins
-
Tools:Screw drivers
Was this instruction helpful to you?
Thank you for voting!
oven not heating up.
-
Vincent from Hutchinson, KS
-
Difficulty Level:Really Easy
-
Total Repair Time:Less than 15 mins
-
Tools:Pliers, Screw drivers
Was this instruction helpful to you?
Thank you for voting!
The bottom heating element broke in one part.
TURNED OFF THE POWER TO THE RANGE, DISCONNECTED THE ELECTRIC PLUG. I unscrewed the element attached to the oven, disconnected the connectors. Reconnected the element and screwed the part back to the oven. EASIER THEN I THROUGHT.
Parts Used:
-
Clifford from Jacksonville, FL
-
Difficulty Level:Really Easy
-
Total Repair Time:Less than 15 mins
-
Tools:Screw drivers
Was this instruction helpful to you?
Thank you for voting!
Light bulb failure
Received the part the day after ordering. Appreciated the quick service and repair took less than a minute.
Parts Used:
-
Grant from Alexandria, VA
-
Difficulty Level:Really Easy
-
Total Repair Time:Less than 15 mins
Was this instruction helpful to you?
Thank you for voting!
Gasket for oven light wore out and needed replacing.
I very simply replaced the gasket where it belonged and I was good to go!
Parts Used:
-
Karen from San Jose, NM
-
Difficulty Level:Really Easy
-
Total Repair Time:Less than 15 mins
-
Tools:Screw drivers
Was this instruction helpful to you?
Thank you for voting!
Bake element inoperative
Turned breaker off. Removed oven door for access, two screws loosened element, unplugged wires from element & removed element. Reverse order to install. Perfect fit. Thanks.
Parts Used:
-
Robert from Blanket, TX
-
Difficulty Level:Really Easy
-
Total Repair Time:Less than 15 mins
-
Tools:Screw drivers
Was this instruction helpful to you?
Thank you for voting!
circuit breaker blew
I went to the source of power on the stove and noticed one of the terminals had come loose from the terminal block and had shorted out against the cover of the terminal junction. After prying the loose terminal off cover I ordered new terminal block and received it the 2nd day. I removed the old terminal block and replaced the part in about 10 minutes..Thank you Parts Select for your easy to find diagrams and quick delivery.
Parts Used:

-
Richard from Sarasota, FL
-
Difficulty Level:Easy
-
Total Repair Time:Less than 15 mins
-
Tools:Pliers, Screw drivers
Was this instruction helpful to you?
Thank you for voting!