















WGD4850HW2 Whirlpool Dryer - Instructions
Keep searches simple. Use keywords, e.g. "leaking", "pump", "broken" or "fit".
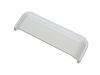
Handle on dryer door broke.
The part arrived in the mail. I used a pair of kitchen scissors to open the package. I removed the part from the plastic bag, and snapped it into place on the front of the dryer. Total time: 15 seconds.
I wish all my repairs were this easy.
I wish all my repairs were this easy.
Parts Used:
-
Kevin from GRESHAM, OR
-
Difficulty Level:Very Easy
-
Total Repair Time:Less than 15 mins
2 of 2 people
found this instruction helpful.
Was this instruction helpful to you?
Thank you for voting!
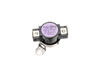
was not heating
remove back of dryer and install part same as old part was installed
Parts Used:
-
Geri from COUNTRYSIDE, IL
-
Difficulty Level:Really Easy
-
Total Repair Time:15 - 30 mins
-
Tools:Screw drivers, Socket set
2 of 2 people
found this instruction helpful.
Was this instruction helpful to you?
Thank you for voting!
Broken handle
-
Richard from WASHOUGAL, WA
-
Difficulty Level:Very Easy
-
Total Repair Time:Less than 15 mins
3 of 5 people
found this instruction helpful.
Was this instruction helpful to you?
Thank you for voting!
Handle on the dryer broke
This was super simple - even I could do it! I followed the 3-step instructions which basically described how to hold the new handle and pushed it into the holes in the door. Less than 30 seconds and no tools.
Parts Used:
-
Steven from COLUMBIA, MD
-
Difficulty Level:Very Easy
-
Total Repair Time:Less than 15 mins
2 of 3 people
found this instruction helpful.
Was this instruction helpful to you?
Thank you for voting!
My handlke broke on my dryer.
I opened the package with my new handle in it that I got from PartSelect, and snapped it right in place. No tools needed, took only seconds!
Parts Used:
-
Susan from LUMBERTON, MS
-
Difficulty Level:Very Easy
-
Total Repair Time:Less than 15 mins
1 person
found this instruction helpful.
Was this instruction helpful to you?
Thank you for voting!
Broken dryer door handy.
Just popped it into place. Was very easy. Took less than 5 minutes.
Parts Used:
-
Gayle from TEXAS CITY, TX
-
Difficulty Level:Really Easy
-
Total Repair Time:Less than 15 mins
1 person
found this instruction helpful.
Was this instruction helpful to you?
Thank you for voting!
handle from dryer broke off and couldn't snap it back in place.
We didn't even look at the instructions. Just rotated the handle until it snapped back into place.
Parts Used:
-
susan from SAUSALITO, CA
-
Difficulty Level:Very Easy
-
Total Repair Time:Less than 15 mins
2 of 4 people
found this instruction helpful.
Was this instruction helpful to you?
Thank you for voting!
Handle broke off door of clothes dryer.
New handle just snapped in - really easy. Have to compliment Part Select - I ordered handle one day and it was delivered the next day. Impressive!
Parts Used:
-
Beverly A from MANHATTAN, KS
-
Difficulty Level:Very Easy
-
Total Repair Time:Less than 15 mins
1 person
found this instruction helpful.
Was this instruction helpful to you?
Thank you for voting!
Broken Door Handle
I snapped the new handle into place, it took 2 seconds. The new handle was made thicker and stronger than original. Its unlikely I will be doing this repair again.
Parts Used:
-
David E from SUMMERVILLE, SC
-
Difficulty Level:Very Easy
-
Total Repair Time:Less than 15 mins
1 person
found this instruction helpful.
Was this instruction helpful to you?
Thank you for voting!
The dryer handle broke.
When I ordered the part over the phone was told it just snaps in. Not sure what it meant. Parts delivery was prompt. Looked at the part and it’s pisition on the dryer.And it really was very simple.
Parts Used:
-
Hasso from PALM COAST, FL
-
Difficulty Level:Very Easy
-
Total Repair Time:Less than 15 mins
1 person
found this instruction helpful.
Was this instruction helpful to you?
Thank you for voting!
door handle broke
-
Richard from DEFIANCE, OH
-
Difficulty Level:Very Easy
-
Total Repair Time:Less than 15 mins
1 person
found this instruction helpful.
Was this instruction helpful to you?
Thank you for voting!
No heat or lost the heating cycle
Initially bought a few parts based on past experience without testing first....my mistake. After testing and purchasing the correct parts the dryer works fine. This is by far the best DIY web site I've ever used and recommend it highly. If you can follow online instructions, this is the way to go....it saves $$$ on service calls.
Parts Used:
-
ANTHONY from NEW EGYPT, NJ
-
Difficulty Level:Really Easy
-
Total Repair Time:15 - 30 mins
-
Tools:Nutdriver
Was this instruction helpful to you?
Thank you for voting!