















WFGS3530RW0 Whirlpool Range - Instructions
Keep searches simple. Use keywords, e.g. "leaking", "pump", "broken" or "fit".
I broke a piece of the trim and had to replace it
took the handle off, replaces the side trim piece and replaced the handle. Very simple!
Parts Used:

-
Gregg from SOUTH BEND, IN
-
Difficulty Level:Really Easy
-
Total Repair Time:30 - 60 mins
-
Tools:Screw drivers
4 of 4 people
found this instruction helpful.
Was this instruction helpful to you?
Thank you for voting!
My drawer did not line up
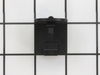
Putting the drawer glides on was easy. My range drawer did not have any glides on so my drawer would fall out. The drawer glides popped right on the drawer. The glides for the track were easy to screw into the body of the range. I had to bend the tracks up a little on each side with a pair of pliers. One glide would go onto the track and the other one would go on top of the track. After bending them a little I was able to push them onto the track.at the same time.
Parts Used:
-
Angel from SN BERNRDNO, CA
-
Difficulty Level:A Bit Difficult
-
Total Repair Time:15 - 30 mins
-
Tools:Pliers, Screw drivers
4 of 5 people
found this instruction helpful.
Was this instruction helpful to you?
Thank you for voting!
Grate Feet fell off early
Used Silicone Rubber to "glue" them. It's heat resistant unlike super glue which is why 8 of them fell off. I only found 6 of them and had to order replacements.
Parts Used:

-
Richard from Highland Park, IL
-
Difficulty Level:Really Easy
-
Total Repair Time:Less than 15 mins
3 of 4 people
found this instruction helpful.
Was this instruction helpful to you?
Thank you for voting!
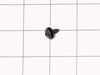
Replaced screw

-
Judith from SALEM, OR
-
Difficulty Level:Very Easy
-
Total Repair Time:Less than 15 mins
-
Tools:Screw drivers
2 of 2 people
found this instruction helpful.
Was this instruction helpful to you?
Thank you for voting!
Corroded/greasy bottom oven tray
Loosened two screws and removed tray, very simple. Replaced new tray and adjusted screws to hold tray. Easiest part was finding new tray part number and ordering replacement using online parts diagram.
Parts Used:

-
Robert Ruth from FERNDALE, WA
-
Difficulty Level:Very Easy
-
Total Repair Time:15 - 30 mins
-
Tools:Screw drivers
2 of 2 people
found this instruction helpful.
Was this instruction helpful to you?
Thank you for voting!
Drawer guides missingJust
-
Mark from Killbuck, OH
-
Difficulty Level:Really Easy
-
Total Repair Time:15 - 30 mins
-
Tools:Screw drivers
3 of 5 people
found this instruction helpful.
Was this instruction helpful to you?
Thank you for voting!
last oven bottom was ruined by melted and burnt plastic
took out old oven bottom by removing 2 screws, placed the new oven bottom in place put the screws back in and was done.
Parts Used:
-
Dennis from Missouri Valley, IA
-
Difficulty Level:Really Easy
-
Total Repair Time:15 - 30 mins
-
Tools:Screw drivers
2 of 3 people
found this instruction helpful.
Was this instruction helpful to you?
Thank you for voting!
Gas oven interment lighting. Pan was cracked and out of shape.
Loosen top two rear screws from the top pan. Remove top pan
Remove 2 front screws from bottom pan. Remove bottom pan. Reverse order.
Replace both pans.
Remove 2 front screws from bottom pan. Remove bottom pan. Reverse order.
Replace both pans.
Parts Used:

-
Teddy from PRAIRIEVILLE, LA
-
Difficulty Level:Really Easy
-
Total Repair Time:15 - 30 mins
-
Tools:Screw drivers
2 of 3 people
found this instruction helpful.
Was this instruction helpful to you?
Thank you for voting!
Countertop Dishwasher - Non Whirlpool
Since I have All Whirlpool appliances in the home, the only one not a Whirlpool was a counter top dishwasher that looks exactly like it could be a Whirlpool and so not to be the odd unit out, I labeled it with with a Whirlpool logo nameplate on the face of the door. Now everything matches perfectly and all in the same exact color white too.
Just measured and marked where the plate was to be located, cleaned that part of the surface, peeled the backing and carefully placed the logo name plate in place and pressed it on. Voila. Done and looks original as well. Call me the big, deep fakearooski.
Just measured and marked where the plate was to be located, cleaned that part of the surface, peeled the backing and carefully placed the logo name plate in place and pressed it on. Voila. Done and looks original as well. Call me the big, deep fakearooski.
Parts Used:

-
Peter from PLEASANT PR, WI
-
Difficulty Level:Very Easy
-
Total Repair Time:Less than 15 mins
2 of 3 people
found this instruction helpful.
Was this instruction helpful to you?
Thank you for voting!
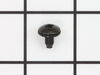
screw came off
very expensive to buy the part but just tighten the screw intot eh predefined place.
Parts Used:
-
Sandeep from EDINA, MN
-
Difficulty Level:Very Easy
-
Total Repair Time:Less than 15 mins
-
Tools:Screw drivers
1 person
found this instruction helpful.
Was this instruction helpful to you?
Thank you for voting!
Pan scratched by housekeeper
-
Kenneth A. from SANGER, CA
-
Difficulty Level:Very Easy
-
Total Repair Time:Less than 15 mins
-
Tools:Screw drivers
1 of 2 people
found this instruction helpful.
Was this instruction helpful to you?
Thank you for voting!
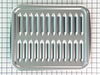
broiler pan missing
-
RAYMOND from JACKSONVILLE, FL
-
Difficulty Level:Really Easy
-
Total Repair Time:Less than 15 mins
1 of 2 people
found this instruction helpful.
Was this instruction helpful to you?
Thank you for voting!
door of oven came apart when plastic screw holders broke
put back together with parts ordered. Parts arrived in 2 days!!!! and saved my large dinner party the following day from being ruined. Thank you so much for your parts inventory and for Jenn Air supplying only the part needed and not the entire door. It was a life saver!
Parts Used:
-
patricia from chipely, FL
-
Difficulty Level:Really Easy
-
Total Repair Time:15 - 30 mins
-
Tools:Screw drivers
1 of 2 people
found this instruction helpful.
Was this instruction helpful to you?
Thank you for voting!
Both outside door handles turned very beige
Everything worked perfectly---thanks to the suggestion of your call center agent. She suggested that since the replacement door handles were no longer available, I should consider repainting them--it worked like a charm. Please tell her she was a life saver. We rent that house in Fl and my returning tenants had complained about the discoloring refer handles. Thank you
Parts Used:
-
Howard from Boynton Beach, FL
-
Difficulty Level:Easy
-
Total Repair Time:30 - 60 mins
-
Tools:Nutdriver
23 of 72 people
found this instruction helpful.
Was this instruction helpful to you?
Thank you for voting!
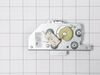
Could not get self cleaning oven to engage
Removed back of stove, 8 screws, removed original latch assembly and installed new assembly. One thing that can cause you difficulty is that the rod that connects the assembly to the front latch on the door can disconnect and has to be reconnected.[Problem]
Parts Used:
-
Charles from Fairfield Bay, AR
-
Difficulty Level:Really Easy
-
Total Repair Time:15 - 30 mins
-
Tools:Screw drivers
Was this instruction helpful to you?
Thank you for voting!