















WFG975H0HZ2 Whirlpool Range - Instructions
Keep searches simple. Use keywords, e.g. "leaking", "pump", "broken" or "fit".
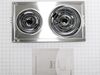
the elements were old and I only had one set, but had the grill
I just had to pull the old ones out, and pop in the new ones. It took longer to get them out of the box, than to replace them. Thank You for your fast ordering and shipping.
Parts Used:
-
Deborah from New Plymouth, ID
-
Difficulty Level:Really Easy
-
Total Repair Time:Less than 15 mins
0 of 1 people
found this instruction helpful.
Was this instruction helpful to you?
Thank you for voting!
Replace grill elements with convention coil elements
Easy as 1-2-3. Opened the box, took out the new electric coil elements, plugged it in to our stove and it worked perfectly.
Parts Used:
-
Kenia from Miramar, FL
-
Difficulty Level:Really Easy
-
Total Repair Time:Less than 15 mins
0 of 1 people
found this instruction helpful.
Was this instruction helpful to you?
Thank you for voting!
Worn Oven Seal
If you have some mechanical ability it is a eazy fix, remove the 2 screws attaching door to oven, disassemble the back screws, and inner panel, remove oven seal, and reverse the process.
Parts Used:
-
Wesley from Avon, IN
-
Difficulty Level:A Bit Difficult
-
Total Repair Time:30 - 60 mins
-
Tools:Screw drivers
0 of 1 people
found this instruction helpful.
Was this instruction helpful to you?
Thank you for voting!
Burners would not heat properly, and eyes could not be leveled.
Pulled old element out, cleaned electrical connector. Cleaned drip pan. Replaced with new unit. The new element was of a better design than the original. I will order second set soon to match.
Wife very pleased too.
Wife very pleased too.
Parts Used:
-
William from Pauline, SC
-
Difficulty Level:Really Easy
-
Total Repair Time:Less than 15 mins
0 of 2 people
found this instruction helpful.
Was this instruction helpful to you?
Thank you for voting!
elements would not heat up
Disengaged the old cartridge and replaced with the new one ---simple as pie-----the real issue is that it was ordered and delivered with-in 4 days---in a well pack and insulated box---great service---
Parts Used:
-
George from East Otis, MA
-
Difficulty Level:Really Easy
-
Total Repair Time:Less than 15 mins
0 of 2 people
found this instruction helpful.
Was this instruction helpful to you?
Thank you for voting!
Both outside door handles turned very beige
Everything worked perfectly---thanks to the suggestion of your call center agent. She suggested that since the replacement door handles were no longer available, I should consider repainting them--it worked like a charm. Please tell her she was a life saver. We rent that house in Fl and my returning tenants had complained about the discoloring refer handles. Thank you
Parts Used:
-
Howard from Boynton Beach, FL
-
Difficulty Level:Easy
-
Total Repair Time:30 - 60 mins
-
Tools:Nutdriver
23 of 72 people
found this instruction helpful.
Was this instruction helpful to you?
Thank you for voting!
Old element cracked
Simply pulled old element and plugged in the new one. The pattern of 3 flat spades and a round on the end of the element matched so it was simple.
Parts Used:
-
Scott from Walnut Grove, CA
-
Difficulty Level:Really Easy
-
Total Repair Time:Less than 15 mins
20 of 674 people
found this instruction helpful.
Was this instruction helpful to you?
Thank you for voting!
wanted to replace the grill unit
removed the grill element and plugged in the new cartridge element. very simple
Parts Used:
-
Brenda from Jonesboro, LA
-
Difficulty Level:Really Easy
-
Total Repair Time:Less than 15 mins
22 of 691 people
found this instruction helpful.
Was this instruction helpful to you?
Thank you for voting!
Large element on one cartridge & small element on the other cartridge
First of all, I could not believe how quickly I received the 2 new Jenn-Air Coil element cartridges!! It seemed like I had just ordered them and next thing I knew, Fed-Ex was ringing my doorbell to deliver them!! Also, I received both cartridge boxes at the same time so this was really great! My experience in the past in ordering two of one item is that the second item is usually shipped a few days later.
This was one of the easiest installations & repairs I have ever done! Given the age of the stove, the old cartridges had a burner on each one that did not work properly. Also, one of the cartridges was beginning to rust on the underside, due to age.
It took approximately 2 minutes to remove the old burner cartridges and install the new ones. All I had to do is slightly lift the lip edge of the cartridge and "unplug" it from the stove which merely entailed either moving the cartridge toward me or away from me, depending on which side of the stove I was replacing the cartridge on. Then, I just simply slid the cartridge into the appropriate plug in the stove. That was it!
I immediately checked all burners and I could not believe the difference! The burners immediately reached the desired temperature whereas the old elements that worked took a couple of minutes to heat properly. Now, the Jenn-Air looks like a new stove and is ready for holiday cooking!!! Thank you so very much for processing my order quickly. I will definitely order any future parts needed from your company. On a scale of 1 to 10, I give you an 11.
This was one of the easiest installations & repairs I have ever done! Given the age of the stove, the old cartridges had a burner on each one that did not work properly. Also, one of the cartridges was beginning to rust on the underside, due to age.
It took approximately 2 minutes to remove the old burner cartridges and install the new ones. All I had to do is slightly lift the lip edge of the cartridge and "unplug" it from the stove which merely entailed either moving the cartridge toward me or away from me, depending on which side of the stove I was replacing the cartridge on. Then, I just simply slid the cartridge into the appropriate plug in the stove. That was it!
I immediately checked all burners and I could not believe the difference! The burners immediately reached the desired temperature whereas the old elements that worked took a couple of minutes to heat properly. Now, the Jenn-Air looks like a new stove and is ready for holiday cooking!!! Thank you so very much for processing my order quickly. I will definitely order any future parts needed from your company. On a scale of 1 to 10, I give you an 11.
Parts Used:
-
W.C. from Elberta, AL
-
Difficulty Level:Really Easy
-
Total Repair Time:Less than 15 mins
20 of 686 people
found this instruction helpful.
Was this instruction helpful to you?
Thank you for voting!
needed a new coil element for my 20+ years old stovetop.
-
Elissa from Fort Thomas, KY
-
Difficulty Level:Really Easy
-
Total Repair Time:Less than 15 mins
20 of 686 people
found this instruction helpful.
Was this instruction helpful to you?
Thank you for voting!
burner going out
-
thomas from missoula, MT
-
Difficulty Level:Really Easy
-
Total Repair Time:Less than 15 mins
20 of 687 people
found this instruction helpful.
Was this instruction helpful to you?
Thank you for voting!
No problem, just wanted 4 burners instead of 2 + grill
This was a plug-in cartridge, so it really didn't need to be installed. However, as I unpacked it, I noticed that there was a blue plastic film sticking out from the edge of the underside. We had to take the cartridge apart to remove the plastic film. I didn't want to take the chance of it catching on fire.
Parts Used:
-
Marsha from SOUTH LAKE TAHOE, CA
-
Difficulty Level:Really Easy
-
Total Repair Time:15 - 30 mins
-
Tools:Nutdriver
20 of 687 people
found this instruction helpful.
Was this instruction helpful to you?
Thank you for voting!
cartridge plug non functional
The old cartridge was pulled out (unplugged) from the stove top and the new one was plugged in. What could be simpler, and I did it myself. I am glad I knew what was the problem, so it was easy. The promptness of your company was astounding, the day after my order online and a phone call. Fabulous business!!
Parts Used:
-
Ilse from Napa, CA
-
Difficulty Level:Really Easy
-
Total Repair Time:Less than 15 mins
19 of 685 people
found this instruction helpful.
Was this instruction helpful to you?
Thank you for voting!
Coils would not heat up unless both control swithes were on high
I always wanted an extra cartridge for my stove. The grill it came with never got used. Now I have a 4 burner stove. However I need to look at the control switches. The brand new cartridge works the same as the old one did. I figured this would be the case.
Parts Select did a great job getting me the insert. Now I need to order up the switches. Hopefully them we will be back in business. More trouble shooting on the way...
Parts Select did a great job getting me the insert. Now I need to order up the switches. Hopefully them we will be back in business. More trouble shooting on the way...
Parts Used:
-
Daniel from Salem, WI
-
Difficulty Level:Really Easy
-
Total Repair Time:Less than 15 mins
19 of 685 people
found this instruction helpful.
Was this instruction helpful to you?
Thank you for voting!
One of the elements quit heating
I removed the old coil element cartidge & slid the new one right into place. Simple repair in a short amount of time!
Parts Used:
-
Connie from Perryville, MO
-
Difficulty Level:Really Easy
-
Total Repair Time:Less than 15 mins
19 of 685 people
found this instruction helpful.
Was this instruction helpful to you?
Thank you for voting!