















WDF590SAJM0 Whirlpool Dishwasher - Instructions
Keep searches simple. Use keywords, e.g. "leaking", "pump", "broken" or "fit".
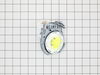
DISHWASHER WOULDN'T DRAIN
1. Shut off water valve
2. disconnect water hose(wrench-adjustable)
3. Disconnect drain hose (screwdriver)
4. Pull dishwasher out from under counter
5. Put down towel to soak up residual water that drains out of dishwasher
6. lay dishwasher face down; electronics is located underneath dishwasher.
7. locate faulty drain pump
8. remove electrical connector from drain pump by first pressing on connector retention tab with screwdriver while sliding connector loose.
9. twist drain pump body while using screw driver to depress drain pump retention tab.
10. remove old drain pump body and insert and twist new drain pump body into old location (use screw driver to assist retention tab engagement)
11. attach electrical connector.
12. Return dishwasher to upright position, slide it under the counter (with its cotton cover); reconnect hoses AND turn water supply back on (make sure you remember to turn the water supply back on)
2. disconnect water hose(wrench-adjustable)
3. Disconnect drain hose (screwdriver)
4. Pull dishwasher out from under counter
5. Put down towel to soak up residual water that drains out of dishwasher
6. lay dishwasher face down; electronics is located underneath dishwasher.
7. locate faulty drain pump
8. remove electrical connector from drain pump by first pressing on connector retention tab with screwdriver while sliding connector loose.
9. twist drain pump body while using screw driver to depress drain pump retention tab.
10. remove old drain pump body and insert and twist new drain pump body into old location (use screw driver to assist retention tab engagement)
11. attach electrical connector.
12. Return dishwasher to upright position, slide it under the counter (with its cotton cover); reconnect hoses AND turn water supply back on (make sure you remember to turn the water supply back on)
Parts Used:
-
James from SACRAMENTO, CA
-
Difficulty Level:Really Easy
-
Total Repair Time:15 - 30 mins
-
Tools:Screw drivers, Wrench (Adjustable)
3 of 3 people
found this instruction helpful.
Was this instruction helpful to you?
Thank you for voting!
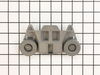
Replaced wheels on lower rack
My husband did the repair. It was very easy. He basically just popped off the old wheels and popped on the new ones.
Parts Used:
-
Jane from JOLIET, IL
-
Difficulty Level:Very Easy
-
Total Repair Time:Less than 15 mins
-
Tools:Screw drivers
3 of 3 people
found this instruction helpful.
Was this instruction helpful to you?
Thank you for voting!
two retainers broke and the main part fell apart
pushed the new retainers in the holes and we are set to go
Parts Used:
-
Lois from Great Falls, MT
-
Difficulty Level:Really Easy
-
Total Repair Time:Less than 15 mins
3 of 3 people
found this instruction helpful.
Was this instruction helpful to you?
Thank you for voting!
Dishwasher not draining
Very easy to twist off the old pump and replace with new part. Worked perfect after replacement! We just followed you tube instructions
Parts Used:
-
Tina from BLOOMINGTON, IN
-
Difficulty Level:Easy
-
Total Repair Time:Less than 15 mins
-
Tools:Pliers
3 of 3 people
found this instruction helpful.
Was this instruction helpful to you?
Thank you for voting!
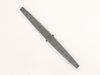
The filter came out and pushed the arm up on the burner and melted it.
The air just unscrews with one twist and the new arm twist right back on. No tools needs. Saved me $100 service call.
Parts Used:
-
Sherry from SUSANVILLE, CA
-
Difficulty Level:Very Easy
-
Total Repair Time:Less than 15 mins
3 of 3 people
found this instruction helpful.
Was this instruction helpful to you?
Thank you for voting!
Wheels fell off
These wheel assembly that came on the lower rack of my dishwasher were junk! They started falling off within 6 months. I put them back on to the point that the pin in the center of the wheels would no long stay in place, thus the frustrating situation of the wheels falling off often.
Assembly was easy peasy!
Assembly was easy peasy!
Parts Used:
-
Jan B. from BEAVER, OK
-
Difficulty Level:Really Easy
-
Total Repair Time:Less than 15 mins
4 of 6 people
found this instruction helpful.
Was this instruction helpful to you?
Thank you for voting!
Door leaking
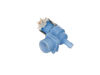
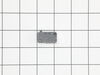
Float switch right in front. Did not remove dishwasher. Used small flat screwdriver to un clip cover. Very soft and easy. Unplug and it slides out.
Same with the water inlet. Did not remove and used a screwdriver and small channel locks. Turn off water. Remove hose and remove screw. Slides out. Very easy.
Same with the water inlet. Did not remove and used a screwdriver and small channel locks. Turn off water. Remove hose and remove screw. Slides out. Very easy.
Parts Used:
-
Randy from Tucson, AZ
-
Difficulty Level:Very Easy
-
Total Repair Time:Less than 15 mins
-
Tools:Screw drivers
3 of 3 people
found this instruction helpful.
Was this instruction helpful to you?
Thank you for voting!
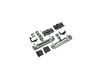
Our renters somehow broke the wheel off the upper rack.
I watched the installation video that came with the parts. I removed both sides of the old track assembly and installed the left and right assembly in about fifteen minutes. I honestly believe my seven year old grandson could have done it for me.
Parts Used:

-
Adrian from CLEARWATER, FL
-
Difficulty Level:Easy
-
Total Repair Time:15 - 30 mins
-
Tools:Screw drivers
5 of 9 people
found this instruction helpful.
Was this instruction helpful to you?
Thank you for voting!
Dishwasher door stopped latching properly.
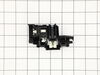
Initial inspection of the issue and research suggested the door latch was malfunctioning / broken. I bought the part and expressed it home. The installation involved removing the door screws on the inside of the door, separating the front and back panels, unplugging the door latch, removing it from its niche and popping in the new one. Reverse the take apart and it was done. Very simple swap. Hardest part was juggling the two halves of the door and preventing the door for trying to close in the process as the bulk of the weight is in the outside half of the door.
The new part did not fix the issue. The door strike was the next part that could be broken / malfunctioning. I ordered that part as well and replaced it. In the process of replacing it I found that the original door strike had been installed upside down. I am guessing it was installed at just the right pitch, or maybe even bent at the manufacturing facility, so that it latched. No idea how it managed two years like that. I installed the new one correctly and the door latches perfectly. Both parts I removed from the unit I will retain if my new parts should fail in the future.
The new part did not fix the issue. The door strike was the next part that could be broken / malfunctioning. I ordered that part as well and replaced it. In the process of replacing it I found that the original door strike had been installed upside down. I am guessing it was installed at just the right pitch, or maybe even bent at the manufacturing facility, so that it latched. No idea how it managed two years like that. I installed the new one correctly and the door latches perfectly. Both parts I removed from the unit I will retain if my new parts should fail in the future.
Parts Used:
-
Bryca from TULSA, OK
-
Difficulty Level:Easy
-
Total Repair Time:30 - 60 mins
-
Tools:Pliers
3 of 3 people
found this instruction helpful.
Was this instruction helpful to you?
Thank you for voting!
Arm sprayer had broken
Something had been loaded in the dishwasher that had gone thru the basket - it hit the arm sprayer and broke it off.
Replacement sprayer was exactly the same - the partselect website has very specific identification method so you get the proper part. You must have your model number.
I watched a you tube video which was referred by part select. This was helpful.
I did not realize at first that only part of the arm sprayer had broken off. The arm sprayer broke off, but there is a base to the arm sprayer that was still attached to the dishwasher. So I could not, of course , fit the new arm with its base over the existing base because they are the same size. Once I realized this, it was a simple replacement, following the youtube instructions. You do have to press and turn counter clockwise to get the old base off, but once that was done, the new sprayer arm, which arrived attached to the base, easily fit, and press hard to turn it clockwise to reattach it..
It has worked perfectly. It is a hard turn to get the arm sprayer off or on, which is good so it doesn't come loose during washing, but when replacing it, you aren't sure of why it won't turn. It is a hard turn. Watch the you tube video.
Replacement sprayer was exactly the same - the partselect website has very specific identification method so you get the proper part. You must have your model number.
I watched a you tube video which was referred by part select. This was helpful.
I did not realize at first that only part of the arm sprayer had broken off. The arm sprayer broke off, but there is a base to the arm sprayer that was still attached to the dishwasher. So I could not, of course , fit the new arm with its base over the existing base because they are the same size. Once I realized this, it was a simple replacement, following the youtube instructions. You do have to press and turn counter clockwise to get the old base off, but once that was done, the new sprayer arm, which arrived attached to the base, easily fit, and press hard to turn it clockwise to reattach it..
It has worked perfectly. It is a hard turn to get the arm sprayer off or on, which is good so it doesn't come loose during washing, but when replacing it, you aren't sure of why it won't turn. It is a hard turn. Watch the you tube video.
Parts Used:
-
Vivienne from GILLETT, PA
-
Difficulty Level:A Bit Difficult
-
Total Repair Time:15 - 30 mins
3 of 4 people
found this instruction helpful.
Was this instruction helpful to you?
Thank you for voting!
Door link broke at plastic connection end
First remove the front kick panel by removing 2 philips screws. Turn off the water supply, and then disconnect the supply line if not of the flexible kind. Mine was copper. Remove 2 screws holding dishwasher to counter top and pull machine out. Open door and attach replacement link by hooking the plastic end to the hinge hook on the door side and then place the string portion round the plastic pulleys and then attach the other end of the link to the end of the spring attached to the rear of the machine along the bottom side. Push dishwasher back into position, reattach supply line and re-install both screws attaching the machine to the counter top. Turn on the water supply and check for leaks. Place the kick plate into postion and secure using the 2 philips screws that were removed.
Parts Used:
-
Richard from Mckinney, TX
-
Difficulty Level:Really Easy
-
Total Repair Time:15 - 30 mins
-
Tools:Screw drivers, Wrench (Adjustable)
4 of 7 people
found this instruction helpful.
Was this instruction helpful to you?
Thank you for voting!
Middle spray arm would not turn
I broke it accidentally while trying to get it off and it would either not spin or fall off. I simply removed it out of the box and put it on. 2 turns to the right and I was done!
Parts Used:
-
Johanna from JOHNSON CITY, TN
-
Difficulty Level:Very Easy
-
Total Repair Time:Less than 15 mins
3 of 4 people
found this instruction helpful.
Was this instruction helpful to you?
Thank you for voting!
Replacing the soap/rinse dispensing module in front door of dishwasher
1. Remove front of door with torx screws around inside top and sides of door.
2. Unclip and remove plug with two wires for dish soap solenoid. You may have to lie on your back or use a mirror to see the location of the small clip retaining the plug.
3. Unclip and remove dispenser module. Here's the rub: the clips used to retain the unit in the door panel of my dishwasher are tabs cut in the stainless steel cut-out and rolled back at a 90 degree angle to retain their springiness. They seat against the back edge of three plastic ridges along the top, bottom and one along each side of the dispenser module. The key is to remove the module without permanently bending these tabs, thereby losing their springiness and destroying their ability to clip tight against the new module to hold it in. I had some success slipping 3 pieces of flashing under the stainless tabs along the top and sides of the old module, allowing the plastic retaining ridges to ride under the tabs all together and move forward to disengage the clips without permanently bending the tabs.
4. Reassembly is just the reverse.
2. Unclip and remove plug with two wires for dish soap solenoid. You may have to lie on your back or use a mirror to see the location of the small clip retaining the plug.
3. Unclip and remove dispenser module. Here's the rub: the clips used to retain the unit in the door panel of my dishwasher are tabs cut in the stainless steel cut-out and rolled back at a 90 degree angle to retain their springiness. They seat against the back edge of three plastic ridges along the top, bottom and one along each side of the dispenser module. The key is to remove the module without permanently bending these tabs, thereby losing their springiness and destroying their ability to clip tight against the new module to hold it in. I had some success slipping 3 pieces of flashing under the stainless tabs along the top and sides of the old module, allowing the plastic retaining ridges to ride under the tabs all together and move forward to disengage the clips without permanently bending the tabs.
4. Reassembly is just the reverse.
Parts Used:
-
Tom from CANBY, OR
-
Difficulty Level:A Bit Difficult
-
Total Repair Time:30 - 60 mins
-
Tools:Screw drivers
3 of 4 people
found this instruction helpful.
Was this instruction helpful to you?
Thank you for voting!
Defective dishwasher heating element
Turned off water supply to the unit. Removed plastic cover at bottom front. I only had to disconnect the copper water line to slide the unit about 1/3 of the way out. I then was able to reach the wires, disconnect them and use a stubby box/open end wrench (5/8? don't remember for sure) to remove the plastic nuts. I then opened the door, removed the bottom basket and slipped the element right out. Installation of new part was reverse.
Parts Used:
-
Matthew from CHATHAM, VA
-
Difficulty Level:Really Easy
-
Total Repair Time:30 - 60 mins
-
Tools:Wrench set
3 of 4 people
found this instruction helpful.
Was this instruction helpful to you?
Thank you for voting!
Leaking dishwasher
Turned the dishwasher in its side. Used the video step by step. This is why we purchased from this site
Parts Used:
-
Nancy from BLOOMINGTON, IN
-
Difficulty Level:Very Easy
-
Total Repair Time:30 - 60 mins
-
Tools:Nutdriver
2 of 2 people
found this instruction helpful.
Was this instruction helpful to you?
Thank you for voting!