Your coupon for will be reflected when you check out!
✖
Your coupon for
✖
Hello!
You're visiting the PartSelect site in U.S.
Would you like to shop on the Canadian site?
Stay on this site
Go to Canadian site
✖
Model Number Locations
1Select Category Type
Select Category Type
2Select Product Type
Select Product Type
3Select {MODEL} Type
Select {MODEL} Type
Sample Model Number Tags
Model numbers can be made up of numbers (1005400, for example) or a combination of letters and numbers (LAT1000AAE). The model number will most likely appear on either a paper sticker or a metal plate. Your appliance's model number tag may look similar to the sample model number tags shown here (model number highlighted in yellow):
Model has been saved to My Models. If you're not signed in, your lists are available on this device and will expire within 30 days.
Model has been saved to My Models.
This rear drum bearing kit is designed for use with dryers. It supports the rear of the drum in your appliance as it tumbles your clothes during the drying cycle. If your drum will not tumble, or if i...
If your dryer does not tumble, will not start, is noisy, or is leaving marks on your clothing, you may need to replace the drum support bearing. The drum is supported at the rear by a bearing, which a...
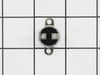
The door catch on your dryer is an important part as it keeps your dryer door closed, in order to ensure no air or clothes can escape. This part works by holding the door strike, which allows the door...
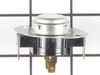
The dryer thermal limiter, also known as a thermal fuse, blows the fuse to cut off power to the dryer when the dryer begins to overheat. Once the dryer reached 220 degrees Fahrenheit, the heat cuts ou...
The door strike is attached to the door of your dryer and holds the door closed. If your dryer door is not closing, this might be due to the door strike needing to be replaced. This is a simple repair...
This is white touch up paint for refrigerators, microwaves, ranges, dryers, and freezers. It is used to cover, or touch up, nicks and scratches on the appliance from wear and tear. It is an 18ml bottl...
$24.67
In Stock
Order now and your part arrives by Apr 23
Questions And Answers for WDE547PBS0
Be the first to ask our experts a question about this model!
✖
Ask a Question
Ask our experts a question on this model and we'll respond as soon as we can.
1. Unplug dryer from outlet 2. Using Lg. flat screwdriver, pry under the front edge of the top and release two spring tabs 3. Lift up top and tilt back out of your way 4. Unscrew two phillips scews on inside of front panel 5. Lift up and out the front panel. Two spring clips at bottom. 6. Rlease tension on drum be
... Read morelt at the motor. Access panel at rear of dryer. 7.Unscrew 3 screws from inside, center rear of drum. 8. Remove drum through the front of the dryer. You may have to spread the sides apart a little bit for it to fit 9. Lift up on the rear drum bearing to remove it from the bearing retainer. ( U shaped plastic socket) 10. unsrew 2 screws and remove the bearing retainer, ground ball. Ball retainer is on outside of dryer. 11. Vacuum everything--duct, blower, lint trap, ect. 12. Intall new bearing retainer and grounding ball, an assistant is helpful at this time, one to hold ball retainer on rear of dryer, one to screw it in from the inside 13. reassemble remainder of parts in reverse order.
Unplugged Dryer. Opened top of Dryer, over the drum. Removed Thermal Limiter. Tested the Thermal Limiter - found it was open. Checked all vents and exhaust tube for lint build-up. Replaced Thermal Limiter. Closed top of dryer. Plugged Dryer back. Tested Dryer - it works.
First..kudos to PartSelect for their fantastic support! Great work folks.
While greasing the bearing in the back of the drum, I found my heating coil was broken. Steps to replace:
1) Unplug the unit 2) Remove the top panel. Note, do not remove the center front screw that does not go into the door. 3) Rem
... Read moreove front outer panel 4) Remove interior front panel 5) Remove front control panel 6 screws, pushing downward the panel and disconnecting connection to door. 6) Remove door by removing the screws on the top and pull door straight off. (I left the air duct attached to the door) 7) Remove the back access panel to the motor 8) Release the belt from the idler pulley and remove the belt. 9) I removed the three screws in the center of the drum as I found it difficult to remove the drum from the bearing. Remove the drum. 10) disconnect the coil terminals by first bending the tabs outward to allow you to be able to pull them off the block 11) remove the old coil 12) carefully stretch the new coil so that it measures 48 inches (no more) 13) Plug new coil into terminals and bend tabs to lock in place. 14) Divide heater coil in half and install coil onto center support on the opposite side from where it connects to the block/back wall of dryer 15) Install remaining coils onto supports. 16) reinstall all parts in reverse order.