















W210 Jenn-Air Wall Oven - Instructions
Keep searches simple. Use keywords, e.g. "leaking", "pump", "broken" or "fit".
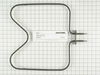
Lower heating element not working
I removed the two screws that held in the old part. I pulled the element out a few inches.I disconnected two wires from the old element and connected it to the new. Using the screws provided I reconnected the unit. All went well. No need for repairman. 1
Parts Used:
-
John from Pittsburgh, PA
-
Difficulty Level:Really Easy
-
Total Repair Time:Less than 15 mins
-
Tools:Screw drivers
5 of 7 people
found this instruction helpful.
Was this instruction helpful to you?
Thank you for voting!
heating element cracked
Easily disconnected the wires and removed cracked element and replaced with new one
Parts Used:
-
Stephanie from MOUNT JOY, PA
-
Difficulty Level:Very Easy
-
Total Repair Time:Less than 15 mins
-
Tools:Screw drivers
4 of 4 people
found this instruction helpful.
Was this instruction helpful to you?
Thank you for voting!
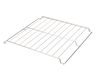
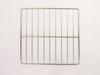
The old racks were beyond cleaning
-
Sherrie from Elverson, PA
-
Difficulty Level:Really Easy
-
Total Repair Time:Less than 15 mins
5 of 8 people
found this instruction helpful.
Was this instruction helpful to you?
Thank you for voting!
Bake element was burnt out
Shut off electricity to oven. Remove existing screws attaching element to back wall of oven. Use pliers to pull off wire connectors. To install the new element, reverse these steps. It's that simple.
Parts Used:
-
Randy from METAIRIE, LA
-
Difficulty Level:Very Easy
-
Total Repair Time:Less than 15 mins
-
Tools:Pliers, Screw drivers
3 of 3 people
found this instruction helpful.
Was this instruction helpful to you?
Thank you for voting!
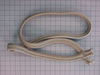
Burned up oven door gasket needed replaced.
I started by removing the door, then trying to remove all of the screws in the oven casing. Of course the very middle screw in the bottom of the oven was rusted and dammged by use. I had to use a drill bit and remove the old screw. After dissasembly of the oven casing, I found that the lip that supports the gasket was rusted and burnt away about 3/4 in. I placed the new gasket in and found that when closed it covered this defect and sealed. I reassembled and cheked for operation.Ok! Imortant--remove the elements before removing oven casing.
Parts Used:
-
Daniel from Prescott, MI
-
Difficulty Level:A Bit Difficult
-
Total Repair Time:1- 2 hours
-
Tools:Pliers, Screw drivers, Wrench (Adjustable)
7 of 15 people
found this instruction helpful.
Was this instruction helpful to you?
Thank you for voting!
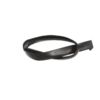
A seal came off the oven
I found the model, ordered the new seal, it arrived very quickly via mail and I replaced the seal. You simply slid off the old, slid on the new one and hooked it in place. No expensive repairman!
Parts Used:
-
andrea from new york, NY
-
Difficulty Level:Really Easy
-
Total Repair Time:Less than 15 mins
3 of 5 people
found this instruction helpful.
Was this instruction helpful to you?
Thank you for voting!
Replacing the bulb in the freezer side
Removed the ice brucket,
Removed the light shield by releasing one screw using a nutdriver.
Replacing the bulb and reinstalled the light shield.
Your web site is one of the best and most helpfull service sites I ever used. Just wish that in the future you will ship parts overseas.
Removed the light shield by releasing one screw using a nutdriver.
Replacing the bulb and reinstalled the light shield.
Your web site is one of the best and most helpfull service sites I ever used. Just wish that in the future you will ship parts overseas.
Parts Used:

-
Yafa (and David) from Bothell, WA
-
Difficulty Level:Easy
-
Total Repair Time:Less than 15 mins
-
Tools:Nutdriver
5 of 11 people
found this instruction helpful.
Was this instruction helpful to you?
Thank you for voting!
Bake Element Burned
Turn off the electricity for the oven from the switch box. Unsure the damaged element from the unit. Pull it forward and unplug connections. Then plug the new element and use the new screws to screw it back to the unit. That's all
Parts Used:
-
Manuk from STUDIO CITY, CA
-
Difficulty Level:Really Easy
-
Total Repair Time:Less than 15 mins
-
Tools:Screw drivers
2 of 2 people
found this instruction helpful.
Was this instruction helpful to you?
Thank you for voting!
Lower bake element would not heat.
Removed two screws. Gently pulled old element away from back of oven, exposing two wires. Disconnected the element from wires by pulling the ends apart with hands. Reconnected the wires with new element. LESS THAN FIVE MINUTES! Saved about a hundred bucks!. (Demo on You Tube.)
Parts Used:
-
Janice from SOUTHFIELD, MI
-
Difficulty Level:Really Easy
-
Total Repair Time:Less than 15 mins
-
Tools:Screw drivers
2 of 2 people
found this instruction helpful.
Was this instruction helpful to you?
Thank you for voting!
240 Volt Bottom Elment Burned Out
Turned breaker off to oven, removed two screws disconnected two wires. Reversed order to install. Piece of cake. Stuart,in va.
Parts Used:
-
harry from front royal, VA
-
Difficulty Level:Really Easy
-
Total Repair Time:Less than 15 mins
-
Tools:Screw drivers
3 of 5 people
found this instruction helpful.
Was this instruction helpful to you?
Thank you for voting!
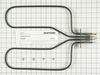
The Broiler element split after oven self-cleaning
We at first thought the replacement could be done by just removing 2 screws.
When in fact it was necessary to pull the oven from the cabinet, remove the rear metal shield in order to unplug the element.
The job went rather smoothly at a considerably less cost than if I had contacted a repair service which would have upped the price of the element plus the cost for the service call.
When in fact it was necessary to pull the oven from the cabinet, remove the rear metal shield in order to unplug the element.
The job went rather smoothly at a considerably less cost than if I had contacted a repair service which would have upped the price of the element plus the cost for the service call.
Parts Used:
-
Rolland from New Port Richey, FL
-
Difficulty Level:A Bit Difficult
-
Total Repair Time:30 - 60 mins
-
Tools:Pliers, Screw drivers
2 of 2 people
found this instruction helpful.
Was this instruction helpful to you?
Thank you for voting!
The oven heating element burned out and would no longer heat.
It was very simple. First thing I did was to go online to youtube and type in the kind of repair I intended to do. There were several short videos showing you how to do the replacement.It was easy and took about 30 to 45 minutes. First thing is shut off the power to the oven. ( Very important). You then need to take out two screws that hold the element in place. At this point, just pull the element toward the front of the oven. You will see some insulation at the hole where the wires come out. Slowly work the element forward until you see the fasteners on the wires ( two wires).Disconnect the fasteners and throw the old element out and put the new one in the oven.Connect the element, push everything back into the hole and screw the element to the back wall. You're done ! I had two wall ovens to fix.
Parts Used:
-
Gary L. from SUN CITY, AZ
-
Difficulty Level:Really Easy
-
Total Repair Time:30 - 60 mins
2 of 2 people
found this instruction helpful.
Was this instruction helpful to you?
Thank you for voting!
bottom element burned out, replaced both elements due to age of elements
Turned off the breaker first. Remove the mounting screws and unplug the element. Then replace the new element. Then put in the mounting screws and turn the breaker on. Easy.
Parts Used:
-
Alan from Raven, VA
-
Difficulty Level:Really Easy
-
Total Repair Time:Less than 15 mins
-
Tools:Screw drivers
2 of 3 people
found this instruction helpful.
Was this instruction helpful to you?
Thank you for voting!
Burnt out lower element
I TURNED THE POWER OFF !!! removed the two screws holding the element in place, disconnected the two power wires, installed the new element. Done, in less than five minutes.
Parts Used:
-
Larry from Benton, LA
-
Difficulty Level:Really Easy
-
Total Repair Time:Less than 15 mins
-
Tools:Screw drivers
2 of 3 people
found this instruction helpful.
Was this instruction helpful to you?
Thank you for voting!
Replaced Broiler Element
Turned off oven power.Removed oven heat shield, element support clips and element mounting plate screws. Disconnected three element power wires and ground wire. Removed old element. Reversed removal procedure for new element install. Piece of cake.
Parts Used:
-
Phillip from Reston, VA
-
Difficulty Level:Easy
-
Total Repair Time:15 - 30 mins
-
Tools:Pliers, Screw drivers
2 of 3 people
found this instruction helpful.
Was this instruction helpful to you?
Thank you for voting!