















UPVH890EJ0MG General Electric Dryer - Instructions
Keep searches simple. Use keywords, e.g. "leaking", "pump", "broken" or "fit".
Dryer would not start
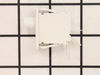
The end repair was very simple and took minimal effort. The time and difficulty was all in the testing. I disassembled the dryer and removed the drum and then hard wired each thermo-fuse to determine where the fault was. After test all of those I was stumped. When I opened the door the light would not come on so I assumed it was a power fault closer to the source. However after all of my testing I couldn't find anything wrong. I then removed the light bulb and realized it was burned out which led me to the door switch being the fault. I removed the switch and soldered the three wire together and the dryer started right up! All I had to do was order a new $15 part, unsolder the wires and plug them in. Would have been so much simpler if that light bulb hadn't of been burned out causing me to over think my diagnosis. This was my first major appliance repair and I did it with only the help of the parts diagram provided on the website.
Parts Used:
-
Joshua from Dallas, TX
-
Difficulty Level:A Bit Difficult
-
Total Repair Time:1- 2 hours
-
Tools:Pliers, Screw drivers, Socket set
92 of 140 people
found this instruction helpful.
Was this instruction helpful to you?
Thank you for voting!
The Dryer would not start
Doing some simple troubleshooting with the volt-ohm meter I determined that the door switch was failed.
The replacement door switch restored the motor circuit keeping my dryer in action.
The replacement door switch restored the motor circuit keeping my dryer in action.
Parts Used:
-
David from Curtice, OH
-
Difficulty Level:Really Easy
-
Total Repair Time:Less than 15 mins
-
Tools:Pliers
60 of 107 people
found this instruction helpful.
Was this instruction helpful to you?
Thank you for voting!
Blower wheel shaft hole was rounded out, lamp was out
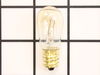
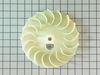
Removed two screws on dryer top and removed top, removed two screws holding front of cabinet and removed cabinet front to the side, disconnected wires to door switch, removed two bolts from motor mount bracket, pulled motor back to access blower wheel, removed old wheel and installed new one, reversed steps, unscrewed old light bulb and screwed in new one.
Had pure hell getting to drum belt and putting it back onto motor pulley and idler, cussed a little, didn't really help . replaced front of cabinet and top, did test run all worked ok.
This job was a little difficult, espicially accessing the belt and idler pulley...
Had pure hell getting to drum belt and putting it back onto motor pulley and idler, cussed a little, didn't really help . replaced front of cabinet and top, did test run all worked ok.
This job was a little difficult, espicially accessing the belt and idler pulley...
Parts Used:
-
Edwin from Eagar, AZ
-
Difficulty Level:Difficult
-
Total Repair Time:30 - 60 mins
-
Tools:Nutdriver, Pliers, Screw drivers, Socket set
30 of 58 people
found this instruction helpful.
Was this instruction helpful to you?
Thank you for voting!
The light bulb in the dryer burned out
The repair, from the time that the bulb burned out until it was replaced took about six months. I could have shortened the time if I had ordered the bulb sooner. It was difficult because I had to listen to a fair amount of nagging, which, thankfully, has now ceased. I also had to actually go online and finI opened the dryer door, reached in with my right hand (which happened to be holding the new bulb) and screwed the new bulb in. Tip: Screw it in counter-clock wise. This was not mentioned in the instructions. Come to think of it, no instructions were provided. The company might wish to correct that oversight.
Parts Used:
-
Colin C. from GENEVA, IL
-
Difficulty Level:Very Difficult
-
Total Repair Time:More than 2 hours
11 of 12 people
found this instruction helpful.
Was this instruction helpful to you?
Thank you for voting!
blub burned out.
I first throwed the breaker then I took the old bulb out. Put new bulb in. Turned the breaker back on.
It worked great
It worked great
Parts Used:
-
Mary from Oak Point, TX
-
Difficulty Level:Really Easy
-
Total Repair Time:Less than 15 mins
14 of 21 people
found this instruction helpful.
Was this instruction helpful to you?
Thank you for voting!
Dryer starts squeaking while operating
Open the dryer door and remove the two screws in the top of the door opening that hold the top of the dryer on, and then remove the dryer top. On the inside of the dryer, there are two screws that hold the front of the dryer on. Remove one screw from each side of the dryer near the top, and the front of the dryer will fall away. The drum slides are visible when you lean the front panel of the dryer out away from the drum. You can replace the drum slides without even removing the front of the dryer completely. Pull out the old drum slides and insert the new slides. Lift the drum slighly from the inside through the dryer door as you tilt the front back into place. Reinsert the screws holding the front of the dryer on and tighten. BE CAREFUL not to drop the screws or you may have to disassemble the dryer to get at the dropped screws. Reinstall the top of the dryer. It is a difficult fit which requres inserting into 3 tabs and sliding the top into place. Check that the top is flush before inserting and tightening the screws in the top of the door opening.
Parts Used:

-
David from Littleton, CO
-
Difficulty Level:Easy
-
Total Repair Time:15 - 30 mins
-
Tools:Screw drivers
10 of 13 people
found this instruction helpful.
Was this instruction helpful to you?
Thank you for voting!
Burned out interior dryer drum light
Tried to replace with home-store bought 6w light. Looked the same, fit into socket, but didn't work. Actually exploded when I turned it on! Be sure to use OEM part like this one. Worked perfectly!
Parts Used:
-
David from Plymouth, MA
-
Difficulty Level:Really Easy
-
Total Repair Time:Less than 15 mins
11 of 18 people
found this instruction helpful.
Was this instruction helpful to you?
Thank you for voting!
Dryer would not start.
First unplug dryer to prevent electrical shock. To remove the front of the dryer, open the door in top left and top right corners is a machine screw. They can be removed with a Phillips screw driver. Lift the top slightly and let front fall forward about 6 inches, lift slightly. Two wire will be connected to the switch in the door. remove the wires and squeeze the tabs on both sides of the switch and push it out. Push new switch in to replace old switch and reassemble.
Parts Used:
-
Brad from DELAVAN, IL
-
Difficulty Level:Easy
-
Total Repair Time:30 - 60 mins
-
Tools:Pliers, Screw drivers
7 of 8 people
found this instruction helpful.
Was this instruction helpful to you?
Thank you for voting!
Dryer bulb burned out
Son found out where the bulb was by using YouTube. I googled lamp for model number and your website came up. I ordered the part, it arrived promptly, and my son installed it.
Parts Used:
-
Mary from NEW BRITAIN, CT
-
Difficulty Level:Very Easy
-
Total Repair Time:Less than 15 mins
3 of 3 people
found this instruction helpful.
Was this instruction helpful to you?
Thank you for voting!
dryer did not latch
-
janet from martinsville, IN
-
Difficulty Level:Really Easy
-
Total Repair Time:Less than 15 mins
-
Tools:Screw drivers
3 of 5 people
found this instruction helpful.
Was this instruction helpful to you?
Thank you for voting!
Squealing as drum rotated
Removed the star bit screws on the top of the control panel then removed the front by opening the door and removing the screws in the upper corners of the door jam. I then removed the top which exposed the drum slides. NOTE: This model requires 4 drum slides and NOT two as specified in the video.
Parts Used:
-
Bill from COMSTOCK PARK, MI
-
Difficulty Level:Really Easy
-
Total Repair Time:15 - 30 mins
-
Tools:Screw drivers
2 of 2 people
found this instruction helpful.
Was this instruction helpful to you?
Thank you for voting!
Dryer was making a loud squealing noise.
I replaced the dryer bearing ( a plastic part) and all of the slides on the bearing. It now operates like new.
Parts Used:
-
Patrick from Albuquerque, NM
-
Difficulty Level:Really Easy
-
Total Repair Time:15 - 30 mins
-
Tools:Screw drivers
2 of 3 people
found this instruction helpful.
Was this instruction helpful to you?
Thank you for voting!
Rubbing noise while dryer was running
Removed too of dryer and placed the parts on. Runs like a brand new one. Thanks so much!
Parts Used:
-
Carol from Simpsonville, SC
-
Difficulty Level:Really Easy
-
Total Repair Time:Less than 15 mins
-
Tools:Screw drivers
2 of 3 people
found this instruction helpful.
Was this instruction helpful to you?
Thank you for voting!
Bulb burned out
Unscrewed the old bulb using the lefty loosey method. Installed the new bulb by turning it clockwise or righty tighty.
Parts Used:
-
Pete from CEDAR RAPIDS, IA
-
Difficulty Level:Very Easy
-
Total Repair Time:Less than 15 mins
1 person
found this instruction helpful.
Was this instruction helpful to you?
Thank you for voting!
Switch not working.
Open the door and removed the part. Installed the new part and started the dryer.
Parts Used:
-
Alan from BELFORD, NJ
-
Difficulty Level:Very Easy
-
Total Repair Time:Less than 15 mins
1 person
found this instruction helpful.
Was this instruction helpful to you?
Thank you for voting!