















UAN7323D Frigidaire Dryer - Instructions
Keep searches simple. Use keywords, e.g. "leaking", "pump", "broken" or "fit".
Dryer wouldn't spin, belt broken
Popped the top of the dryer off. Removed 3 screws from lower front panel. Removed front panel slide belt over drum, remove 2 bolts from rear panel and installed belt over motor and around idler tensioner. Reinstalled front panel and top of dryer . Also greased idler pulley to shaft , beings tensioner was okay. Plugged in and tested dryer, it was okay.
We went to PartSelect. com and order the belt and it was fast shipping. We couldn't find the belt anywhere else. Thanks for PartSelect.
We went to PartSelect. com and order the belt and it was fast shipping. We couldn't find the belt anywhere else. Thanks for PartSelect.
Parts Used:
-
Reveice E from Arcadia, FL
-
Difficulty Level:Really Easy
-
Total Repair Time:15 - 30 mins
-
Tools:Nutdriver, Screw drivers
3 of 4 people
found this instruction helpful.
Was this instruction helpful to you?
Thank you for voting!
No heat when running.
First of all I would like you all to know that I cheated just a bit. I had SEARS come out and tell me for sure what the problem was, as they took my dryer apart a payed close attention to everything they did. After I was told that it would cost me over $200 (on top of the $109 I just payed for them to tell me what was wrong) to fix the heating element. I replied with a "NO THANKS!", I also told them not to worry putting it back together. It seemed like he was very happy to hear that and thought I was going to buy a new dryer, he even gave me a coupon for a whole 10% off if I spend over $400. After spending 10 minutes or so on line I found the part I needed @ Partselect.com (plug-plug) for like $20. Once I received the part it took all of 15 minutes to take of the old and put on the new. First: Make sure power is off by unplugging or turn off breaker (can't finish a project if a project finishes you)! Second: Find the two power lines sticking out at about four o'clock and disconnect. Third: Unscrew porcelain separator and remove the two coil ends before removing the coil it's self from the arrow like holders. Forth: reverse last three steps with care (coil feels like it could break easily). Fifth: Place drum back in it's setting while making sure that the drive belt that turns drum is placed around motor pulley. Sixth: Button it up the way you pulled it a part. and your done, good luck!
Parts Used:
-
JASON from SOUTH BEND, IN
-
Difficulty Level:Easy
-
Total Repair Time:15 - 30 mins
-
Tools:Pliers, Socket set
3 of 4 people
found this instruction helpful.
Was this instruction helpful to you?
Thank you for voting!
Dryer drum would not turn
I first removed a vent cover in the back where the idler is located. With pliers I removed the tension off the spring. Next I simply slide the idler off the post. I pulled up on the top panel which opened like a clam shell. I used a flat blade screw driver to separate the front panel from the dryer so I could slide the new belt around the drum. I reversed the steps. All in all it was easy. It took me about 30min including cleanup.
Parts Used:
-
Ben from Weaverville, NC
-
Difficulty Level:Easy
-
Total Repair Time:15 - 30 mins
-
Tools:Nutdriver, Pliers, Screw drivers
3 of 5 people
found this instruction helpful.
Was this instruction helpful to you?
Thank you for voting!
rusted lint screen
-
Ford from East Brunswick, NJ
-
Difficulty Level:Really Easy
-
Total Repair Time:Less than 15 mins
-
Tools:Screw drivers
2 of 2 people
found this instruction helpful.
Was this instruction helpful to you?
Thank you for voting!
tumbler not turning
I took the front part off, then removed the old belt out and installed the new one in. Also fix the tensioner wheel (it had come off) After I posisoned / aligned the belt. Also cleaned the whole dryer with compressed air, it was really dirty and nasty, this dryer has not been cleaned in 20 years, overall I had a great experience with parts select, they send the parts real fast.
Tank you
Jorge Garcia, Buena park CA
Tank you
Jorge Garcia, Buena park CA
Parts Used:
-
Jorge from Buena Park, CA
-
Difficulty Level:Easy
-
Total Repair Time:1- 2 hours
-
Tools:Nutdriver, Pliers, Screw drivers
2 of 2 people
found this instruction helpful.
Was this instruction helpful to you?
Thank you for voting!
Noisy squeaky dryer
Main problem was the bearing, replaced the belt and felt seal as well
The video instruction was very helpful
Was easy with basic mechanical aptitude
Dryer running great now
All parts from Partselect.com
Have ordered from them before and would order from them again
The video instruction was very helpful
Was easy with basic mechanical aptitude
Dryer running great now
All parts from Partselect.com
Have ordered from them before and would order from them again
Parts Used:
-
Dave from SAN FRANCISCO, CA
-
Difficulty Level:Easy
-
Total Repair Time:1- 2 hours
-
Tools:Screw drivers
2 of 2 people
found this instruction helpful.
Was this instruction helpful to you?
Thank you for voting!
Belt snapped after 13 yrs. maybe 15 yrs
I raised up the top then took 4 bolts out of the front and it came off and then I slipped the belt on. Now was the fun part. I tried to put belt around the tension spring from the front of the machine. Bad mistake. So I turned the machine around and took off little plate bottom left, back side reached in and WA-LA back in commision. I took a long brush and cleaned all I could reach and put it back together. Bingo, back in business.
And I'm 71 yrs. old.
And I'm 71 yrs. old.
Parts Used:
-
JOHNNY from ASHEVILLE, NC
-
Difficulty Level:A Bit Difficult
-
Total Repair Time:30 - 60 mins
-
Tools:Nutdriver
2 of 3 people
found this instruction helpful.
Was this instruction helpful to you?
Thank you for voting!
Drum stoppped spinning, motor didn't.
Opened the top, removed the 4 screws that held the front top the cabinet, took the front off, went after the dust with the vacuum cleaner, lifted the drum, installed the belt, put the front back on, and put the belt over the idler. Most of the time was in the cleaning.
Parts Used:
-
Allen from Cardington, OH
-
Difficulty Level:Really Easy
-
Total Repair Time:1- 2 hours
-
Tools:Nutdriver
1 person
found this instruction helpful.
Was this instruction helpful to you?
Thank you for voting!
Dryer does not start
Followed video instructions, easy installation. Unfortunately it didn't fix the problem. Plan to take back off and check belt, etc before ordering another part.
Parts Used:
-
Anna from FLORENCE, KY
-
Difficulty Level:Really Easy
-
Total Repair Time:30 - 60 mins
-
Tools:Pliers, Screw drivers
1 person
found this instruction helpful.
Was this instruction helpful to you?
Thank you for voting!
wrong part
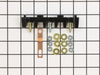
my original part arrived and it did not fit. When I called to explain the problem I was told it was the wrong part. The big problem is... Frigidaire calls the receptacle a terminal block kit as well as a terminal block kit which is a totally different part. I tried to explain that to several different folks I spoke to at your company as well as Frigidaire but I'm not sure if I got that point across. Take a look at part # 530 393 5058 and part # 530 440 9888 and you will see that they both mention terminal block kit. Hopefully the part I am getting from Frigidaire is an OEM part and will fit.
Parts Used:
-
Barbara from WICKENBURG, AZ
-
Difficulty Level:Very Difficult
-
Total Repair Time:30 - 60 mins
2 of 4 people
found this instruction helpful.
Was this instruction helpful to you?
Thank you for voting!
The dryer gets too hot on top.
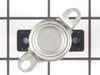
Unplugged the dryer, removed the top of, disconnected the electrical connectors, removed the front panel, disconnected the belt, removed the drum, removed the old Safety Thermostat, installed the new Safety Thermostat and assembled the dryer again.
Parts Used:
-
Keith from FOND DU LAC, WI
-
Difficulty Level:Easy
-
Total Repair Time:1- 2 hours
-
Tools:Nutdriver, Screw drivers, Socket set
1 person
found this instruction helpful.
Was this instruction helpful to you?
Thank you for voting!
Door latch receiver broke
-
sandra from PLYMOUTH, MN
-
Difficulty Level:Very Easy
-
Total Repair Time:Less than 15 mins
-
Tools:Pliers
1 person
found this instruction helpful.
Was this instruction helpful to you?
Thank you for voting!
Drum was not revolving
Open the back plate. Broken pulley was already out of place. Put the spring on the pulley and placed it. It took me less than 10 min
Parts Used:
-
khalid from HILLSBOROUGH, NJ
-
Difficulty Level:Very Easy
-
Total Repair Time:Less than 15 mins
-
Tools:Pliers, Screw drivers
1 person
found this instruction helpful.
Was this instruction helpful to you?
Thank you for voting!
broken belt and pulley
First of all, I've purchased a belt from local service center that cost me more than $21 (local tax is 8.5%). But, I can not find the idel pulley assembly so I searched on the Internet and ordered from PartSelect.com.
Surprisedly, my order came just one day - they must cross-ship from local distribution that it's even faster than to get those in local stores (driving .. and hope they have what I want ..).
I've replaced the belt 2 days ago - it's easy with 4 screws removed to pull out the front door. The back panel is opened with 2 screws remove, and very easy to replace the pulley.
It's a heavy duty gas dryer made in 1989 and this is the third time I changed the belt and the first time to change a new pulley. I would recommend to change the idle pulley because I may not need to change the belt if I have had replaced it last time. A broken or not functional idle pulley may damage the belt in a short time.
Appliance such as gas dryer like mine will last forever with replaceable belt and pulley. I'm really happy to see a working dryer (almost 20 years old) and my wife is asking a small component for her washer .. that I think I can easily fix that too .. with the help of PartSelect search.
Hope this will help.
John
Surprisedly, my order came just one day - they must cross-ship from local distribution that it's even faster than to get those in local stores (driving .. and hope they have what I want ..).
I've replaced the belt 2 days ago - it's easy with 4 screws removed to pull out the front door. The back panel is opened with 2 screws remove, and very easy to replace the pulley.
It's a heavy duty gas dryer made in 1989 and this is the third time I changed the belt and the first time to change a new pulley. I would recommend to change the idle pulley because I may not need to change the belt if I have had replaced it last time. A broken or not functional idle pulley may damage the belt in a short time.
Appliance such as gas dryer like mine will last forever with replaceable belt and pulley. I'm really happy to see a working dryer (almost 20 years old) and my wife is asking a small component for her washer .. that I think I can easily fix that too .. with the help of PartSelect search.
Hope this will help.
John
Parts Used:
-
John from Temple City, CA
-
Difficulty Level:Easy
-
Total Repair Time:Less than 15 mins
-
Tools:Nutdriver, Pliers, Socket set, Wrench (Adjustable)
3 of 7 people
found this instruction helpful.
Was this instruction helpful to you?
Thank you for voting!
Broken door clip
Literally pop it in the small opening. Super easy and works perfectly now!
Parts Used:
-
Gregory from SAN RAFAEL, CA
-
Difficulty Level:Very Easy
-
Total Repair Time:Less than 15 mins
1 person
found this instruction helpful.
Was this instruction helpful to you?
Thank you for voting!