















TPX24BIBABB General Electric Refrigerator - Instructions
Keep searches simple. Use keywords, e.g. "leaking", "pump", "broken" or "fit".
lights blown out

-
Gerald from WINTERVILLE, GA
-
Difficulty Level:Very Easy
-
Total Repair Time:Less than 15 mins
6 of 14 people
found this instruction helpful.
Was this instruction helpful to you?
Thank you for voting!
water dispenser/ice maker wouldn't work
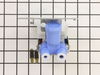
Unplugged refrigerator and turned off water valve at wall. Removed the entire back, lower cardboard panel (turns out I didn't have to do this...could have just removed the screws from the right side and folded the cardboard along a perforated line designed for that purpose). Removed screw holding water control valve to back of refrigerator. Took new control valve, and slipped on adaptors for electrical connectors (in bag) to the two smaller of the four electrical prongs). Removed electrical sockets from old connector and placed them over appropriate prongs on new connector. Unscrewed the two old water out lines, cut the old fittings off and slipped the lines snugly into the new outlet valve (new valve had slip on connectors not requiring lines to be screwed in). Keep straight which line goes to which outlet port! Then removed water line going into old fitting and screwed it on to new valve inlet fitting (after removing black plastic protective cap). Turned wall water valve on, checked for leaks (none), and plugged refrigerator back in. Water restored to both icemaker and water dispenser!
By the way, the first valve came damaged, but one phone call and the people at Part Select promptly sent out a replacement which I had the very next day (and this was two days before Christmas!). Great job!
By the way, the first valve came damaged, but one phone call and the people at Part Select promptly sent out a replacement which I had the very next day (and this was two days before Christmas!). Great job!
Parts Used:
-
Thomas from Grapevine, TX
-
Difficulty Level:Easy
-
Total Repair Time:15 - 30 mins
-
Tools:Screw drivers, Wrench (Adjustable)
2 of 3 people
found this instruction helpful.
Was this instruction helpful to you?
Thank you for voting!
Water leak from the Water Valve.
I received my parts in 2 days, that is fast. It took me less than 15 minutes to install the unit. Now I've got ice and water from my refrigerator. Instead of taking expensive warranties, I would rather order parts from your company and do it myself on all my appliances.
Parts Used:
-
Tony from Conover, NC
-
Difficulty Level:Really Easy
-
Total Repair Time:Less than 15 mins
-
Tools:Wrench set
4 of 9 people
found this instruction helpful.
Was this instruction helpful to you?
Thank you for voting!
Leaking water
Be careful when ordering the part. Make sure you need a Double or Single Outlet Water Valve. They look almost the same in the catalog.
Unplug the power cord and turn off the stopcock water supply valve. Unplug the 2 electrical jacks and pull-out the water hose from the compression type fitting. Use a philips screwdriverdriver to remove the bad part. Install the new part in the reverse steps.
Unplug the power cord and turn off the stopcock water supply valve. Unplug the 2 electrical jacks and pull-out the water hose from the compression type fitting. Use a philips screwdriverdriver to remove the bad part. Install the new part in the reverse steps.
Parts Used:
-
Ruben from Sylmar, CA
-
Difficulty Level:Really Easy
-
Total Repair Time:Less than 15 mins
-
Tools:Screw drivers, Wrench (Adjustable)
1 person
found this instruction helpful.
Was this instruction helpful to you?
Thank you for voting!
Noisy
I didn’t do the repair because I ordered two grommets. When they arrived, one of the packages was empty! Instead of just sending me another one, they refunded the part so I still need one. By the way, I was not refunded half the shipping either which was more than the part itself.
Parts Used:
-
Brad from SPRING MILLS, PA
-
Difficulty Level:Very Difficult
-
Total Repair Time:More than 2 hours
1 person
found this instruction helpful.
Was this instruction helpful to you?
Thank you for voting!
The water valve was leaking
I Took the six screws off the back panel to get to underneath the refridgerator. took the 2 screws out of the bracket thast holds on the water valve took the 2 lines off and then put everything back
Parts Used:
-
Joey from Travelers Rest, SC
-
Difficulty Level:Easy
-
Total Repair Time:15 - 30 mins
-
Tools:Nutdriver, Pliers
1 person
found this instruction helpful.
Was this instruction helpful to you?
Thank you for voting!
Body case seal gone bad on water valve
Easy. First, unplug the fridge.
1)Shut off then disconnect water line.
2)Remove water valve mount screw.
3)Disconnect electrical plugs and snip water lines (square cut lines for new valve).
4)Simply insert and seat water lines into their respective places on the new valve. Using adapters as needed, reconnect electrical plugs.
5)Mount valve and reconnect water line.
6)Turn on water supply and check for leaks. Possible leaks: water line or not fully seated lines to the new valve.
7)Restore power and enjoy :o)
1)Shut off then disconnect water line.
2)Remove water valve mount screw.
3)Disconnect electrical plugs and snip water lines (square cut lines for new valve).
4)Simply insert and seat water lines into their respective places on the new valve. Using adapters as needed, reconnect electrical plugs.
5)Mount valve and reconnect water line.
6)Turn on water supply and check for leaks. Possible leaks: water line or not fully seated lines to the new valve.
7)Restore power and enjoy :o)
Parts Used:
-
David from Columbia, MO
-
Difficulty Level:Really Easy
-
Total Repair Time:30 - 60 mins
-
Tools:Nutdriver, Wrench (Adjustable)
1 person
found this instruction helpful.
Was this instruction helpful to you?
Thank you for voting!
Light burnt out.
Turned the wire protector to the side. Turned out the old bulb and replaced it with the new. Turned the wire protector back in place and I'm like new.
Parts Used:
-
Roscoe G from ROCHESTER, NY
-
Difficulty Level:Very Easy
-
Total Repair Time:Less than 15 mins
2 of 4 people
found this instruction helpful.
Was this instruction helpful to you?
Thank you for voting!
drawer facing cracked
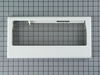
ordered drawer face - perfect part- snapped right in. done. order came within 10 days.
will order again if needed.
will order again if needed.
Parts Used:
-
Christine from Delray Beach, FL
-
Difficulty Level:Really Easy
-
Total Repair Time:Less than 15 mins
3 of 7 people
found this instruction helpful.
Was this instruction helpful to you?
Thank you for voting!
After the ice dumped, the tray would overfull and run over into the freezer
The operation is very simple on this valve. I disconnected the water lines and wires.
Then two I removed the two screws attaching
valve to the ref.box.
The reinstall is just the opposite from removal.
Then two I removed the two screws attaching
valve to the ref.box.
The reinstall is just the opposite from removal.
Parts Used:
-
Henderson from Holladay, TN
-
Difficulty Level:Easy
-
Total Repair Time:15 - 30 mins
-
Tools:Nutdriver, Pliers
2 of 4 people
found this instruction helpful.
Was this instruction helpful to you?
Thank you for voting!
Fridge wasn't cooling and half freezing
Part was perfect fit .Removed fan .three screws.replaced that s it
Parts Used:
-
Wendell Hayes from Dillob, SC
-
Difficulty Level:Really Easy
-
Total Repair Time:30 - 60 mins
-
Tools:Screw drivers
1 person
found this instruction helpful.
Was this instruction helpful to you?
Thank you for voting!
Leaking Inlet Water Valve
Very quick and easy repair. Took off cover to access valve using standardr screw driver. After shutting off water supply to valve disconnected copper water supply line. Used a large towel to catch any residual water in line. Removed two water lines on valve use plies if more than hand tight to loosen. Removed screw holding valve in place, removed valve and disconnected wires (be sure power to frig is off least you get a shock. Reverse proceedure to install new valve. new valve has simple push in connections for plastic water lines. Install two electrical adpaters and electric lines. Mount valve with screw, connect copper water line. Turn water back on and check for leaks. Turn power on and check for proper water running at dispenser. Again check for any leaks. No leaks, install cover and you are done.
Parts Used:
-
David from Mechanicsville, MD
-
Difficulty Level:Easy
-
Total Repair Time:15 - 30 mins
-
Tools:Screw drivers, Wrench set
1 person
found this instruction helpful.
Was this instruction helpful to you?
Thank you for voting!
Ice maker would not work
Disconnected the power and then the water line. Removed the cardboard shield on back of the refrig. Then removed the faulty solenoid which was held in place by one bolt. Removed the two plastic water hoses and two sets of electrical connectors. I then reversed the process to install the new solenoid. I encountered two challenges. The new solenoid had a plastic housing that had to be removed and one set of the electrical connectors required an extension. The extensions were included with the solenoid, but there were no instructions.
Parts Used:
-
Rehn from Austin, TX
-
Difficulty Level:Easy
-
Total Repair Time:15 - 30 mins
-
Tools:Screw drivers, Wrench set
1 person
found this instruction helpful.
Was this instruction helpful to you?
Thank you for voting!
The water dispenser in the door would drip continuously .
Used the parts diagram from PartSelect.com to locate the valve. Removed the old valve and disconnected inlet water line and the 2 outlet water lines(one for ice maker & one for water dispencer). Reconnected water lines to new valve and positioned it back in place on the refrigerator. Problem solved -no more drip, drip, drip.
Parts Used:
-
Donald from Pinnacle, NC
-
Difficulty Level:Really Easy
-
Total Repair Time:15 - 30 mins
-
Tools:Nutdriver, Wrench (Adjustable)
1 person
found this instruction helpful.
Was this instruction helpful to you?
Thank you for voting!
Ice Maker was not making ice
Followed the instructions in the video, which showed our exact refrigerator. Very easy instruction, for a simple job. However, it did not fix the problem. At this point I suspect a faulty replacement part (which cannot now return), or some other issue requiring further analysis. Could also be that the original Inlet Water Valve is not at fault, which means that this high probability fix (70%) was not needed.
Parts Used:
-
Michael from NAUGATUCK, CT
-
Difficulty Level:Really Easy
-
Total Repair Time:15 - 30 mins
-
Tools:Nutdriver, Pliers, Screw drivers, Socket set, Wrench (Adjustable)
1 person
found this instruction helpful.
Was this instruction helpful to you?
Thank you for voting!