















TFX27TMBWH General Electric Refrigerator - Instructions
Keep searches simple. Use keywords, e.g. "leaking", "pump", "broken" or "fit".
Ice crusher not working
Remove the ice maker, motor and replace.
The biggest problem was that the part was NOT available from GE. Part Select had the part, it was easily identified on their website and it couldn't have been easier to order it.
The repair from GE would have cost me hundreds of dollars. Thanks Parts Select.
The biggest problem was that the part was NOT available from GE. Part Select had the part, it was easily identified on their website and it couldn't have been easier to order it.
The repair from GE would have cost me hundreds of dollars. Thanks Parts Select.
Parts Used:
-
Brian from Battle Ground, WA
-
Difficulty Level:Really Easy
-
Total Repair Time:15 - 30 mins
-
Tools:Screw drivers, Socket set
4 of 6 people
found this instruction helpful.
Was this instruction helpful to you?
Thank you for voting!
The lights were on inside however the the water/ice dispenser did not work and the fridge and freezer side was not cooling
Simply take off the back panel. Remove the old run capacitor which is attached to the compressor by a white part. It pulls right off. You will have to unplug two wires. I took a pic to ensure I plugged the wires back up the correct way. Then I attached the new capacitor to the white part and put on the sleeve that was included, plugged it back into the compressor and zip tied the excess part of the sleeve. Once done plug fridge back up (always unplug electric devices when doing maintenance) to check before replacing back panel. It may take a few minutes before it kicks on.
Parts Used:
-
Rickey from DUMAS, AR
-
Difficulty Level:Really Easy
-
Total Repair Time:30 - 60 mins
-
Tools:Socket set
4 of 6 people
found this instruction helpful.
Was this instruction helpful to you?
Thank you for voting!
My ice breaker started leaking and making noise anf the stripper broke.
I ended up needing to order a new ice maker because the one I had is discontinued. I'm a 65yr old grandma and I did it myself!!!! The hardest part was finding the tool to loosed the nuts. I took the old one out and just put the new one right in it's place. Easy as pie.
Parts Used:
-
Marie from Elk Grove Village, IL
-
Difficulty Level:Really Easy
-
Total Repair Time:15 - 30 mins
-
Tools:Nutdriver
4 of 6 people
found this instruction helpful.
Was this instruction helpful to you?
Thank you for voting!
Ice maker filled too full and ice froze in the basket and a piece was broke on the icemaker itself.f
-
Karen from SAN ANTONIO, TX
-
Difficulty Level:Really Easy
-
Total Repair Time:15 - 30 mins
-
Tools:Screw drivers
3 of 3 people
found this instruction helpful.
Was this instruction helpful to you?
Thank you for voting!
Drawer slide broke
Removed 2 screws that hold it on, put the new one in with the 2 screws that were removed.
Parts Used:

-
Richard from Tucson, AZ
-
Difficulty Level:Really Easy
-
Total Repair Time:Less than 15 mins
-
Tools:Screw drivers
3 of 3 people
found this instruction helpful.
Was this instruction helpful to you?
Thank you for voting!
Needed left and right drawer rails for crisper
I was so pleased to find your website. We have just one company here in Columbia,S.C. that sells refrigerator parts. I did find out that they wanted about $60.00 for both pieces. Needless to say,I was just going to do without. I knew there had to be someone else. I found you guys on line,ordered my parts for a little over $5.00 a piece,and I put them in myself. I'm talking standard GE parts,not knockoffs. I am so pleased. Thanks for being there. I tell everyone about you.
Parts Used:
-
Joanne from West Columbia, SC
-
Difficulty Level:Really Easy
-
Total Repair Time:Less than 15 mins
-
Tools:Screw drivers
4 of 6 people
found this instruction helpful.
Was this instruction helpful to you?
Thank you for voting!
My wife called me at work and said the refrigerator was "peeing" on the floor.
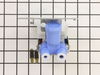
When I got home I pulled the refrigerator away from the floor, checked all the water lines for leak evidence, and then took the back panel off to check everything behind. The water valve was leaking at the hose insert locations. I turned off the water, spent less than 5 minutes disassembling the valve from the rerfrigerator, and got online to buy another one. The part arrived several days before expected, and it took me less time to install the new part than it did to take the old one out. Now all I have to do is repair the floor damage I caused when pulling out the refirgerator!
Parts Used:
-
Jerry from Hurst, TX
-
Difficulty Level:Really Easy
-
Total Repair Time:Less than 15 mins
-
Tools:Nutdriver, Pliers
3 of 3 people
found this instruction helpful.
Was this instruction helpful to you?
Thank you for voting!
Made ice would not eject from ice holder bin
removed broken bin , slid new ice bin in closed door. I bought the complete part.
Parts Used:
-
Lynn from MOUNTAIN HOME, ID
-
Difficulty Level:Very Easy
-
Total Repair Time:Less than 15 mins
3 of 3 people
found this instruction helpful.
Was this instruction helpful to you?
Thank you for voting!
would not crush ice
you must pay careful attention when taking the dispenser apart,especially the long rod that controls the deflector,but if close attention is payed to disassembly you should have no problem.
Parts Used:
-
Larry from Mount Airy, NC
-
Difficulty Level:A Bit Difficult
-
Total Repair Time:30 - 60 mins
-
Tools:Nutdriver, Screw drivers
3 of 3 people
found this instruction helpful.
Was this instruction helpful to you?
Thank you for voting!
Ice Maker would not crush ice.
Removed tray from ref. Removed from cover from tray useing a screwdriver. Removed housing, took old parts out. Make sure you take the parts out in order and put new parts back in same order as old parts.
Parts Used:
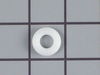


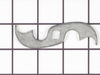
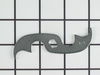
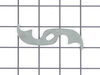
-
Kelly from Canandaigua, NY
-
Difficulty Level:A Bit Difficult
-
Total Repair Time:15 - 30 mins
-
Tools:Screw drivers
7 of 15 people
found this instruction helpful.
Was this instruction helpful to you?
Thank you for voting!
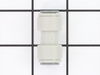
5/16" tubing to chilled water dispenser cracked
Cut out cracked tubing between valve and where tubing enters into refrigerator. Cut new tubing to length and attach to existing using union.
Parts Used:
-
Mark from Indian Trail, NC
-
Difficulty Level:Easy
-
Total Repair Time:15 - 30 mins
-
Tools:Nutdriver
4 of 6 people
found this instruction helpful.
Was this instruction helpful to you?
Thank you for voting!
Cold water dispencing was becoming slower and volume of ice was becoming less.
Shut water supply off, removed power plug from wall and removed electrical connector from valve. Unscrewed two plastic nuts which retained lines to old valve. Remove old valve and reinstalled new valve with one screw. Removed inserts from end of lines. (These inserts keep lines from deforming.). Trimmed and chamfered ends of lines reinstalled inserts and installed lines to new valve. Turned on watter, checked for leaks turned power on inserted glass for water received good flow. Ice maker did not receive water. Due to low flow of water to ice tray because of low flow with old valve, ice built up in flexable water delivery tube that goes from back of refrigator to ice tray. Removed tube ran under warm water removed ice blockage reinstall tube all working excelent. This iceing problem took about anouther 15 to 25 min to correct.
Parts Used:
-
Peter from Ashford, CT
-
Difficulty Level:Really Easy
-
Total Repair Time:15 - 30 mins
-
Tools:Nutdriver, Pliers
4 of 6 people
found this instruction helpful.
Was this instruction helpful to you?
Thank you for voting!
Ice maker needed replacement
Unplug refridge then loosened two bolts holding old ice maker. Lower then unplug and removed. Plugged in new harness and tightened two bolts to secure new ice maker. Plug in frig and wait for ice.
Parts Used:
-
James from PLYMOUTH, MA
-
Difficulty Level:Really Easy
-
Total Repair Time:15 - 30 mins
-
Tools:Socket set
3 of 3 people
found this instruction helpful.
Was this instruction helpful to you?
Thank you for voting!
Interior Light did not go on due to faulty switch
I ordered two switches, replaced both with a knife in 10 minutes. Interior light works, thanks.
Parts Used:

-
Robert from Coto de Caza, CA
-
Difficulty Level:Really Easy
-
Total Repair Time:Less than 15 mins
4 of 6 people
found this instruction helpful.
Was this instruction helpful to you?
Thank you for voting!
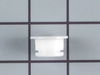
We found a snap ring and washer in a glass of ice
I took the ice maker tray out and dumped the ice and then removed 4 screws to take the plastic front off the drawer. I then took 4 more screws out to remove auger assembly. I could now unscrew the broken nut and replace it with the new one and put the snap ring and washer back in place and then put everything back together. Done
Had I had my lathe running at the time I would have made this part out of aluminum instead of the new one and original that is out of plastic which is why it did not last.
Had I had my lathe running at the time I would have made this part out of aluminum instead of the new one and original that is out of plastic which is why it did not last.
Parts Used:
-
Randy from Cohasset, AL
-
Difficulty Level:Easy
-
Total Repair Time:15 - 30 mins
-
Tools:Pliers, Screw drivers
3 of 4 people
found this instruction helpful.
Was this instruction helpful to you?
Thank you for voting!