Your coupon for will be reflected when you check out!
✖
Your coupon for
✖
Hello!
You're visiting the PartSelect site in U.S.
Would you like to shop on the Canadian site?
Stay on this site
Go to Canadian site
✖
Model Number Locations
1Select Category Type
Select Category Type
2Select Product Type
Select Product Type
3Select {MODEL} Type
Select {MODEL} Type
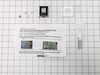
Sample Model Number Tags
Model numbers can be made up of numbers (1005400, for example) or a combination of letters and numbers (LAT1000AAE). The model number will most likely appear on either a paper sticker or a metal plate. Your appliance's model number tag may look similar to the sample model number tags shown here (model number highlighted in yellow):
TFX22ZPBEWW General Electric Refrigerator - Overview
Save your modelModel Saved!
Save your model for later to make things easier.
Model has been saved to My Models. If you're not signed in, your lists are available on this device and will expire within 30 days.
Model has been saved to My Models.
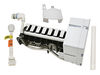
This 10 by 5 inch ice maker (Electromechanical Icemaker Kit, Ice Maker Assembly) produces ice. This particular model will produce seven crescent shaped cubes every cycle. It is constructed of plastic ...
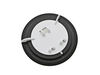
This “Dispenser Door Assembly” (Door Recess Assembly, Ice Door Assembly, Dispenser Door, Refrigerator Dispenser Ice Chute Door Kit, Dispenser Door Flap, Ice Chute Door, Flapper) keeps the room air fro...
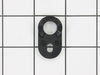
This evaporator fan motor grommet, or condenser fan grommet is built for refrigerators. It provides a cushion between the fan motor and the motor mounting bracket. It is made or round, black plastic a...
This 40-Watt light bulb is sold individually.
It is specially designed to withstand extreme temperatures, so this bulb is compatible with a variety of appliance types including refrigerators, ranges,...
This part is the replacement water line for your refrigerator. It is a long plastic tube, which is 5/16 of an inch in diameter. If your refrigerator is leaking, or will not dispense water or ice, you ...
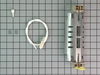
This part has one port and 2 solenoids and comes with a mounting bracket. The water valve is a solenoid-operated switch located at the bottom of the refrigerator. When it is energized by electrical p...
This water valve assembly has been redesigned. It has a new quick connect style valve. To install: Cut original plastic nuts off tubing and gently push into valve until they stop. No other nuts or connectors needed.
This is a replacement water filter adapter for your refrigerator. It is approximately 2.5 inches in diameter and is made of plastic. The filter adapter allows you to connect your water filter to your ...
Removed black cardboard covering on back of refrig with nut driver (6 screws), turned off water supply to pump, removed cooper waterline to pump with adjustable wrench, removed 1 screw holding pump to refrigerator, removed plastic waterline from pump by turning hose counter clockwise. Inserter plastic water line in new pump by screwing li
... Read morene in clockwise, pushed orange plastic stop around waterline into pump, connected cooper water line to pump first wrapping threads on pump with teflon plumbers tape, reinstalled pump to refrig and cardboard back on refrig with 6 screws.
One side note:.
This is the second pump which has burst at the blue plastic seam in seven years.
Disclaimer - if you aren't confident about doing this repair, call a repair specialist in. Also, take care not to damage the freezer coils as they have refrigerant in them that I'm told is harmful if it leaks. It may also be under pressure. The instructions that follow won't require you to touch the coils. There is no need to unplug the r
... Read moreefrigerator or disconnect the water supply to do this repair. The screw driver you will need is a phillips (the one withe the + head).
1st, take out your frozen food (which, if you need to do this repair may not be frozen) and put it in a cooler or the refrigerator. 2nd, remove the ice cube bucket and dump the ice cubes in the cooler to help keep the frozen food cool. Turn the ice cube maker off. 3rd, remove the freezer shelves. 4th, locate the panel covering the freezer coils. It's a panel at the back of the freezer. It hides the freezer coils and protects them from damage. It's held in place by two screws located at the top left and right corners of the panel. 5th, unscrew the screws holding the panel to the refrigerator. 6th, detach the clip at the top of the panel. 7th, remove the panel. You should see the coils now. The coils will be covered in frost if the defroster heater has failed. If the coils are not covered in frost, there may be another reason for the refrigerator failing to cool. 8th, even if the coils are covered in frost, you should also inspect the defroster heater at the bottom, underneath the coils. The business end of it is a long tube running horizontally between two wires. If it's black like a badly burned out light bulb, then it's failed. If the bulb appears fine, you may have a different reason for your refrigerator and freezer frosting up. We'll assume that the defroster heater has blown out, and proceed. 9th, place a towel at the bottom of the panel space, to soak up any water that melts and runs down. There is a drain under the coils. It collects water that melts during the defrost cycle, but I'd rather mop up the water instead of relying on the drain. 10th, use hot air blowing from the hair dryer to defrost the coils. Just play the air from the hair dryer over the coils, starting at the top, and working down. The frost will quickly melt and the water will be soaked up by the towels. If you want things to go faster, you can throw hot water on the coils to melt them faster, but that produces more water to mop up, and makes a big mess. It's also dangerous to have water lying around if you then decide to use the hair dryer to continue defrosting the coils. 11th. MOST IMPORTANT. Don't use your screwdriver or any other sharp object to pick away at the frost on the coils. If you damage the coils the refrigerant could leak out. I'm told that it's dangerous stuff. Furthermore, I expect that you'd have to buy a new refrigerator if you damaged the coils. 12th, once you've defrosted the coils, locate the defroster heater and bracket assembly again. It's held in place by two screws, and has two insulated wires running into it on either side. Unscrew the screws, disconnect the wires and remove the assembly. Throw it away - there are no useful parts in it. 13th, install the new defroster heater and bracket assembly by connecting the wires to it, mounting it back into its place, and rescrewing the screws. 14th, put the panel back in place, replace the clip, and screw the panel back in place. 15th, turn the ice cube maker back on and replace the ice cube bucket and shelves. Put your food back into the freezer. 16th, use the freezer and refrigerator as normal. If the defroster heater fails again (I'm on my third one in less than six years), you'll notice frost building up on the panel at the back of the freezer before your freezer and refrigerator stops cooling. The frost build up is your signal to defrost the freezer and buy another defroster heater and bracket assembly. I don't know why this part is so weak, and don't know any fix except to keep replacing it.
This is a side-by-side frige with water and ice dispenser in the left freezer door. I first checked for possible water line freezing in the freezer door or in the water chiller area (behind the vegetable drawers) as described in e-articles I had read, but this did not appear to be the problem. I found two solenoid valve pairs; one that
... Read moreroutes dispenser or ice-maker water to the filter and the other that routes the water to the end device. I ran a couple of tests on the solenoid valves and found that the first inlet valve that sends water to the filter did not work, but the second valve that relays the water to the dispenser was still working. By temorarily connecting the wiring for the dispenser solenoid to the functioning ice-maker solenoid, I confirmed that the wiring and switch were working properly and that the problem must be the solenoid itself (it also still hummed when the dispenser button was pressed). The entire quad solenoid valve assembly can be pulled out after removing the one hex-screw on the back of the frige (the assembly is all held together with a bracket). I disconnected the wiring connector to the solenoid valves. I disconnected the plastic water tubing by pushing it toward the fitting and then depressing the tubing inlet ring to release the tubing. I removed the two screws holding the solenoid valve and replaced it.