















TFT26JWDAAA General Electric Refrigerator - Instructions
Keep searches simple. Use keywords, e.g. "leaking", "pump", "broken" or "fit".
Interior light needed replaced
Unplugged the appliance for safety. Removed two 1/4" screws that held the assembly in place. Carefully removed the wire guard that retains the glass shield. Unscrewed old light bulb and replaced with new part. Reversed the steps after cleaning glass cover.
Parts Used:

-
Leo from TWIN FALLS, ID
-
Difficulty Level:Really Easy
-
Total Repair Time:Less than 15 mins
-
Tools:Nutdriver
22 of 43 people
found this instruction helpful.
Was this instruction helpful to you?
Thank you for voting!
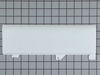
This replacement of the light shield was fast and easy. I wish they all good go this smooth.
I repaired as follows. 1) Open freezer door. 2)Removed ice maker bin. 3) removed screw with broken tab on it. 4) install new shield slide to side.
5) Reinstall screw. 6) Grab TAB (tasty adult beverage) and enjoy on back deck while talking about how good you are at repairing stuff.... HA!
5) Reinstall screw. 6) Grab TAB (tasty adult beverage) and enjoy on back deck while talking about how good you are at repairing stuff.... HA!
Parts Used:
-
Stephen from Northglenn, CO
-
Difficulty Level:Really Easy
-
Total Repair Time:Less than 15 mins
-
Tools:Screw drivers
11 of 11 people
found this instruction helpful.
Was this instruction helpful to you?
Thank you for voting!
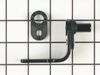
The cam broke apart and the pieces were on the floor. The door did not close automatically. This was on the freezer side.
I used the same steps as described in other descriptions listed here. Since I was changing the hinge assembly on the freezer side the difference I discovered was that there was a nylon water hose inside the hinge assembly that I did not at first know how to remove. I finally called a repairman I happened to know and following his instruction simply snapped the hose loose where there was a connector and placed a cloth under it to catch the moisture that drained. Having done that, the rest of the assembly went just the same way as the other instructions listed here said that it would. Door now functions like new.
Parts Used:
-
Bennie from Gainesville, FL
-
Difficulty Level:Easy
-
Total Repair Time:30 - 60 mins
-
Tools:Nutdriver, Pliers, Screw drivers
12 of 14 people
found this instruction helpful.
Was this instruction helpful to you?
Thank you for voting!
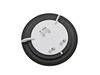
Flapper was stuck open. Old and warped.
-
James from Virginia Beach, VA
-
Difficulty Level:Easy
-
Total Repair Time:15 - 30 mins
-
Tools:Screw drivers
16 of 27 people
found this instruction helpful.
Was this instruction helpful to you?
Thank you for voting!
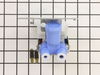
Replace Dual Inlet Water Valve
Unplug the electrical power to the refridgerator, remove old valve, marking which electrical wire set goes to which solenoid valve. Cut the nut fasteners from the ice maker and front door water tubes. Leave the nut fastener on the supply line.
New valve - remove plastic shipping protection guard, remove rubber cap from supply connection, bend mounting bracket to a 90 degree bend, attach electrical wire reducers to the small wattage solenoid wires then to the solenoid, attach large wattage solenoid wires to the large solenoid, push ice maker tube into the small quick-connection(no nut fastener needed), push the front door water into the large quick-connection, finally mount valve asembly using same holes in frame as held the old valve assembly. Plug in the power. Solenoid valves may take an hour or so to operate.
New valve - remove plastic shipping protection guard, remove rubber cap from supply connection, bend mounting bracket to a 90 degree bend, attach electrical wire reducers to the small wattage solenoid wires then to the solenoid, attach large wattage solenoid wires to the large solenoid, push ice maker tube into the small quick-connection(no nut fastener needed), push the front door water into the large quick-connection, finally mount valve asembly using same holes in frame as held the old valve assembly. Plug in the power. Solenoid valves may take an hour or so to operate.
Parts Used:
-
Timothy from West Windsor, NJ
-
Difficulty Level:Easy
-
Total Repair Time:Less than 15 mins
-
Tools:Pliers, Screw drivers, Wrench set
16 of 27 people
found this instruction helpful.
Was this instruction helpful to you?
Thank you for voting!
This part on refrigerator went out, wouldn't dispense water.
I removed the back cover on the refrigerator. Unbolted the unit. First of all I unpluged the refrigerator. Took off the two electrical connections and removed the input and output water lines. I then reversed this process when I installed the new part. It was real easy.
Parts Used:
-
Glen from Harrisburg, OR
-
Difficulty Level:Really Easy
-
Total Repair Time:Less than 15 mins
-
Tools:Pliers
13 of 18 people
found this instruction helpful.
Was this instruction helpful to you?
Thank you for voting!
water valve leak
This Valve Has 2 Different Size Water Lines Going In To It And They Are Different Diameters.Each Has Its Own Collar That Locks The Lines Into It. Make Sure That You Put The Right Size Collar Over The Line Before You Insert It Into The Valve, Because Once You Put The Line In You Cant Pull It Back Out Without Messing Up The Valve. Make Sure It Is Right Because You Only Get One Shot At It.
Parts Used:
-
Scott from Columbus, IN
-
Difficulty Level:Easy
-
Total Repair Time:Less than 15 mins
-
Tools:Pliers, Screw drivers, Wrench set
10 of 10 people
found this instruction helpful.
Was this instruction helpful to you?
Thank you for voting!
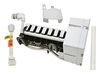
Refridgerator Freezer stoped making ice
Turned off power, removed cover from Ice maker, checked resistance across thermostat for zero (read open), all other switches read proper value (when activated). Ordered and received thermostat. Removed Ice Maker from freezer, removed two screws holding ice tray to Control Assembly. Removed Thermostat and replaced with new one. Applied Silicone Sealant to face of Thermostat for adhesion to ice tray when assembled. Remounted Ice Tray to Control Assembly and remounted in freezer. Works Great...
Parts Used:
-
Marion from Palm Coast, FL
-
Difficulty Level:Easy
-
Total Repair Time:30 - 60 mins
-
Tools:Screw drivers
17 of 31 people
found this instruction helpful.
Was this instruction helpful to you?
Thank you for voting!
Ice machine wasnt making ice
First I turned the refrigerator and water line off. Then moved to the freezer section, followed the directions, removed the two screws. Directions state to not remove them but I had to in this case. Unplugged the ice maker and removed it from the freezer. I installed the two mounting screws then tried to plug the electrical connection back in but had to use the adaptor cord furnished in the kit. The cord was a little long but I tucked it in and mounted the ice maker. Turned it on then turned the refrigerator and water back on and in a few hours had ice! Very easy to do!
Parts Used:
-
Robert from Auburn, AL
-
Difficulty Level:Really Easy
-
Total Repair Time:Less than 15 mins
-
Tools:Screw drivers
14 of 23 people
found this instruction helpful.
Was this instruction helpful to you?
Thank you for voting!
broken ice maker
removed 3 screws unplug and remove old unit. install two screws install new ice maker, tighten screws plug in and turn on. had ice in 20 min.
Parts Used:
-
robert from bensalem, PA
-
Difficulty Level:Really Easy
-
Total Repair Time:Less than 15 mins
-
Tools:Screw drivers
10 of 12 people
found this instruction helpful.
Was this instruction helpful to you?
Thank you for voting!
Ice maker Stripper lost a tooth
First turn off the power, remove the ice tray, remove the two screws holding the ice maker to the side of the freezer, use the screw driver to gently open the electrical clip for the power cord inside the freezer, remove the complete unit from freezer, bend the old stripper from the holding pin- it is flexible- it will bend, replace the new stripper on the holding pin and bend into the slot to hold it firmly, no water will come out from the fill cup into the freezer, plug in the power cord, mount back to side of freezer, you are done.
Parts Used:
-
Ernest W. from Charlotte, NC
-
Difficulty Level:Really Easy
-
Total Repair Time:Less than 15 mins
-
Tools:Nutdriver, Screw drivers
10 of 12 people
found this instruction helpful.
Was this instruction helpful to you?
Thank you for voting!
leaking water / icemaker valve
Simple. UNPLUG THE FRIDGE. Remove set screw holding valve to frame, switch hoses one at a time into new valve, switch wires one set at a time from old to new, re-attach the new valve, turn on water , plug in fridge, check for leaks. 2-minute job.
Parts Used:
-
Lorry from Bentonville, AR
-
Difficulty Level:Really Easy
-
Total Repair Time:Less than 15 mins
-
Tools:Nutdriver
10 of 13 people
found this instruction helpful.
Was this instruction helpful to you?
Thank you for voting!
Fridge not cold
On this fridge, you MUST take out the ice maker. First took out the shelves. Then take out the ice maker. This is done by taking out the four screws on the side that hold the assembly containing the bulb. Then there is one screw that holds that assembly to the icemaker. Do not take out any other screws, this is a mistake I made that cost me a few more hours figuring out how to get the other parts to mount correctly to the assembly containing the bulb. The icemaker should lift right out once the white plus is unplugged from the assembly that holds the light. Then took out the shelf brackets and finally could remove rear panel. Found it all iced up as others have. Took 1.5 hours to manually defrost while using sponges to sop up all the water that would run into the drain if you let it. Was about a gallon of water so using sponges worked well. Heater was open when checked with a meter, but you could tell it was blown by the way it looked. All cloudy. Put things back in reverse order. Had an issue with the icemaker shooting water out and missing the icemaker. Eventually was able to align better. This fridge had also just stopped dispensing water. I think the lines may have been frozen in the back, because one day after defrosting manually, the water dispenser started working again Overall this took about 4 hours. But a few days later, the water dispenser again stopped working. Not sure about that one. I have a valve already that I will try for this issue but somehow I don't think its the valve.
Parts Used:
-
Christopher from Perkasie, PA
-
Difficulty Level:A Bit Difficult
-
Total Repair Time:More than 2 hours
-
Tools:Nutdriver, Pliers, Screw drivers, Socket set, Wrench set
9 of 11 people
found this instruction helpful.
Was this instruction helpful to you?
Thank you for voting!
Will not make ice
-
GEORGE from ELIOT, ME
-
Difficulty Level:Easy
-
Total Repair Time:Less than 15 mins
-
Tools:Screw drivers
13 of 23 people
found this instruction helpful.
Was this instruction helpful to you?
Thank you for voting!
Ice Maker was leaking all over freezer compartment
Pulled out the fridge, took off the cardboard back. Get a nut driver instead of screwdriver (easier). TURN OFF WATER NOW. UNPLUG FRIDGE NOW. Removed one screw holding valve. Pulled off electrical connectors. Use two small adjustable wrenches to remove water lines. Tag the plastic tubes (I marked RED and BLUE). Grab the new valve and try to stuff it into the same space. Whoops ! Dang plastic housing protecting the electrical from the water is in the way. Have to cut most of it out to make it fit. By the way, DONT follow the instructions about take the bracket off the OLD solenoid. You don't need it. Just throw it away. Connect the wires (remember to use the adapters sent with the new solenoid) Mount the new solenoid (now that the plastic is out of the way) with the one screw (nut driver). Hook up the supply water line (wrenches). Hook up the plastic tubes (aren't you glad you marked them ?). The tubes just push into the new solenoid, no more threads. I just left the plastic nuts on the tubing. TURN ON THE WATER. Check your connections for leaking. Do this before plugging in the fridge. If OK, plug in the fridge. Run some water on the door, look in about an hour to see if cubes are making now. Put cardboard back on fridge. Push fridge back against wall. CONGRATULATE YOURSELF ON A JOB WELL DONE.
Parts Used:
-
Mary from Langhorne, PA
-
Difficulty Level:A Bit Difficult
-
Total Repair Time:15 - 30 mins
-
Tools:Nutdriver, Screw drivers, Wrench set
9 of 11 people
found this instruction helpful.
Was this instruction helpful to you?
Thank you for voting!