















TFF22RNB General Electric Refrigerator - Instructions
Keep searches simple. Use keywords, e.g. "leaking", "pump", "broken" or "fit".
would not "dump" ice cubes
I am more than 80 yrs, always thought I could fix just about everything--but, this looked complicated. Once I received the new icemaker; took a good look where the screw-holes, etc. were, then removed the "old" one. Took about 20 or 30 minutes, then the "new" one was easily installed.
Parts Used:
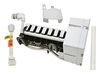
-
Phayo from Lake Charles, LA
-
Difficulty Level:Easy
-
Total Repair Time:15 - 30 mins
-
Tools:Nutdriver
Was this instruction helpful to you?
Thank you for voting!
Ice maker went to sleep and forgot to wake up.
Followed the instructions. Smooth as silk. This part is better than the original. There appears to be a sensor that beeps when the ice reservoir is full.
Parts Used:
-
Harold from Abilene, TX
-
Difficulty Level:Easy
-
Total Repair Time:15 - 30 mins
-
Tools:Nutdriver, Screw drivers
Was this instruction helpful to you?
Thank you for voting!
Plastic part of icemaker broke
I watched the video and then read the instructions. Emptied and cleaned freezer compartment. Removed old unit and removed part of old unit to be used in new installation. I then installed the new unit and turned the water back on. I let the unit produce over night and through the first batch of ice away. Because of the various regrigerators this ice maker was used I had a little confusion recognizing our model, but worked through this problem useing some common sense. All around I'm very satisfied with the results.
Parts Used:
-
Robert from Glen Ellyn, IL
-
Difficulty Level:Easy
-
Total Repair Time:30 - 60 mins
-
Tools:Pliers, Screw drivers
Was this instruction helpful to you?
Thank you for voting!
Ice make stopped making ice
Went to GE website and researched the problem for the model, determined that it was 90% sure it was the Ice maker, I ordered it and it arrived the next day, installed it and it began working immediately,
Parts Used:
-
Carl from Broomfield, CO
-
Difficulty Level:Really Easy
-
Total Repair Time:15 - 30 mins
-
Tools:Nutdriver, Screw drivers
Was this instruction helpful to you?
Thank you for voting!
change of ice maker
-
Conti USA, Inc. from Fort Lauderdale, FL
-
Difficulty Level:Easy
-
Total Repair Time:15 - 30 mins
-
Tools:Socket set
Was this instruction helpful to you?
Thank you for voting!
Icemaker leaking water
I had to defrost the freezer to free the icemaker. After that the installation was plug and play with two small exceptions: 1) I had to file down the width of the left hand tine of the old stripper so that it would fit the new icemaker, and 2) the motor housing of the new icemaker was slightly wider than the old one. It fit, but just barely. But I'm back in the ice again, no dripping water, all is good.
Parts Used:
-
Allen from Santa Fe, NM
-
Difficulty Level:A Bit Difficult
-
Total Repair Time:1- 2 hours
-
Tools:Nutdriver, Screw drivers
Was this instruction helpful to you?
Thank you for voting!
Broken ice maker replacement
Installing the actual ice maker was quite easy. What takes most of the time is preparing the freezer for the install. Need to remove all shelving, (and the door) to gain access to the unit. The ice maker is simple to install once access is achieved. Putting everything back together takes some time.
Parts Used:
-
Matthew J from White Plains, NY
-
Difficulty Level:A Bit Difficult
-
Total Repair Time:1- 2 hours
-
Tools:Screw drivers, Wrench (Adjustable), Wrench set
Was this instruction helpful to you?
Thank you for voting!
Icemaker plastic piece had broken causing ice to not make properly and loose water to freeze things into chunks
I spent 15 - 20 minutes just hunting/deciding which of several sets of parts & directions to follow. The provided directions were not bad; but none of them quite matched my GE ADORA side-by-side model. Once I came up with the actions I would need to take...I was done in 5 minutes! The kit , as I said, came with all the parts one could need (and one or two un-needed parts included for other model GE refrigerators) I am very happy with PART SELECT...altough GE doesn't rate as high with me for their declining reliability.
Parts Used:
-
Paul J from Niceville, FL
-
Difficulty Level:Easy
-
Total Repair Time:15 - 30 mins
-
Tools:Screw drivers
Was this instruction helpful to you?
Thank you for voting!
Replacement Of Ice Maker
Removed old ice maker, then screwed in new ice maker. Only thing that was a little difficult was to hold the auger motor, while trying to unplug the clipped in plug on the old ice maker. I could have used an extra pair of hands.
Parts Used:
-
Craig from Eagle, CO
-
Difficulty Level:Easy
-
Total Repair Time:15 - 30 mins
-
Tools:Nutdriver, Screw drivers
Was this instruction helpful to you?
Thank you for voting!
Cord
-
Laurie from Portland, ME
-
Difficulty Level:Really Easy
-
Total Repair Time:Less than 15 mins
-
Tools:Screw drivers
Was this instruction helpful to you?
Thank you for voting!