















SMV9165SC (XAA) Samsung Microwave - Instructions
Keep searches simple. Use keywords, e.g. "leaking", "pump", "broken" or "fit".
Microwave door did not close
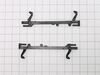
Initially I called a Samsung recommended appliance repair outfit to fix the latch. The technician informed me that he does not fix latches. I need to buy a full new door for the microwave for $215 plus he charges $165 to come to my house. I got angry and did some research and it turned out that this is a very common problem. I ordered part PS4229162 "door key" $6.67 then followed the instructions on a youtube video by zimsjeep
"Repair a Broken Microwave Door Latch" to install. At first I struggled a bit hooking up the spring to the frame, but then I used a slim plier to hold the spring (instead of my fingers) and that did the trick.
"Repair a Broken Microwave Door Latch" to install. At first I struggled a bit hooking up the spring to the frame, but then I used a slim plier to hold the spring (instead of my fingers) and that did the trick.
Parts Used:
-
Rozsa from MADISON, NJ
-
Difficulty Level:Easy
-
Total Repair Time:30 - 60 mins
45 of 65 people
found this instruction helpful.
Was this instruction helpful to you?
Thank you for voting!
Not the original type bulb
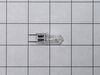
The repair was very easy, however the bulb was not the same as the original one. The original bulb had a bright setting and a low setting, but the replacement bulb was only the low setting bulb. There was no bright and dim operation. The switch on the microwave had the duel settings.
Parts Used:
-
John from Orlando, FL
-
Difficulty Level:Really Easy
-
Total Repair Time:Less than 15 mins
-
Tools:Screw drivers
31 of 40 people
found this instruction helpful.
Was this instruction helpful to you?
Thank you for voting!
Buzzing noise, no heating of food
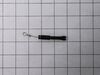
Removed control panel, discharged HV capacitor. Removed old diode, tested to confirm failure. Replaced part. Other than the removal of the panel swapping the part was almost as easy as replacing a light bulb.
Parts Used:
-
Ted from Hudson, NH
-
Difficulty Level:Easy
-
Total Repair Time:30 - 60 mins
-
Tools:Pliers, Screw drivers
22 of 35 people
found this instruction helpful.
Was this instruction helpful to you?
Thank you for voting!
Microwave stopped working - would not heat up
I removed the outer cover and exposed the inner workings. I watched a video on partselect.com to show how to remove and replace the Diode. I followed the instructions and it was very easy to replace.
Unfortunately, the diode was only part of the issue. I ended up replacing the High Voltage capacitor and Magnetron also. Those were a little more complicated but still easy to do.
Now the Microwave works just like new! Cost me less than $100 for all parts.
Unfortunately, the diode was only part of the issue. I ended up replacing the High Voltage capacitor and Magnetron also. Those were a little more complicated but still easy to do.
Now the Microwave works just like new! Cost me less than $100 for all parts.
Parts Used:
-
louis from PARRISH, FL
-
Difficulty Level:Easy
-
Total Repair Time:1- 2 hours
-
Tools:Pliers, Screw drivers
11 of 21 people
found this instruction helpful.
Was this instruction helpful to you?
Thank you for voting!
Appears to work, but food not heated
The high voltage tired was shorted. I replaced it with a new one, but that did not solve the problem.
You can test the high voltage tired with a voltmeter and a 9 V battery. Search Search for it on YouTube.
You can also test the high voltage capacitor, the high-voltage transformer, and the magnetron with a multi meter. Search for the procedures on YouTube.
I tested all these high-voltage components with a low-voltage multi meter, and they all checked out OK (after replacing the diode). However the microwave still did not heat food.
When working on a microwave it is important to unplug it and also discharge the high voltage capacitor. The capacitor has a 10 megaohm resister to automatically discharge itself, but it may have failed – – so discharge it manually.
In the end I ordered a new microwave.
You can test the high voltage tired with a voltmeter and a 9 V battery. Search Search for it on YouTube.
You can also test the high voltage capacitor, the high-voltage transformer, and the magnetron with a multi meter. Search for the procedures on YouTube.
I tested all these high-voltage components with a low-voltage multi meter, and they all checked out OK (after replacing the diode). However the microwave still did not heat food.
When working on a microwave it is important to unplug it and also discharge the high voltage capacitor. The capacitor has a 10 megaohm resister to automatically discharge itself, but it may have failed – – so discharge it manually.
In the end I ordered a new microwave.
Parts Used:
-
Joel from CAMBRIDGE, MA
-
Difficulty Level:Difficult
-
Total Repair Time:1- 2 hours
20 of 48 people
found this instruction helpful.
Was this instruction helpful to you?
Thank you for voting!
The microwave would not turn on or would run with the door open
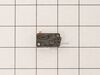
Other tools that are usefull long needle nose pliers, long thin blade screw driver and small magnetic flashlight. Place the microwave on a work bench and remove the case it cover 3 sides. Place the microwave on a chair so it can stand with the controls up. You are replacing the lower door microswitch. The switch is located behind the control panel in the lower part of the area. The switch is several inches inside this area and your hands will not fit. Take care when moving wires and a couple of sensors. Use the thin blade screwdriver to release a tab holding the switch in place. Do not break this tab. Take the needle nose pliers and remove the switch. Put the wires on the new switch, open the door a short distance so a door lever moves enough to put the microswitch back into the bracket.
Parts Used:
-
Raymond from TROY, OH
-
Difficulty Level:Easy
-
Total Repair Time:1- 2 hours
-
Tools:Screw drivers
6 of 13 people
found this instruction helpful.
Was this instruction helpful to you?
Thank you for voting!
Burned out lamp on microwave
Opened light panel and replaced bulb. Very, very easy.
I am concerned, however, that this bulb does not emit the same amount of light as the one i replaced. The item number is the same, however, so I am perplexed at this bulb efficiency.
I am concerned, however, that this bulb does not emit the same amount of light as the one i replaced. The item number is the same, however, so I am perplexed at this bulb efficiency.
Parts Used:
-
Ellen from Colorado Springs, CO
-
Difficulty Level:Really Easy
-
Total Repair Time:Less than 15 mins
-
Tools:Screw drivers
5 of 10 people
found this instruction helpful.
Was this instruction helpful to you?
Thank you for voting!
Microwave lamp burnt out
With microwave still attached under the cabinets, I removed 2 screws for the top grill and then one screw for the bulb cover plate. This provided access to the bulb. The replacement bulb was a simple plug-in.
The best part of this experience was the exploded parts diagram on the PartsSelect web site which allowed me to easily locate and order the correct part.
The best part of this experience was the exploded parts diagram on the PartsSelect web site which allowed me to easily locate and order the correct part.
Parts Used:
-
Kenneth from Millersville, MD
-
Difficulty Level:Easy
-
Total Repair Time:Less than 15 mins
-
Tools:Screw drivers
9 of 22 people
found this instruction helpful.
Was this instruction helpful to you?
Thank you for voting!
VERY dirty- grease soaked- filters from under the above the stove microwave.
Pulled the filters down, measured and went on line- done. was fast to find the part and easy to order...
Parts Used:
-
Suzanne from LONG BEACH, CA
-
Difficulty Level:Very Easy
-
Total Repair Time:Less than 15 mins
-
Tools:Pliers
4 of 8 people
found this instruction helpful.
Was this instruction helpful to you?
Thank you for voting!
broke glass serving tray in microwave, hard to find item
-
walter from coatesville, IN
-
Difficulty Level:Really Easy
-
Total Repair Time:Less than 15 mins
2 of 2 people
found this instruction helpful.
Was this instruction helpful to you?
Thank you for voting!
filter on microwave
-
kenny from Blytheville, AR
-
Difficulty Level:Very Easy
-
Total Repair Time:Less than 15 mins
2 of 2 people
found this instruction helpful.
Was this instruction helpful to you?
Thank you for voting!
Burned out light bulb
I followed the instructions in the owners' manual on how to access the bulb. Installation was a breeze. I couldn't believe how fast I received the replacement bulb from PartSelect. I ordered it on line one afternoon and Fedex delivered it to my front door before 9:00 A.M. the next day. Awesome service.
Parts Used:
-
Jon from Adel, IA
-
Difficulty Level:Really Easy
-
Total Repair Time:Less than 15 mins
-
Tools:Screw drivers
4 of 8 people
found this instruction helpful.
Was this instruction helpful to you?
Thank you for voting!
microwave door
We did not use the part, the spring fell off inside the door. We kept the part just in case
Parts Used:
-
SANDRA from GLENDO, WY
-
Difficulty Level:Really Easy
-
Total Repair Time:15 - 30 mins
-
Tools:Screw drivers
1 of 3 people
found this instruction helpful.
Was this instruction helpful to you?
Thank you for voting!
The plastic door key (latch) broke where the spring attaches.
I took off the inner plastic frame of the door, removed the broken part, hooked the spring up to the new latch and replaced it into the proper alignment holes, and works perfectly. It was less than a 5 minute repair.
Parts Used:
-
Dave from ROCHESTER, MN
-
Difficulty Level:Very Easy
-
Total Repair Time:Less than 15 mins
-
Tools:Screw drivers
1 of 4 people
found this instruction helpful.
Was this instruction helpful to you?
Thank you for voting!
Microwave cooking tray cracked
We just order the tray and basically replaced it with the new one we ordered. It fits perfectly. Very happy with the purchase.
Parts Used:
-
Marilou from Sylmar, CA
-
Difficulty Level:Really Easy
-
Total Repair Time:Less than 15 mins
0 of 2 people
found this instruction helpful.
Was this instruction helpful to you?
Thank you for voting!