















SGS5362BS (01) Bosch Dishwasher - Instructions
Keep searches simple. Use keywords, e.g. "leaking", "pump", "broken" or "fit".
Overfill then no fill
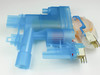
Remove bottom kick plate and raise the feet up. Remove attachment from the top to counter. Slide out. Facing the unit, remove left hand side sheet metal cover. The unit is behind this cover. Unhook the hose on the lower end. Pop the new one in and hook it up!! Test on quick rinse and see results. If ok return to normal as disassembled. Make sure to level the unit after tucking it back in. Enjoy!!
Parts Used:
-
Lawrence from FREDERICKSBRG, PA
-
Difficulty Level:Easy
-
Total Repair Time:30 - 60 mins
-
Tools:Nutdriver, Pliers
2 of 2 people
found this instruction helpful.
Was this instruction helpful to you?
Thank you for voting!
Getting to the part at the bottom of the dishwasher was a little pain.
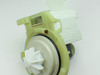
Everything went great installing the new drain pump. Our dishwasher works like it’s brand new again. I would recommend part select to anyone that needs to repair their dishwasher parts or any applications parts.
Parts Used:
-
Travis from Hermon, NY
-
Difficulty Level:Very Easy
-
Total Repair Time:15 - 30 mins
-
Tools:Nutdriver, Pliers, Screw drivers, Wrench (Adjustable)
2 of 3 people
found this instruction helpful.
Was this instruction helpful to you?
Thank you for voting!
Not getting water
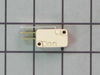
shut off water, pull dishwasher out, took side insulation off, unhooked what was connected to the float switch and replaced the new with the old. Reconnected everything and put insulation back and wa-la , all done
Parts Used:
-
Ranaye from BECKER, MN
-
Difficulty Level:Very Easy
-
Total Repair Time:15 - 30 mins
-
Tools:Nutdriver, Screw drivers
1 person
found this instruction helpful.
Was this instruction helpful to you?
Thank you for voting!
Drain filter got old fell apart

-
Mary from HUNTINGTN STA, NY
-
Difficulty Level:Really Easy
-
Total Repair Time:15 - 30 mins
1 person
found this instruction helpful.
Was this instruction helpful to you?
Thank you for voting!
Replace catch for door latch
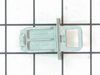
Dishwasher door won’t stay closed. Upon inspection, the metal striker/catch at the top of the door was broken. This dishwasher is 12 years old and this is the first problem I’ve had with it. To repair the catch, first remove screws holding cover plate at the bottom of the door. Next, remove screws holding the dishwasher stable from under the counter. The pull out the dishwasher to gain access to the catch. You’ll have to take a small set of pliers and bend the two tabs back that hold the catch in place. Lift the catch up and forward to remove. Replace and bend the tabs back to hold the new catch securely. Move the dishwasher back in place and secure with the screws previously removed. Put the cover plate back in place and you’re done.
Parts Used:
-
Michael from WEBSTER, TX
-
Difficulty Level:Easy
-
Total Repair Time:15 - 30 mins
-
Tools:Pliers, Screw drivers
1 person
found this instruction helpful.
Was this instruction helpful to you?
Thank you for voting!
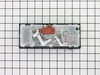
Needed to replace dispenser
The video pretty much showed it all except...if you have a custom panel on the front like ours did. In that case, yiu have to remove the torx screws along the top PLUS to extras in the side of the part that protrudes into the tub of the washer. Those two are key to releasing the front panel and are also held in with fairly flimsy spring steel so be careful. Otherwise, pretty easy to do.
Parts Used:
-
Andrew from Redding, CT
-
Difficulty Level:Difficult
-
Total Repair Time:30 - 60 mins
Was this instruction helpful to you?
Thank you for voting!