















SF303PEKT1 Whirlpool Range - Instructions
Keep searches simple. Use keywords, e.g. "leaking", "pump", "broken" or "fit".
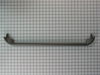
Oven door handle broken
Removed broken pieces,installed replacement handle on glass and push nuts,then installed on to oven door.
Parts Used:
-
Prisciliano Jr. from El Paso, TX
-
Difficulty Level:Really Easy
-
Total Repair Time:Less than 15 mins
-
Tools:Pliers, Screw drivers
Was this instruction helpful to you?
Thank you for voting!
broken handle
-
Ronald from Chatsworth, CA
-
Difficulty Level:Really Easy
-
Total Repair Time:Less than 15 mins
-
Tools:Screw drivers
Was this instruction helpful to you?
Thank you for voting!
going from lp gas to nat. gas
Repair was easy-----getting the parts was the hard part. Ordered 4ea only got 1, ordered again and only got 1, spoke to rep again and they promissed to fix the problem. Next time i got 8 ea. IN the end they refunded my money and all is well. Many people involed in getting this part but the company did its job and fixed the problem. (just give it time)
Parts Used:

-
George from South New Berlin, NY
-
Difficulty Level:Easy
-
Total Repair Time:Less than 15 mins
-
Tools:Pliers, Screw drivers
Was this instruction helpful to you?
Thank you for voting!
The door handle broke off
I placed the new handle through the holes in the oven door glass. Then pushed the nuts on to secure it. Place the glass on the clips and tightened the screws to attach the glass to the oven door. Very simple and easy. PartSelect website was very user friendly and shipping in less than 48 hours after ordering even at Christmas time.
Parts Used:
-
JENNIFER from ELLWOOD CITY, PA
-
Difficulty Level:Easy
-
Total Repair Time:Less than 15 mins
-
Tools:Screw drivers
Was this instruction helpful to you?
Thank you for voting!
oven igniter
ordered the part and in less then 24 hours from ordering the part it was shipped and delivered and my husband and I put the part in took us no time at all very easy to do... 2 years ago i had this same problem and called a guy in the area cost me $200. I had dinner in the oven by 5 that night!!!!
Parts Used:

-
Kasey from Stryker, OH
-
Difficulty Level:Really Easy
-
Total Repair Time:Less than 15 mins
-
Tools:Screw drivers, Wrench (Adjustable)
Was this instruction helpful to you?
Thank you for voting!
Tine clip installation
Slide the teethed washers on with gloved hand, so you don't break the glass with a tool. Get them down as close as possible and then screw the peice back into place on the oven door.
Parts Used:
-
Dawn from Monee, IL
-
Difficulty Level:Really Easy
-
Total Repair Time:15 - 30 mins
-
Tools:Screw drivers
Was this instruction helpful to you?
Thank you for voting!
Gas oven burner would not light
The igniter would glow but no gas was released to the burner. I was told that the igniter is bad because it is not getting hot enough to open the safety valve to release the gas to the burner. I turn the gas off and unplugged the oven. Opened the oven removed the racks then removed the two screws that hold the bottom plate of the oven. Now I can see the burner and the igniter. The igniter is held on to the burner with two screws. Unscrew then and unplugged the wires. Then replaced with new igniter. Replaced everything that I removed. Plugged oven back in and turned on gas. Then started oven, it takes 45 sec. for the igniter to get hot enough to release the gas and everything was working.
Parts Used:
-
Mario from Tomball, TX
-
Difficulty Level:Easy
-
Total Repair Time:15 - 30 mins
-
Tools:Screw drivers, Socket set
Was this instruction helpful to you?
Thank you for voting!
Igniter Glows but gas never comes to ignite.
Since the broiler worked fine, I took the igniter from the broiler (exact same) and moved it to the bottom and sure enough oven ignited fine. I did this to isolate the problem, because it could have been either the igniter or the valve. I put the broiler igniter back on top when I got the new part, because it is used only 5% of the time. Be aware that you may need to rummage for some machine screws because the factory screws stripped when I removed them. The oven must have annealed them.
Parts Used:
-
Paul from State College, PA
-
Difficulty Level:Really Easy
-
Total Repair Time:15 - 30 mins
-
Tools:Nutdriver
Was this instruction helpful to you?
Thank you for voting!
old igniter glowed red but was too cold
Shut off gas and unplugged electrical cord. Removed grates; oven floor and flame spreader and then unbolted old igniter with nut driver. Removed shield in rear of over with Phillips screwdriver and unplugged igniter from power socket. Removed old igniter and replaced with new. Bolted new igniter into place with nut driver and plug into rear socket. Turned on gas and plugged in electric to test igniter; saw white glow and flame on in a minute. Replaced rear shield, flame spreader, oven floor and grates. DONE!
Parts Used:
-
dominic from Tucson, AZ
-
Difficulty Level:Really Easy
-
Total Repair Time:Less than 15 mins
-
Tools:Nutdriver, Screw drivers
Was this instruction helpful to you?
Thank you for voting!
The oven wouldn't light.
Our oven wouldn't light as the ignitor wasn't getting hot enough. I ordered the part from your company and got it in just a few days. A quarter inch wrench and one plug, done!
Parts Used:
-
Jim from Broadalbin, NY
-
Difficulty Level:Really Easy
-
Total Repair Time:Less than 15 mins
-
Tools:Nutdriver
Was this instruction helpful to you?
Thank you for voting!
Igniter went bad so gas wouldn't fire up
Removed a cover plate on the back of the stove. Unplugged the old igniter. Pulled the bottom drawer out. Reached in under the stove and undid the 2 screws holding the igniter in place. Screwed the new igniter in and put everything back together. The only tricky bit was reaching the igniter through the bottom drawer opening.
Parts Used:
-
Mick from Indianapolis, IN
-
Difficulty Level:Easy
-
Total Repair Time:30 - 60 mins
-
Tools:Nutdriver, Screw drivers
Was this instruction helpful to you?
Thank you for voting!