















SCG20200A Jenn-Air Range - Instructions
Keep searches simple. Use keywords, e.g. "leaking", "pump", "broken" or "fit".
Oven heat loss, door gasket needed replacement
The entire "project" took me less than 3 minutes, and required no tools at all! First, the saleswoman over the phone pointed me to the correct product for my problem ($30 less than what I thought I needed), and it arrived at my home within 4 days. Then, it was just a matter of pulling off the old gasket, and snapping the new one in place! Simple!
Parts Used:

-
Stephen from Chapell Hill, NC
-
Difficulty Level:Really Easy
-
Total Repair Time:Less than 15 mins
3 of 4 people
found this instruction helpful.
Was this instruction helpful to you?
Thank you for voting!
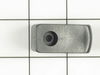
Broiler drawer didn't track poperly
Remove screw securing the broken drawer guide. Placed new drawer support in place and tightened screw. Replaced drawer. All done in less than 5 minutes (and cheaply).
Parts Used:
-
Keith from Atlanta, GA
-
Difficulty Level:Really Easy
-
Total Repair Time:Less than 15 mins
-
Tools:Screw drivers
3 of 4 people
found this instruction helpful.
Was this instruction helpful to you?
Thank you for voting!
Temp out of wack
-
Peter from Montello, WI
-
Difficulty Level:Really Easy
-
Total Repair Time:More than 2 hours
-
Tools:Nutdriver
3 of 4 people
found this instruction helpful.
Was this instruction helpful to you?
Thank you for voting!
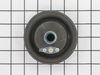
Burner head were clogged with grease
First I removed the old burner head by twisting it counter clockwise by using wide channel lock pliers. When It completely came off, the burner head had deteriorated so much that it almost came apart. When I took off the 2 wires from the burner head it also easily came apart. The burner-head was in really bad condition. I cleaned the whole area and connected the 2 wires to the new burner head and hand tightened in a clokwise direcrtion. It took 20 minutes to install.
Parts Used:
-
Jaime from Brooklyn, NY
-
Difficulty Level:A Bit Difficult
-
Total Repair Time:15 - 30 mins
-
Tools:Wrench (Adjustable)
4 of 7 people
found this instruction helpful.
Was this instruction helpful to you?
Thank you for voting!
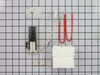
Oven taking to long to preheat.
Accessed igniter removed 2screws holding it.unpluged igniter installed new one.
Parts Used:
-
Isaac from LATHRUP VLG, MI
-
Difficulty Level:Very Easy
-
Total Repair Time:30 - 60 mins
-
Tools:Screw drivers
3 of 4 people
found this instruction helpful.
Was this instruction helpful to you?
Thank you for voting!
Oven burner would periodically go out and re-light
The ignitor is held on by two screws which were rusted in place. When I tried to remove them, the screws became stripped and had to be cut off.
Once the part was free, the rest of the repair went quickly . At that point:
- Pull the element leads enough to get to the plastic connector
- Disconnect the old part
- Connect the new part
- Re-attach to the bracket with new screws.
Once the part was free, the rest of the repair went quickly . At that point:
- Pull the element leads enough to get to the plastic connector
- Disconnect the old part
- Connect the new part
- Re-attach to the bracket with new screws.
Parts Used:
-
Richard from Merrimac, MA
-
Difficulty Level:Easy
-
Total Repair Time:15 - 30 mins
-
Tools:Screw drivers, Wrench set
3 of 4 people
found this instruction helpful.
Was this instruction helpful to you?
Thank you for voting!
Broiler front drawer slides broke
I noticed the drawer on the broiler was sliding crooked and found the plastic slides had broken. Of course I thought it would be a hassle and not worth the time to fix it. I would just "live with it". Boy was I wrong, it was probably the simplest fix ever. It was easy to get the correct parts from PartSelect with their exploded and concise diagram. The parts were ordered and delivered in a couple of days. It took me all of 10 minutes with a screwdriver to make the repairs. Now it is a good as new.
Parts Used:
-
Ernie from Fremont, CA
-
Difficulty Level:Really Easy
-
Total Repair Time:Less than 15 mins
-
Tools:Screw drivers
3 of 4 people
found this instruction helpful.
Was this instruction helpful to you?
Thank you for voting!
The inside glass was broken on oven door.
I was pleased with how the job went.
It took longer than expected because I am not really a "do it yourselfer", but I studied the door and reread how others managed the repair several times.
There were more screws than mentioned here.
Someone said 10 screws but there were 12.
In the end I was pleased and surprised how simple the job was, but recommend others read carefully what others have written. I didn't but learned one must.
It took longer than expected because I am not really a "do it yourselfer", but I studied the door and reread how others managed the repair several times.
There were more screws than mentioned here.
Someone said 10 screws but there were 12.
In the end I was pleased and surprised how simple the job was, but recommend others read carefully what others have written. I didn't but learned one must.
Parts Used:

-
Jacob from Cotton, MN
-
Difficulty Level:A Bit Difficult
-
Total Repair Time:30 - 60 mins
-
Tools:Screw drivers
3 of 4 people
found this instruction helpful.
Was this instruction helpful to you?
Thank you for voting!
Burner heads were rusted out, releasing flames from underneath and also clogged with carbon dust
Very simple! Unscrewed the burner heads with a simple twist, unplugged the two wires from the old head, plugged them into the new one, then screwed that back in. The flames are MUCH better - more efficient and safe. thank you! ( Only issue was when we ordered we didn't see a choice of color and the new ones are different, but it really doesn't matter on an older stove anyway.)
Parts Used:
-
Donald from Appleton, ME
-
Difficulty Level:Really Easy
-
Total Repair Time:Less than 15 mins
3 of 4 people
found this instruction helpful.
Was this instruction helpful to you?
Thank you for voting!
oven would not light
New parts matched up perfectly. Undid screws holding old igniter, hardest part of procedure because one screw was frozen and broke off. Pulled stove out and new igniter"s connector was identical. Pushed stove back into place and it lighted on the first try.
Parts Used:
-
gary from covington, LA
-
Difficulty Level:Easy
-
Total Repair Time:30 - 60 mins
-
Tools:Nutdriver, Screw drivers
2 of 2 people
found this instruction helpful.
Was this instruction helpful to you?
Thank you for voting!
gas burners would not light with electric ignighters
using the diagram shown on line Looked up the ignition module and ordered it by phone. Received it the next day and installed it within the hour. Previously I had called the repairman and he said it would be a couple of weeks before he could look at it and a service call was $75 plus parts..I fixed it for the cost of the module $34. I am very satisfied.
Parts Used:
-
Leo from Temple, TX
-
Difficulty Level:Easy
-
Total Repair Time:30 - 60 mins
-
Tools:Screw drivers, Wrench (Adjustable)
3 of 5 people
found this instruction helpful.
Was this instruction helpful to you?
Thank you for voting!
replace igniters
Watched u tube video as supplied and followed instructions. Had trouble getting burners off so cleaned around edge of burners with fine bladed knife as suggested by other forum user and used oil filter type wrench to remove burner. There are three bumps on burner that hold it in place so need to turn anti clockwise to remove.
Parts Used:
-
David from CHESTER, CA
-
Difficulty Level:Easy
-
Total Repair Time:30 - 60 mins
2 of 2 people
found this instruction helpful.
Was this instruction helpful to you?
Thank you for voting!
oven igniter although lit up it failed to permit gas valve to open
ordered new replacement oven igniter kit and also felt it was a good opportunity to change the oven temperature sensor so also ordered short oven sensor kit. both parts fit as described as original replacements with very little work involved. oven worked properly good well done and a big saving on a service call repair or new range.
Parts Used:
-
Teresa from BRICK, NJ
-
Difficulty Level:Easy
-
Total Repair Time:30 - 60 mins
-
Tools:Screw drivers
2 of 2 people
found this instruction helpful.
Was this instruction helpful to you?
Thank you for voting!
floor panel heavily stained and warped
-
Joel from Monroe, NY
-
Difficulty Level:Really Easy
-
Total Repair Time:Less than 15 mins
3 of 5 people
found this instruction helpful.
Was this instruction helpful to you?
Thank you for voting!
Burner cap had rusted out
-
robert from tisbury, MA
-
Difficulty Level:Really Easy
-
Total Repair Time:Less than 15 mins
2 of 2 people
found this instruction helpful.
Was this instruction helpful to you?
Thank you for voting!