















S1050EH-Z Admiral Range - Instructions
Keep searches simple. Use keywords, e.g. "leaking", "pump", "broken" or "fit".
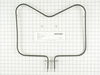
The original bake element burned out
1. Removed racks 2. Removed two screws holding in the bake element. 3. Gently pulled out the element exposing the two wires connected to it. 4. The two wires were held by a clip connection. 5. Removed the wire clips holding the wires. 6. Attached the clips to the new element and re-installed the element. New problem: The element did not heat up. A repairman informed me that the selector switch was damaged during the burnout- that switch was no longer manufactured and was discontinued. Whirlpool company was checked and indicated that there was a new part # 7403P023-60 but that was discontinued too. I was able to get the element working by moving the selector switch to the "Bake" position and then moving the switch about 1/4" in the clockwise direction. The element heated and the oven works at least for now as I search for a replacement part. PartSelect was an invaluable aid and helpful all along the process.
Parts Used:
-
William from Florissant, MO
-
Difficulty Level:Really Easy
-
Total Repair Time:15 - 30 mins
-
Tools:Pliers, Screw drivers
Was this instruction helpful to you?
Thank you for voting!
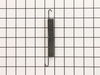
Broken Door Spring
Slid oven out from counters. On each side there are 3 screws on the front and three screws on the back holding the side piece on. Once off, the spring was very easy to get at and replace. I had only one broken, but replaced both anyways. I think it took longer to clean the sides of the oven that haven't been touched in years than to replace the springs. This job was very simple and easy.
Parts Used:
-
Matthew from Chippewa Falls, WI
-
Difficulty Level:Really Easy
-
Total Repair Time:15 - 30 mins
-
Tools:Pliers, Screw drivers
Was this instruction helpful to you?
Thank you for voting!
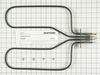
Broil element burned out
Removed the oven door, removed old burned element, installed new element. Turned CB back on and tested oven. Reinstalled oven door. Straight forward and easy to follow directions with new element.Local appliance part house said the element was no longer available. Thanks to you I did not need a new oven. Very easy replacement job with normal tools.Thanks
Parts Used:
-
Wallace from Lowell,, AR
-
Difficulty Level:Easy
-
Total Repair Time:15 - 30 mins
-
Tools:Screw drivers
Was this instruction helpful to you?
Thank you for voting!
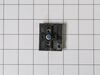
Burner was always in high temperature.
Pulled the range away from the wall and took out all the screws of the back panel. I had two different screws. Removed the dial and took two screws out behind the dial. Carefully removed the wires and placed them on the new switch. Screwed switch to panel, replaced dial and put the back panel back on range. Pushed range back into place.
Parts Used:
-
Dennis from Oak Lawn, IL
-
Difficulty Level:Really Easy
-
Total Repair Time:15 - 30 mins
-
Tools:Screw drivers
Was this instruction helpful to you?
Thank you for voting!
I had a power serge and it burned the Plug at the termial block and melted a few wire.
After we got the part in the mail my husband put it on and shortened the wires and put new plugs on the ends of the wires and we had to get a new plug put it on and it was fixed.
Parts Used:

-
Robin from Vanderbilt, PA
-
Difficulty Level:Really Easy
-
Total Repair Time:15 - 30 mins
-
Tools:Socket set
Was this instruction helpful to you?
Thank you for voting!
Burner stayed on "high", could not adjust heat
I UNPLUGGED STOVE, removed panel covering the controls, removed the knob on front and the two screws there that hold the control in, inserted new control and replaced the two screws on the front that hold it onto the stove, used needle nosed pliers to unplug one connection at a time from the old control and onto the new control in the back. When I had all connections plugged onto the new control I re-installed the panel cover with a screwdriver, plugged the stove back in, and the burner is now working good as new!
Parts Used:
-
Deborah from Hodgen, OK
-
Difficulty Level:Really Easy
-
Total Repair Time:15 - 30 mins
-
Tools:Pliers, Screw drivers
Was this instruction helpful to you?
Thank you for voting!
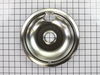
Drip bowls tarnished.
Remove heating element coils. & old drip pans. Install the new drip pans and reinsert the heating elements and insure all elements were level. For aesthetic reasons I replaced all the drip pans - 2 x 8" & 2 x 6".
Parts Used:
-
Jennifer from Albion, NE
-
Difficulty Level:Really Easy
-
Total Repair Time:15 - 30 mins
Was this instruction helpful to you?
Thank you for voting!
Burner was in full hot.
Turned off the power. Pull the range away from the wall and removed the eight screws holding the cover in place. Carefully pulled the wires off the old switch. Removed the old switch and replaced it with the new. Put all the wires on and replaced the back cover and was done. Burner works fine. This part replaces a lot of different number switches.
Parts Used:
-
Dennis from Oak Lawn, IL
-
Difficulty Level:Really Easy
-
Total Repair Time:15 - 30 mins
-
Tools:Pliers, Screw drivers
Was this instruction helpful to you?
Thank you for voting!
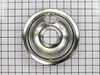
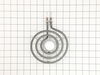
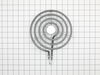
Elements did not fit properly.
Ordered the parts, installed.
Parts Used:
-
myrna from homestead, FL
-
Difficulty Level:Really Easy
-
Total Repair Time:Less than 15 mins
Was this instruction helpful to you?
Thank you for voting!
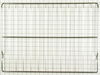
Somehow one of our oven racks was missing - maybe taken inadvertently from beside old refrigerator when it was removed.
We just installed the new rack in the oven. The amazing thing (after many unsuccessful attempts to find the correct rack) was having a friend recommend partselect.com. The gentleman I spoke to was extremely knowledgeable, helpful and efficient. We had our new rack 2 days after placing the order. We thought that kind of service didn't exist any more! Thank you so much. Now we can make 2 pizzas at the same time!!!
Parts Used:
-
Judy from Framingham, MA
-
Difficulty Level:Really Easy
-
Total Repair Time:Less than 15 mins
Was this instruction helpful to you?
Thank you for voting!
replace the cook stove's drip bowls instead of cleaning them
I removed the burners and then the older drip bowls of the cook stove--and then I put on the new drip bowls and put back on the burners. My mechanical skills were sufficient for the replacement of the drip bowls.
Parts Used:
-
Dallas from Arlington, TX
-
Difficulty Level:Really Easy
-
Total Repair Time:Less than 15 mins
Was this instruction helpful to you?
Thank you for voting!
I needed to replace to two 8* drip bowls on the kitchen range
(a) I took out (and threw away) two stained 8* chrome drip bowls on my kitchen range; (b) ti put in two new 8" chrome drip bowls on my kitchen range. I'm pleased that I was equal to the task.
Parts Used:
-
Dallas from Arlington, TX
-
Difficulty Level:Really Easy
-
Total Repair Time:Less than 15 mins
Was this instruction helpful to you?
Thank you for voting!
Stove needed new bowls
-
Karen from Kettering, OH
-
Difficulty Level:Really Easy
-
Total Repair Time:Less than 15 mins
Was this instruction helpful to you?
Thank you for voting!
Old dirty drip pans
Removed heating element, installed new drip pan, replaced heating element. Was amazed at fast delivery - ordered in afternoon, arrived fed ex next morning!
Parts Used:
-
gizella from mays landing, NJ
-
Difficulty Level:Really Easy
-
Total Repair Time:Less than 15 mins
Was this instruction helpful to you?
Thank you for voting!
The drip pans needed replacing.
Put in the new drip pan -- which are really nice shiny ones.
Parts Used:
-
Alison from Carnation, WA
-
Difficulty Level:Really Easy
-
Total Repair Time:Less than 15 mins
Was this instruction helpful to you?
Thank you for voting!