















RVM1535DMB General Electric Microwave - Instructions
Keep searches simple. Use keywords, e.g. "leaking", "pump", "broken" or "fit".
Still runs even the door was open
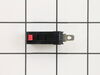
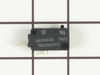
Pulled it from the wall remove the front vent covers removed the control panel remove the door switches by a special screw driver bit which looks a star remove the electrical terminals pressed the plastic clip pulled the switch replaced it with new one then followed initial steps backward
Parts Used:
-
Erwin from CONROE, TX
-
Difficulty Level:Really Easy
-
Total Repair Time:30 - 60 mins
-
Tools:Pliers
2 of 3 people
found this instruction helpful.
Was this instruction helpful to you?
Thank you for voting!
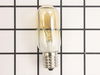
Cracked Light Lens, Burned Out Bulbs
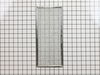
Easy peasy - removed lens holder w/screw driver. Cleaned cover after removing damaged glass lens. Then unscrewed burnt out light bulbs. Installed new bulbs, slid in new light lens into holder and screwed back into bottom of microwave. Removed greasy filter and slid in new filter. Done!
Parts Used:
-
Nancy from FAYETTEVILLE, AR
-
Difficulty Level:Really Easy
-
Total Repair Time:Less than 15 mins
-
Tools:Screw drivers
2 of 3 people
found this instruction helpful.
Was this instruction helpful to you?
Thank you for voting!
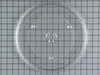
rotating plate broke
-
regina from weston, FL
-
Difficulty Level:Really Easy
-
Total Repair Time:Less than 15 mins
2 of 3 people
found this instruction helpful.
Was this instruction helpful to you?
Thank you for voting!
Microwave will not start
Removed three screws from the top front cover and slide it out and following I removed the touch panel and the housing that holds the switches and replaced the bad one.
Parts Used:
-
Carlos from GLENDALE, NY
-
Difficulty Level:Very Easy
-
Total Repair Time:15 - 30 mins
-
Tools:Nutdriver, Screw drivers
3 of 6 people
found this instruction helpful.
Was this instruction helpful to you?
Thank you for voting!
microwave Quit working but lights worked
-
Rick from Muncie, IN
-
Difficulty Level:Really Easy
-
Total Repair Time:15 - 30 mins
-
Tools:Screw drivers
5 of 12 people
found this instruction helpful.
Was this instruction helpful to you?
Thank you for voting!
glass light lens was broken, had collected grease, was dark.
Simply removed screw, pulled down light holder, unfoled the metal tabs, took out the broken pieces and replaced the glass lens and light bulb.
Parts Used:
-
William from Littleton, CO
-
Difficulty Level:Really Easy
-
Total Repair Time:Less than 15 mins
-
Tools:Screw drivers
2 of 3 people
found this instruction helpful.
Was this instruction helpful to you?
Thank you for voting!
light lens broke a couple of years ago
unscrewed the screw, pried up metal tabs that hold in light lens. took out broken pieces, slid in new light lens re-secured tabs with fingers, screwed in the screw again.
Parts Used:
-
KAREN from MANSFIELD, MA
-
Difficulty Level:Really Easy
-
Total Repair Time:Less than 15 mins
-
Tools:Screw drivers
3 of 6 people
found this instruction helpful.
Was this instruction helpful to you?
Thank you for voting!
Broken lens
remove two screws bend out flaps remove broken glass install new glas bend flaps back to hold glass install two screws. Done.
Parts Used:
-
Norman from Voorheesville, NY
-
Difficulty Level:Really Easy
-
Total Repair Time:Less than 15 mins
-
Tools:Screw drivers
1 person
found this instruction helpful.
Was this instruction helpful to you?
Thank you for voting!
Timer, light and control pad worked. Turn table and heat did not work. Oven would not start up.
I first read where someone had the same problem. Their solution was a burned-out fuse. I ordered a new fuse...installed it and that did not solve my problem. I revisted PartSelect and read how Marla (from Arlington, TX)solved her problem. I purchased a secondary switch and when it arrived, I made a copy of Marla's instructions and followed them to the letter. I installed the new secondary switch into the secondary space, put everything back together and the oven STILL DID NOT WORK. I had to take the latching panel apart again and test each switch to see if there was another bad one. I found that the third switch was burned out. So I took the new switch out of the second slot and installed it into the third slot. I tested the switches before reinstalling the latching panel. This time everything worked. So I put everything back together, reinstalled the microwave on the wall, tested it again, and everything worked perfectly.
Parts Used:

-
Pearlie from Beulaville, NC
-
Difficulty Level:A Bit Difficult
-
Total Repair Time:30 - 60 mins
-
Tools:Screw drivers
1 person
found this instruction helpful.
Was this instruction helpful to you?
Thank you for voting!
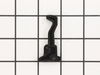
Broken Hook on Microwave Door
This particular model has 2 hooks that are separate.
1. Remove the plastic trim on the inside of the door. Use a spatula and be care not to break any of the snapping parts. It will come apart.
2. There will be a metal trim that needs to be removed in order to get to the "screw" or "rod" that holds the hook in place.
3. All around the metal trim, there are plastic snaps. Use a screw driver to release the snaps from the metal trim.
4. My metal trim did not want to fully be removed... I was able to release the side where the hooks were and the bottom snaps.
5. Use the needle nose pliers to remove the spring. I found it easier to remove the bottom part of the spring to free the hook.
6. I had to pull on the metal trim enough to get the rod out of the hook so the hook could be removed. Very difficult with one person, but I got it done.
7. Put the spring in the new hook before you install it.
8. Put the rod back in, then the hook, then through the right hole.
9. Attach the bottom of the spring back to the lower hole.
10. Snap the metal trim back onto the microwave door.
11. Snap the plastic trim back onto the door.
12. Move the hooks up and down and feel there is tension. This should probably be done after Step 9.
13. Breathe!!!!
1. Remove the plastic trim on the inside of the door. Use a spatula and be care not to break any of the snapping parts. It will come apart.
2. There will be a metal trim that needs to be removed in order to get to the "screw" or "rod" that holds the hook in place.
3. All around the metal trim, there are plastic snaps. Use a screw driver to release the snaps from the metal trim.
4. My metal trim did not want to fully be removed... I was able to release the side where the hooks were and the bottom snaps.
5. Use the needle nose pliers to remove the spring. I found it easier to remove the bottom part of the spring to free the hook.
6. I had to pull on the metal trim enough to get the rod out of the hook so the hook could be removed. Very difficult with one person, but I got it done.
7. Put the spring in the new hook before you install it.
8. Put the rod back in, then the hook, then through the right hole.
9. Attach the bottom of the spring back to the lower hole.
10. Snap the metal trim back onto the microwave door.
11. Snap the plastic trim back onto the door.
12. Move the hooks up and down and feel there is tension. This should probably be done after Step 9.
13. Breathe!!!!
Parts Used:
-
Barbara from GLENDALE, AZ
-
Difficulty Level:A Bit Difficult
-
Total Repair Time:30 - 60 mins
-
Tools:Screw drivers
1 person
found this instruction helpful.
Was this instruction helpful to you?
Thank you for voting!
Not heat
-unplug
-remove top and front covers
-unplug wire connectors from heating assembly
-remove heating assembly from metal stand and push out of the way
-remove metal stand from dry
-pull out heating assembly
-install new one in reserve order
-remove top and front covers
-unplug wire connectors from heating assembly
-remove heating assembly from metal stand and push out of the way
-remove metal stand from dry
-pull out heating assembly
-install new one in reserve order
Parts Used:
-
Kip from POWELL, OH
-
Difficulty Level:Very Easy
-
Total Repair Time:15 - 30 mins
-
Tools:Screw drivers, Socket set
1 person
found this instruction helpful.
Was this instruction helpful to you?
Thank you for voting!
Previoous glass lens was broken
This repair was easy and could be done by anyone. If you undertake to do this replacement, remember to slowly bend the medal tabs back that hold the lens. Handled roughly these tabs could break off.
This repair can be don in under 5 minutes, easily !!
This repair can be don in under 5 minutes, easily !!
Parts Used:
-
Tommy from Santa clarita, CA
-
Difficulty Level:Really Easy
-
Total Repair Time:15 - 30 mins
-
Tools:Screw drivers
1 person
found this instruction helpful.
Was this instruction helpful to you?
Thank you for voting!
One of the 2 door latches broke
Very easy replacement by taking off the plastic trim and than the front portion of the door. Unscrew the 2 screws holding the door handle. Both pieces just snap off from clips. Next pull the spring off the latch and slide the pin that secures the latch to the door. Install everything by reversing your procedures when taking apart completing the repair.
Parts Used:
-
Duane from BUCKEYE, AZ
-
Difficulty Level:Really Easy
-
Total Repair Time:Less than 15 mins
-
Tools:Pliers, Screw drivers
1 person
found this instruction helpful.
Was this instruction helpful to you?
Thank you for voting!
Under the microwave there are two light bulbs that light up the top of the oven/range.
Last week I removed the glass cover that was held in by one screw and removed the burnt out light bulb. I ordered the bulb and left the glass cover off until the bulb arrived. I had to wait until this evening to put the glass cover back on and fasten the screw because I have a window right next to the oven and the sun streaming in made it too difficult for me to see how to put the glass back in and replace the screw.
Parts Used:
-
Janet from TREASURE IS, FL
-
Difficulty Level:Very Easy
-
Total Repair Time:Less than 15 mins
-
Tools:Screw drivers
1 person
found this instruction helpful.
Was this instruction helpful to you?
Thank you for voting!
bulb burned out light that is under the microwave, which lights the oven below.
thank you for the video--very clear, responsible, applicable although the illustration was not exactly of our kind of light. the bulb was exactly like the one Hotpoint used in its microwave made in 1989! I will come back to you for parts in the future. (You have the model # from my original order.)
Parts Used:
-
Gary from UNIVERSITY PA, MD
-
Difficulty Level:Really Easy
-
Total Repair Time:Less than 15 mins
-
Tools:Screw drivers
1 person
found this instruction helpful.
Was this instruction helpful to you?
Thank you for voting!