















RT18BKXAL00 Whirlpool Refrigerator - Instructions
Keep searches simple. Use keywords, e.g. "leaking", "pump", "broken" or "fit".
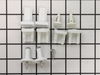
Shelf studs broke several years ago and I had a problem locating them. Finally wised up and checked Part Direct and found them, ordered the kit w/ 12 pieces. Then quickly watched the installation video. Took less than 30 minutes to replace two different studs. Wife is very happy.
Simply took broken pieces of old stud out and replaced with the new ones. Used pliers to adjust them. Replace a freezer stud and a fridge stud.
Parts Used:
-
Karl from BIRDSBORO, PA
-
Difficulty Level:Easy
-
Total Repair Time:15 - 30 mins
-
Tools:Pliers
1 person
found this instruction helpful.
Was this instruction helpful to you?
Thank you for voting!
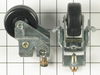
One of the front wheels was broken in half.
Very easy. Left the front of the refrigerator so it is approx. 4 inches of the floor. (used a two by four. Removed the screws (one for each roller). Removed the rollers and replaced with new rollers. Reinstalled the screws with secures the rollers to the refrigerator. Done
Parts Used:
-
John from INNSBROOK, MO
-
Difficulty Level:Very Easy
-
Total Repair Time:15 - 30 mins
-
Tools:Nutdriver
1 person
found this instruction helpful.
Was this instruction helpful to you?
Thank you for voting!
Condenser fan motor froze up
Unplug fridge, unpluged fan motor from plug socket, removed bracket screws, removed fan retainer clip from shaft. removed screws holding fan to bracket
Parts Used:

-
Douglas from Mesa, AZ
-
Difficulty Level:Easy
-
Total Repair Time:15 - 30 mins
-
Tools:Nutdriver, Pliers
2 of 4 people
found this instruction helpful.
Was this instruction helpful to you?
Thank you for voting!
Motor noise while running and clicking when shutting off
The instruction sheet supplied with the new motor described the steps to take very good. Replaced the rubber grommets for the three motor mounts also. A flashlight or light source was needed or was very helpful.
Parts Used:
-
Curtis from Sedona, AZ
-
Difficulty Level:Easy
-
Total Repair Time:15 - 30 mins
-
Tools:Nutdriver, Pliers
1 of 2 people
found this instruction helpful.
Was this instruction helpful to you?
Thank you for voting!
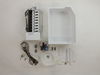
old ice maker quit making ice
replaced ice maker with recommended add on kit. easy to replace exact replacement. used this company for washing machine part. parts correct both times.
Parts Used:
-
CONRAD from RENICK, WV
-
Difficulty Level:Really Easy
-
Total Repair Time:30 - 60 mins
-
Tools:Nutdriver, Pliers, Screw drivers
1 of 2 people
found this instruction helpful.
Was this instruction helpful to you?
Thank you for voting!
Nonr
-
Gaynell P from Spring, TX
-
Difficulty Level:Really Easy
-
Total Repair Time:Less than 15 mins
1 of 2 people
found this instruction helpful.
Was this instruction helpful to you?
Thank you for voting!
refrigerator stopped cooling due to condenser over-heating
Pull refrigerator out to access back, unplug unit and remove the 3 .25" screws cut the power leads to motor and install new with easy to understand instructions provided with new motor. Plug refrigerator back in and enjoy your cold beverages once more. EASIEST REPAIR EVER.
Parts Used:
-
Kevin from COVINGTON, LA
-
Difficulty Level:Really Easy
-
Total Repair Time:Less than 15 mins
-
Tools:Nutdriver, Pliers
1 of 2 people
found this instruction helpful.
Was this instruction helpful to you?
Thank you for voting!
Ice maker stopped making ice.
This was really easy to do thanks to comments posted on the Partselect web site and the instructions included in the package. I removed three screws, unplugged the wire harness using a small screw driver to "unlock" the harness, removed the old ice maker assembly from the freezer, and reversed the process with the new assembly. Saved the valve and other parts for future use. The new unit started making ice within an hour or two. Very cool!
Parts Used:
-
Miguel from Hollywood, FL
-
Difficulty Level:Really Easy
-
Total Repair Time:15 - 30 mins
-
Tools:Nutdriver, Screw drivers
1 of 2 people
found this instruction helpful.
Was this instruction helpful to you?
Thank you for voting!
Condenser Fan Failure
Partition between Freezer and Fridge was running very hot. (Warm is normal). Oiling fan did not work. The only problems encountered in the replacement were getting fan out and in through coolant lines, cut plug off to accomodate generic fan wiring, getting the screws back in without cooking your hand on a hot compressor. Unit works great!
Parts Used:
-
Al from Tonka Bay, MN
-
Difficulty Level:Easy
-
Total Repair Time:30 - 60 mins
-
Tools:Socket set
2 of 5 people
found this instruction helpful.
Was this instruction helpful to you?
Thank you for voting!
freezer and food section too warm
removed lower back cover. diconnected fan ass'y electrical connection, removed fan housing (3 screws). removed fan motor from housing. cut old connector from fan and installed on new fan with wire nuts included. re-installed new fan to housing and re-installed housing to frame.
Parts Used:
-
William from Milford, MA
-
Difficulty Level:Easy
-
Total Repair Time:30 - 60 mins
-
Tools:Socket set
1 of 2 people
found this instruction helpful.
Was this instruction helpful to you?
Thank you for voting!
fan motor had gone bad
I removed the nuts that held the motor mount, then removed fan blade, cut the wires, and slid the motor pass the mounts and the coil shroud, Installed motor in reverse order. worked out ok.
Parts Used:
-
william from whitwell, TN
-
Difficulty Level:Easy
-
Total Repair Time:30 - 60 mins
-
Tools:Screw drivers, Socket set, Wrench set
1 of 2 people
found this instruction helpful.
Was this instruction helpful to you?
Thank you for voting!
cooling fan quit
Ordered new fan motor on line took out old motor and replaced with new one
Parts Used:
-
George from Belhaven, NC
-
Difficulty Level:Easy
-
Total Repair Time:30 - 60 mins
-
Tools:Nutdriver
1 of 2 people
found this instruction helpful.
Was this instruction helpful to you?
Thank you for voting!
Ice-maker would not make ice.
Took three screws out of the old ice-maker, disconnected the electric pigtail in the freezer, shut the water off, removed two mounting screws on the water valve (back & bottom of fridge), used a wrench to remove the water lines.
Put new valve on, reattached water lines, connected electric pigtail to ice-maker, put 3 screws back in to mount ice-maker, turned the water on and had ice in about 6 hours.
VERY EASY - All the parts for various installation were included and the instructions are easy to follow.
Put new valve on, reattached water lines, connected electric pigtail to ice-maker, put 3 screws back in to mount ice-maker, turned the water on and had ice in about 6 hours.
VERY EASY - All the parts for various installation were included and the instructions are easy to follow.
Parts Used:
-
WILLIAM from PALM HARBOR, FL
-
Difficulty Level:Really Easy
-
Total Repair Time:15 - 30 mins
-
Tools:Nutdriver, Wrench set
1 of 2 people
found this instruction helpful.
Was this instruction helpful to you?
Thank you for voting!
Poor design leaves fitting vulnerable to damage. Part was broken when pushed to close to the wall.
-
Mike from Camas, WA
-
Difficulty Level:Really Easy
-
Total Repair Time:Less than 15 mins
-
Tools:Screw drivers
1 of 2 people
found this instruction helpful.
Was this instruction helpful to you?
Thank you for voting!
Broken shelf supports
-
Bob from Las Vegas, NV
-
Difficulty Level:Really Easy
-
Total Repair Time:Less than 15 mins
1 of 2 people
found this instruction helpful.
Was this instruction helpful to you?
Thank you for voting!