















RT16DKYVG01 Whirlpool Refrigerator - Instructions
Keep searches simple. Use keywords, e.g. "leaking", "pump", "broken" or "fit".
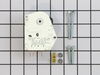
Water was running into refrig from freezer and ice cream was soft
We wasted time looking for the electrical schematic on our refrigerator (the first step in the instructions). By skipping that and reading further in the instructions, the type of cooling that the refrigerator has can easily be determined by the colors of the wires that go to the defrost timer. You need to know this to set up the timer properly for your specific refrigerator. Had I just started there, the entire repair would have taken less than 10 minutes. Very simple repair and it works like a charm, no more water coming into the refrigerator and the ice cream is rock hard. Glad we didn't have to spend lots on a new appliance. Thanks Part Select.com! BH
Parts Used:
-
William from Delano, MN
-
Difficulty Level:Really Easy
-
Total Repair Time:Less than 15 mins
-
Tools:Nutdriver
Was this instruction helpful to you?
Thank you for voting!
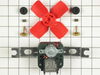
Noisy fan
Unplug the refrigerator. Remove the rear shelf supports by lifting them straight up. No tools required. Remove the screws holding the rear cover of the freezer. Use a nut driver to remove the 4 screws holding the fan housing. Unplug the wiring harness, then remove the fan and install the new one. Remount the housing, plug in the harness replace the rear cover, install the shelf supports and plug in the refrigerator. It was 30 minutes start to finish, which includes the time to gather the tools, unload and reload the freezer, and putting the tolls away!
Parts Used:
-
Harry from Cincinnati, OH
-
Difficulty Level:Really Easy
-
Total Repair Time:15 - 30 mins
-
Tools:Nutdriver, Screw drivers
Was this instruction helpful to you?
Thank you for voting!
How to get timer out of defrost cycle?
Talked to local appliance repair tech, who explained how to manually turn timer with a screw driver and listen to the switch go from on to off.
Parts Used:
-
David from Virginia Beach, VA
-
Difficulty Level:A Bit Difficult
-
Total Repair Time:15 - 30 mins
-
Tools:Socket set
Was this instruction helpful to you?
Thank you for voting!
Loud noise from freezer when running
Pulled the electric plug! Removed the freezer shelf and the rear shelf supports by pulling straight up. Swung rear panel out of the way after taking out the two phillips head screws at the top. Removed the plastic deflector grill to which the motor is attached with a nut driver. Removed motor from grill and disconnected wire prongs (pull off). Attach new motor. Only issue - the ground prong has been moved to the front of the motor so the wire just reaches and has to be gently bent back so the fan blade clears it. Reattach deflector grill. Push on fan blade, but not too far to hit wire. Reassemble the rest in reverse order.
Parts Used:
-
Joseph from Cottsge Grove, WI
-
Difficulty Level:Easy
-
Total Repair Time:Less than 15 mins
-
Tools:Nutdriver, Pliers, Screw drivers
Was this instruction helpful to you?
Thank you for voting!
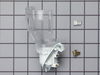
Protective cover for bulb had melted
I tried to just replace the cover rather than the whole unit but it was impossible - the cover would not go/stay on. I tried to remove the old unit completely but it would not unplug it was practically fused to the back of the fridge and the liner was cracking. I ended up breaking the cover and jerry rigging it over the bulb to prevent items in the fridge from being able to touch. Bad solution.
Parts Used:
-
Lee from Brooklyn, NY
-
Difficulty Level:Very Difficult
-
Total Repair Time:15 - 30 mins
-
Tools:Screw drivers, Wrench (Adjustable)
Was this instruction helpful to you?
Thank you for voting!
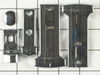
The handle end cap was broken.
The most difficult problem was determining what part I needed.Once I was able to find the parts description, selecting the part was easy. Ordering the part was a simple matter of following the instructions. Imagine my surprise when I received the parts on the very next day!! The installation of the new parts was very easy. Thank you for keeping me from buying a new refrigerator.
Parts Used:
-
Terry from Flint, MI
-
Difficulty Level:Really Easy
-
Total Repair Time:Less than 15 mins
-
Tools:Screw drivers
Was this instruction helpful to you?
Thank you for voting!
light switch sticking
I watched the video and thought "I can do this". Made some notes and then proceeded to remove the old switch and replace with the new one. Thank you.
Parts Used:

-
Paula from Rush, NY
-
Difficulty Level:Easy
-
Total Repair Time:Less than 15 mins
-
Tools:Pliers, Screw drivers
Was this instruction helpful to you?
Thank you for voting!
No light in frig
We tried repairing with a new switch which was very easy to install but it didn't fix the problem.
Parts Used:
-
Irene from Whitehall, MT
-
Difficulty Level:Really Easy
-
Total Repair Time:Less than 15 mins
Was this instruction helpful to you?
Thank you for voting!
fan motor did not run all the time
unpluged refrigerator. removed panel in front of fan. Removed the fan motor. Installed the new fan kit. Replaced the panel in front of fan. Pluged the refrigerator back in. The refrigerator runs a 100 percent better
Parts Used:
-
Charles from Marion, IN
-
Difficulty Level:Really Easy
-
Total Repair Time:Less than 15 mins
-
Tools:Nutdriver, Pliers, Screw drivers
Was this instruction helpful to you?
Thank you for voting!
exchange of defective light rocker switch
1)pry out the old/defective light rocker switch with a screw driver (flat head) and pull out the cables 2)unplug two connectors at the end of light rocker switch 3) connect new light rocker into two connectors 4)push the wires inside and put back new light rocker switch
Parts Used:
-
Steve from River Edge, NJ
-
Difficulty Level:Really Easy
-
Total Repair Time:Less than 15 mins
-
Tools:Screw drivers
Was this instruction helpful to you?
Thank you for voting!
The Refrigerator Was Running But Blowing Hot Air, Everything In Freezer Had Defrosted.
First I watched the video on your website, it was quite helpful. It showed me the location of the part to be replaced. Then I used the nut driver to remove a couple of screws, and slowly pulled the cover off . Once I pulled the cover down I could see the part that needed replacing, it had a couple of phillips head screws holding it in place, I removed those screws and unplugged the defrost timer, taking note of the color of the wires. Then I took the new defrost timer and attached the loose wire to the correct terminal according to the directions(this is where the color of your wires comes in), then I plugged in the new defrost timer and replaced the screws. I then reattached the cover making sure not to pinch any of the wires, and replaced the screws. It was so easy I was sure I did something wrong and it wouldn't work, but I plugged the refrigerator back in and let it sit for about 20 minutes and then when I checked it was running cool. I'm 55 years old and never had the nerve to try anything like this before but since my husband passed away I've had to try things myself or replace a lot of appliances. If I can do it anyone can.
Parts Used:
-
Jeanne from Fairview Heights, IL
-
Difficulty Level:Really Easy
-
Total Repair Time:Less than 15 mins
-
Tools:Nutdriver, Screw drivers
Was this instruction helpful to you?
Thank you for voting!
Light in the refrigerator didn't work
I did exactly as the video showed. I popped out the old switch, disconnected the two terminals, connected the new switch and put it back. The light now works! The refrigerator is over 25 years old and the switch works! What a great website this is. Couldn't of done the job without Partselect's help.
Parts Used:
-
Anthony from Fairport, NY
-
Difficulty Level:Really Easy
-
Total Repair Time:Less than 15 mins
-
Tools:Screw drivers
Was this instruction helpful to you?
Thank you for voting!
evaporator tray rusted out leaking water on floor
Had no problem at all it took about 5 minutes to get the tray off and about 5 minutes to put new tray on.New part fit perfect. Thanks Robert Lovern
Parts Used:
-
robert from amory, MS
-
Difficulty Level:Really Easy
-
Total Repair Time:Less than 15 mins
-
Tools:Wrench (Adjustable)
Was this instruction helpful to you?
Thank you for voting!
Hinge bracket between refrig and bottom freezer had broken. This is the part which keeps the door from opening too far.
After I did the prep work of removing the items inside the door the project took less than 15 minutes to get the repair job done. 1. Remove the door by taking off the top hinge cover on top of the door, remove the three screws with a socket wrench, remove the plastic gasket under the hinge, left door up and off the lower hinge pin 2. Place the new bracket on the freezer door hinge pin, flange side down 3. I had to place an extra spacer washer, which I had on hand, on top of the hinge bracket 4. Replace the door on the bottom hinge pin 5. My husband held the door in place as I reattached the top of the door with the plastic spacer and 3 screws I had removed 6. Replaced the plastic gasket and hinge cap on the top 7. With the door reattached, I removed the existing screw under the door directly below the new hinge bracket, lined up the hinge bracket to the screw hole and attached it in place. Much to my surprise and pleasure, the door swings perfectly, stopping where it should with the door shelves loaded! Thank you PartSelect for having a part that would work for my 16 year old refrigerator even though I had to add a washer shim to make the new part as thick as the original.
Parts Used:
-
Mary from Tillamook, OR
-
Difficulty Level:Really Easy
-
Total Repair Time:Less than 15 mins
-
Tools:Screw drivers, Socket set
Was this instruction helpful to you?
Thank you for voting!
stopped cooling
I looked for the obvious sign of malfunction, a leak lack of air flow dirty coil finding nothing obvious I checked the electrical components and the first was the start relay with a bimetal temperature switch was the problem that was identifyed when removed due to the relay sounding like it was internally damaged because of severe rateling
Parts Used:

-
bradley from harlingen, TX
-
Difficulty Level:Really Easy
-
Total Repair Time:Less than 15 mins
-
Tools:Nutdriver
Was this instruction helpful to you?
Thank you for voting!