















RS257BAWWXAA Samsung Refrigerator - Instructions
Keep searches simple. Use keywords, e.g. "leaking", "pump", "broken" or "fit".
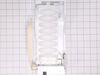
Ice maker not functioning properly
Barely losened the two rear screws. Took out the two front screws and the ice maker slides toward front of fridge off the 2 rear screws. Unhooked the wiring plug. Replaced with new ice maker.
Parts Used:
-
Bill from Tucson, AZ
-
Difficulty Level:Easy
-
Total Repair Time:15 - 30 mins
-
Tools:Screw drivers
2 of 3 people
found this instruction helpful.
Was this instruction helpful to you?
Thank you for voting!
Refrigeration side was not cold enough.
Replaced the Broken Cover Motor and the Fan Blade. Fan motor was test with 12VDC power supply, or by replugging fan connector and holding down the door closing switch.
After a few days, the fan made loud noise. Due to defrog heater was open when it was test with ohmmeter. Ice deposited around the fan.
I had to buy a whole ASSY EVAP-REF part # DA96-00395C, and seperated the evaperator, and replaced the heater and sensor.
Spray bottle was used spray hot water to de-iced the evaperator. And salt accelerated the ice melting process.
Note: spray water to clean salt before installing new parts
After a few days, the fan made loud noise. Due to defrog heater was open when it was test with ohmmeter. Ice deposited around the fan.
I had to buy a whole ASSY EVAP-REF part # DA96-00395C, and seperated the evaperator, and replaced the heater and sensor.
Spray bottle was used spray hot water to de-iced the evaperator. And salt accelerated the ice melting process.
Note: spray water to clean salt before installing new parts
Parts Used:


-
Ductri from RESEDA, CA
-
Difficulty Level:A Bit Difficult
-
Total Repair Time:More than 2 hours
-
Tools:Screw drivers
1 of 3 people
found this instruction helpful.
Was this instruction helpful to you?
Thank you for voting!
Lever Dispenser-Ice Was Broken.
Using the putty knife, pry off the faceplate for the ice/water dispenser. Disconnect the wire harness. Using philips head screwdriver, remove the dispenser assembly. Remove the old dispenser and replace. Reverse for reassembly. Note * I should have bought the water dispenser lever and replaced it as well since I had the assembly out. Secondary note * be mindful during reassembly to not put pressure on the water dispenser or have a glass handy. :)
Parts Used:

-
RUSSELL from LAS VEGAS, NV
-
Difficulty Level:Easy
-
Total Repair Time:15 - 30 mins
-
Tools:Screw drivers
0 of 2 people
found this instruction helpful.
Was this instruction helpful to you?
Thank you for voting!
Ice tray had cracked and broken. The water is still not filling up my ice tray.
The replacement was fairly simple. I removed the existing tray and detached the water line. Once the water line water reattached to the new tray I inserted into the ice maker.
*** The problem I'm having now is the water is not filling up the tray***
Not sure what I did wrong? Any help would be greatly appreciated!!!
*** The problem I'm having now is the water is not filling up the tray***
Not sure what I did wrong? Any help would be greatly appreciated!!!
Parts Used:

-
Timothy from SALISBURY, NC
-
Difficulty Level:Easy
-
Total Repair Time:15 - 30 mins
5 of 29 people
found this instruction helpful.
Was this instruction helpful to you?
Thank you for voting!
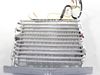
Refrigerator section stopped cooling evaporator was iced up
1:Removed heating element and sensors from new evaporator assembly supplied by partSelect. 2: removed the evap covers, and defrosted the evaporator in place used a hair dryer to speed things up. 3: Pried open the old evap heater from the evaporator assembly while still in place. replaced the new heating element and sensors 4: closed up the covers and powered back up. Saved on a $2500.00 expense on buying a new refrigerator, and saved the environment too!
Parts Used:
-
Nikhil from Mountainside, NJ
-
Difficulty Level:Easy
-
Total Repair Time:More than 2 hours
-
Tools:Pliers, Screw drivers
Was this instruction helpful to you?
Thank you for voting!