















RMC305PVT00 Whirlpool Microwave Oven Combo - Instructions
Keep searches simple. Use keywords, e.g. "leaking", "pump", "broken" or "fit".
Didn't heat
Cordless drill removed 2 screws replaced element and 2 screws
Done. Didn't use new bracket
Done. Didn't use new bracket
Parts Used:

-
Mark from TRENTON, NE
-
Difficulty Level:Very Easy
-
Total Repair Time:Less than 15 mins
-
Tools:Screw drivers
1 person
found this instruction helpful.
Was this instruction helpful to you?
Thank you for voting!
REPLACED NONFUNCTIONAL BROIL ELEMENT
-
Frederick from STONINGTON, CT
-
Difficulty Level:Easy
-
Total Repair Time:15 - 30 mins
-
Tools:Pliers, Screw drivers
1 person
found this instruction helpful.
Was this instruction helpful to you?
Thank you for voting!
Microwave door glass shattered.
Hired a professional installer who completed the installation, after he left used the microwave once, and 2 hours later glass shattered again. This was very frustrating and costly.
Parts Used:

-
ERNEST from BERNALILLO, NM
-
Difficulty Level:Very Difficult
-
Total Repair Time:More than 2 hours
-
Tools:Pliers, Screw drivers, Socket set
1 person
found this instruction helpful.
Was this instruction helpful to you?
Thank you for voting!
The video gave me the confidence to order the part
The tech said he used No 2 Phillip's. Once I took the door off and removed the racks I quickly learned a Phillips was not going to work. I am now the proud owner of a Kobslt star and square ratchet screwdriver.
Parts Used:

-
Leroy from SUWANEE, GA
-
Difficulty Level:Really Easy
-
Total Repair Time:30 - 60 mins
-
Tools:Screw drivers
1 person
found this instruction helpful.
Was this instruction helpful to you?
Thank you for voting!
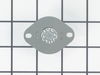
After using self cleaning feature oven wouldn't heat
I looked up the problem and determined I needed to replace the limit switch which is inside the back panel. As a 78 year old woman who isn't afraid to tackle these problems I found this easier than most. Just be sure to disconnect the electrical connection if you don't have long enough length to pull oven from the wall cabinet. I won't put any sheet pans in the oven next time I self clean it.
Parts Used:
-
Nadine from ALACHUA, FL
-
Difficulty Level:Really Easy
-
Total Repair Time:30 - 60 mins
-
Tools:Screw drivers
1 person
found this instruction helpful.
Was this instruction helpful to you?
Thank you for voting!
Limit Thermostat had burned out due to high temp of self cleaning mode
1) Removed the trim pieces (2 screws). 2) removed the 2 screws holding the oven in the wall. 3) Slid the oven out of the wall cabinet 4) removed the back panel of the oven ( 10 screws. 5.) removed the old thermostat (2 nuts) 6.). Installed the new thermostat and reversed steps 4-1
Parts Used:
-
Jay from MINNETRISTA, MN
-
Difficulty Level:Easy
-
Total Repair Time:30 - 60 mins
-
Tools:Nutdriver, Screw drivers
1 person
found this instruction helpful.
Was this instruction helpful to you?
Thank you for voting!
E1 and e15
-
Calvin from GARNER, NC
-
Difficulty Level:Really Easy
-
Total Repair Time:30 - 60 mins
-
Tools:Screw drivers
1 person
found this instruction helpful.
Was this instruction helpful to you?
Thank you for voting!
broken glass dish for microwave
no repair needed - ordered part, came within 3 days - very satisfied
Parts Used:

-
Janet from Concord, CA
-
Difficulty Level:Really Easy
-
Total Repair Time:Less than 15 mins
1 of 2 people
found this instruction helpful.
Was this instruction helpful to you?
Thank you for voting!
I snapped a bolt on the main power terminal block when connecting the pigtail.
Removed the small metal panel covering the main power terminal in back of the electric range. Removed the nuts holding the red, white and black electrical wires from the range using the appropriate socket (there will be two nuts on each bolt end). Removed the two screws holding the main power terminal block with appropriate screw driver. Connect the new main power terminal block to the range using the two screws. Reconnect the red, black and white electrical wires coming from the range using one nut for each wire. IMPORTANT: do no over tighten the nuts because the bolts could snap. Reconnect the pigtail and secure the small metal panel covering the main power panel.
Parts Used:

-
Frank from Palm Coast, FL
-
Difficulty Level:Easy
-
Total Repair Time:15 - 30 mins
-
Tools:Screw drivers, Socket set
3 of 8 people
found this instruction helpful.
Was this instruction helpful to you?
Thank you for voting!
Cracked in oven door glass
Read the instructions in installation manual to remove door. Kept removing screws. Was surprised to find two panes of glass between the inner glass and the outer glass. Cleaned all the glass (4) and the inside of the door. Looks brand new. Be careful with the insulation; be sure it is pushed back or it will show from the outside.
Parts Used:

-
Alan from Prairieville, LA
-
Difficulty Level:Easy
-
Total Repair Time:30 - 60 mins
-
Tools:Nutdriver, Screw drivers
2 of 5 people
found this instruction helpful.
Was this instruction helpful to you?
Thank you for voting!
Inner glass dooe cracked due to thermal stress
I removed the Oven door, unscrew 10 screws, open up the dor case, clean all glass levels, replace inner glass, reassembled the door, reinstalled the door to the appliance.
Parts Used:
-
ariel from tarzana, CA
-
Difficulty Level:Easy
-
Total Repair Time:30 - 60 mins
-
Tools:Screw drivers
2 of 5 people
found this instruction helpful.
Was this instruction helpful to you?
Thank you for voting!
glass tray missing
found the part no. and ordered it. it was delivered fast and efficient.
tracking was also helpful.
thanks
tracking was also helpful.
thanks
Parts Used:
-
Carol from Phoenix, AZ
-
Difficulty Level:Really Easy
-
Total Repair Time:Less than 15 mins
1 of 2 people
found this instruction helpful.
Was this instruction helpful to you?
Thank you for voting!
burned out light

-
Charles from WEST END, NC
-
Difficulty Level:Very Easy
-
Total Repair Time:30 - 60 mins
1 of 2 people
found this instruction helpful.
Was this instruction helpful to you?
Thank you for voting!
Right side Door Spring broke.
Removed door to see what happened to the spring, ordered new spring and door frame on line and replaced parts. Had to replace door frame as it broke while removing it.
Parts Used:
-
Joseph R from East Falmouth, MA
-
Difficulty Level:Easy
-
Total Repair Time:30 - 60 mins
-
Tools:Screw drivers
2 of 5 people
found this instruction helpful.
Was this instruction helpful to you?
Thank you for voting!
glass on oven door was broken
removed door from oven, took all screws off door to remove glass, put new glass in place, put oven door back together, put oven door back onto the oven
Parts Used:
-
nancy from edison, NJ
-
Difficulty Level:Difficult
-
Total Repair Time:More than 2 hours
-
Tools:Screw drivers
2 of 5 people
found this instruction helpful.
Was this instruction helpful to you?
Thank you for voting!