















RMC305PVB00 Whirlpool Microwave Oven Combo - Instructions
Keep searches simple. Use keywords, e.g. "leaking", "pump", "broken" or "fit".
Broken inner door glass
Removed the door from the oven. Undid all the parts above the inner glass door. Installed the inner glass and reassembled the door. Reinstalled oven door.
Parts Used:

-
alvin from st. louis park, MN
-
Difficulty Level:A Bit Difficult
-
Total Repair Time:15 - 30 mins
-
Tools:Screw drivers
2 of 3 people
found this instruction helpful.
Was this instruction helpful to you?
Thank you for voting!
inner oven glass cracked
With just the removal of a few screws I was able to replace the glass with the side benefit of cleaning the outter glass that had gotten dirty over the years with use. This is a simple project that all can complete.
Parts Used:
-
Bill from Sedalia, CO
-
Difficulty Level:Easy
-
Total Repair Time:Less than 15 mins
-
Tools:Nutdriver, Screw drivers
3 of 6 people
found this instruction helpful.
Was this instruction helpful to you?
Thank you for voting!
Open the carton and install turntabe glass tray.

-
Roger from LYMAN, ME
-
Difficulty Level:Very Easy
-
Total Repair Time:Less than 15 mins
2 of 3 people
found this instruction helpful.
Was this instruction helpful to you?
Thank you for voting!
The interior oven door glass was broken
I found some of the feedback posted on this site very helpful. Taking photos as I went along was also very helpful in remembering how to put it back together. There are several over-lapping pieces to the door and you have to be careful to put things back together in the correct order. Lining up the screw holes on the hinges with the door is also a little tricky.
Parts Used:
-
Dante from Apex, NC
-
Difficulty Level:A Bit Difficult
-
Total Repair Time:30 - 60 mins
-
Tools:Screw drivers
2 of 3 people
found this instruction helpful.
Was this instruction helpful to you?
Thank you for voting!
Broken glass tray
-
Robert from HEMET, CA
-
Difficulty Level:Very Easy
-
Total Repair Time:Less than 15 mins
2 of 3 people
found this instruction helpful.
Was this instruction helpful to you?
Thank you for voting!
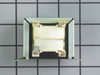
There was an annoying buzzing sound coming from the bottom of the stove
I pinpointed the location of the sound, took off the protective plate, felt it vibrating against the plate. I disconnected the power supply, and looked at the wirings and how it was connected, saw some burning residue surrounding the area of the Transformer. Then figured that I could simply replace this. I wrote down the Model and Serial number of the Stove, searched online, found this site. Located the part on the diagram, then simply ordered it. My part arrived in 3 days, and had the part replaced the next day. Couldn't be a smoother fix. Thanks.
Parts Used:
-
Craig from Snoqualmie, WA
-
Difficulty Level:Easy
-
Total Repair Time:15 - 30 mins
-
Tools:Screw drivers
6 of 15 people
found this instruction helpful.
Was this instruction helpful to you?
Thank you for voting!
R&R broken inner door glass and insulation.
Since there is multiple glass panels with several brackets, screws and insulation within the oven door I strongly suggest to take photos at each step using your smart phone. Do not attempt to remove all the components at once. Bracket positions, screw locations and glass orientation is necessary. This is the best advice I have to make this a quick and very easy job.
Parts Used:
-
Gary from PRESCOTT, AZ
-
Difficulty Level:Easy
-
Total Repair Time:30 - 60 mins
-
Tools:Screw drivers
2 of 4 people
found this instruction helpful.
Was this instruction helpful to you?
Thank you for voting!
Replacement of inner glass
Opened overn door and inserted allen wrenchs through the holes in the door hinges. Close the door until it makes contact with the allen wrenchs, then grasp the oven door handle and the bottom of the oven door and lift up to remove the door. Place the door on a flat surface,(I used a bed) and remove the screws to gain access to the glass. Upon re-assesbly, leave door flat line up and re-install all screws before putting the front pannel back on. Insert door back into the oven and open, remove the allen wrenches and close the door. The process is easy and will take 30 minutes to an hour and save you a $100.00 service call!
Parts Used:
-
Mark from Kingsport, TN
-
Difficulty Level:Easy
-
Total Repair Time:30 - 60 mins
-
Tools:Screw drivers
2 of 4 people
found this instruction helpful.
Was this instruction helpful to you?
Thank you for voting!
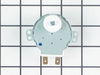
Replace turntable motor
removed perimeter screws from the bottom side and the lower cover is hinged at the wall side. Motor is visible and easily removed with two screws. Take of the old one, install the new one, and reverse the procedure to put the bottom cover back in place. Will nee helper to hold one side of the bottom until couple of screws can be put in on the other side.
Parts Used:
-
Monty from Mansfield, TX
-
Difficulty Level:Really Easy
-
Total Repair Time:15 - 30 mins
-
Tools:Screw drivers
1 person
found this instruction helpful.
Was this instruction helpful to you?
Thank you for voting!
The Bake Element burn and stop heating up
I turn off the power in the breaker box and then unscrew the part and replace it with the new one
Parts Used:

-
Emiliano from EASTVALE, CA
-
Difficulty Level:Really Easy
-
Total Repair Time:15 - 30 mins
-
Tools:Screw drivers
1 person
found this instruction helpful.
Was this instruction helpful to you?
Thank you for voting!
I broke the glass cooking tray when instaling my oven microwave combo
-
Jeff from Baytown, TX
-
Difficulty Level:Really Easy
-
Total Repair Time:Less than 15 mins
2 of 4 people
found this instruction helpful.
Was this instruction helpful to you?
Thank you for voting!
All elements would heat to around 200 degrees, then stop
Disconnect the sensor harness and checked resistance on the sensor,should read around 1100 ohm I only got 25.The sensor is mounted in the oven cavity back wall below upper element,the door must be removed. Unscrew 2 Philips head screw,unhook the harness,install new sensor,reconnect harness,install screws.
Parts Used:

-
frank from Wilmington, NC
-
Difficulty Level:Really Easy
-
Total Repair Time:15 - 30 mins
-
Tools:Screw drivers
1 person
found this instruction helpful.
Was this instruction helpful to you?
Thank you for voting!
replaced lower blower of a double wall oveno
Easily, Removed the oven with help of my grandson, this model is quite heavy. Open the back cover panel, removed the old blower. replaced with the new blower, covered with the back protective panel. About one hour because some screws much harder to reach.
Parts Used:

-
Duane from COON RAPIDS, MN
-
Difficulty Level:Really Easy
-
Total Repair Time:30 - 60 mins
-
Tools:Pliers, Screw drivers
1 person
found this instruction helpful.
Was this instruction helpful to you?
Thank you for voting!
The oven was over heating because it wasn’t reading the temperature
Pulled the stove out, unscrewed the back and plugged the new thermostat in. Screwed the back back on
Parts Used:
-
LAURIE from BILTMORE LAKE, NC
-
Difficulty Level:Really Easy
-
Total Repair Time:30 - 60 mins
-
Tools:Screw drivers
2 of 4 people
found this instruction helpful.
Was this instruction helpful to you?
Thank you for voting!
The element had burned up.
Unplugged old element unit and plugged in new element. Took two needle nose pliers and a flexible body. Took about 5 minutes. Works fine. Anybody can do it. Make sure power is off at the box.
Parts Used:
-
Kenyon from CALHOUN, GA
-
Difficulty Level:Really Easy
-
Total Repair Time:30 - 60 mins
-
Tools:Pliers
1 person
found this instruction helpful.
Was this instruction helpful to you?
Thank you for voting!