















RM978BXVM2 Whirlpool Microwave Oven Combo - Instructions
Keep searches simple. Use keywords, e.g. "leaking", "pump", "broken" or "fit".
Baking Element burned out.
Turn Off Breaker.
Removed oven racks....
Removed two screws holding element in place...
Disconnect spade lug connectors from old heating element.
Connected spade lug connectors to new heating element.
Reinstall 2 screws holding element.....
Replace oven racks.
Turn Breakers back On.
Done 10 Min. Install
Removed oven racks....
Removed two screws holding element in place...
Disconnect spade lug connectors from old heating element.
Connected spade lug connectors to new heating element.
Reinstall 2 screws holding element.....
Replace oven racks.
Turn Breakers back On.
Done 10 Min. Install
Parts Used:

-
Rick from Pineville, MO
-
Difficulty Level:Really Easy
-
Total Repair Time:Less than 15 mins
-
Tools:Screw drivers
9 of 11 people
found this instruction helpful.
Was this instruction helpful to you?
Thank you for voting!
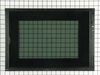
Microwave plastic door frame broken
Ordered a new door frame morning of March 25.
Part arrived the next morning and by that afternoon, the
replacement was complete. Only four screws held the frame.
Part arrived the next morning and by that afternoon, the
replacement was complete. Only four screws held the frame.
Parts Used:
-
Frederic from Los Altos, CA
-
Difficulty Level:Really Easy
-
Total Repair Time:30 - 60 mins
-
Tools:Screw drivers
10 of 14 people
found this instruction helpful.
Was this instruction helpful to you?
Thank you for voting!
Broken Oven Door
This is an easy fix. Just before the holidays, it was imperative that this appliance be in top shape. Since the door 'hung' wrong, it was determined that the hinge pin broke. Remove the 2 phillips head screws on the door and open the door to the to a 15 degree opening. This position allows you to slip the door off the hinge levers. Now that the door is off, replace the hinge pin and slip the retainer ring on with a screw driver blade to push it on the pin. Slide the door back on the levers and fasten the retainer screws. DONE!
Parts Used:

-
Mark from Leawood, KS
-
Difficulty Level:Really Easy
-
Total Repair Time:Less than 15 mins
-
Tools:Screw drivers
9 of 12 people
found this instruction helpful.
Was this instruction helpful to you?
Thank you for voting!
Broken Belt on Wave Disperser
The microwave is the upper unit of combination microwave & conventional oven. Disconnect power to the unit. Slide unit out of built-in cabinet to expose the top shield of the microwave. Remove 5 screws holding top cover in place. Remove cover, which exposes the belt reel and drive motor. Install the new belt by threading it on the drive motor pulley, then walk the new belt on the stirrer pulley. Replace the top cover and reinstall the 5 screws. Reinstall the combination unit in the wall cabinet. Reconnect electrical power. Task Complete. The belt just seem to die of old age about every seven year. Without the wave disperser operating, the microwave oven does not give even heating.
Parts Used:

-
Harold from Foxfield, CO
-
Difficulty Level:Easy
-
Total Repair Time:15 - 30 mins
-
Tools:Nutdriver
8 of 9 people
found this instruction helpful.
Was this instruction helpful to you?
Thank you for voting!
Heating Element broken
My husband wanted me to call a repair man but I had read online how easy it was. I received my element in one day from Fresno, CA and followed the instructions given by others on line. I couldn't believe how easy it was. The most difficult was removing the connectors because they were stuck. I used needle nose pliers as someone suggested. Saved the cost of a repair man.
Parts Used:
-
PATRICIA from VACAVILLE, CA
-
Difficulty Level:Easy
-
Total Repair Time:15 - 30 mins
-
Tools:Pliers, Screw drivers
9 of 12 people
found this instruction helpful.
Was this instruction helpful to you?
Thank you for voting!
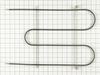
Broiler wouldn't heat
First I removed the ovem door, then I removed the 4 screws, unplugged element and plugged in the new one, then replace the screws and door. It should have been a 10 min job but I'm old and a bit fat...slowed me down.
Parts Used:
-
Diane from Mill Valley, CA
-
Difficulty Level:Really Easy
-
Total Repair Time:15 - 30 mins
-
Tools:Screw drivers
7 of 7 people
found this instruction helpful.
Was this instruction helpful to you?
Thank you for voting!
Broil Element Was Burned Out
1. Move oven out from wall 2. Remove back panel of oven, 8 screws 3. Remove 3 screws inside oven holding element 4. Pulled wire connections off of element 5. Reverse procedure to install new element
Parts Used:
-
DAVID from COTTAGE GROVE, WI
-
Difficulty Level:Really Easy
-
Total Repair Time:15 - 30 mins
-
Tools:Nutdriver
9 of 14 people
found this instruction helpful.
Was this instruction helpful to you?
Thank you for voting!
Oven bake element
Open oven door. Still power to the wall, but all Knobs in "OFF" position. two phillips screws, pull old element back, and disconnect both leads. Put the leads on the new element and reinsert with two mounting screws. Simple.
Parts Used:
-
ross from DEARY, ID
-
Difficulty Level:Very Easy
-
Total Repair Time:Less than 15 mins
-
Tools:Screw drivers
6 of 6 people
found this instruction helpful.
Was this instruction helpful to you?
Thank you for voting!
Oven would not reach selected temperature
First, shut off the power at the breaker panel. Next, I simply unscrewed the screws holding in each element, disconnected the leads, reconnected the leads to the new elements, positioned each element & reinserted the screws. A suggestion: Before loosening the screws, a light shot of PB Blaster or similar might help.
Parts Used:
-
Howard from BRYAN, TX
-
Difficulty Level:Really Easy
-
Total Repair Time:30 - 60 mins
-
Tools:Screw drivers
6 of 6 people
found this instruction helpful.
Was this instruction helpful to you?
Thank you for voting!
The Bottom Element Was Not Heating
Unplug first then took back off and took wire clips off and connectected the other on in worked fine you will like part select I just ordered apart for my frig. Waiting for it now.
Parts Used:
-
y.d. from lagrange, KY
-
Difficulty Level:Really Easy
-
Total Repair Time:Less than 15 mins
-
Tools:Pliers, Screw drivers
6 of 8 people
found this instruction helpful.
Was this instruction helpful to you?
Thank you for voting!
Oven wouldn't heat
Ordered element and received it the next day. Removed two screws that holds element in place. I then pulled the element out about 3 or 4 inches and disconnected the two wires. Put new element in connected the wires mounted element in place with the two screws. Now works great!
Parts Used:
-
Michael from Wichita, KS
-
Difficulty Level:Really Easy
-
Total Repair Time:15 - 30 mins
-
Tools:Screw drivers
5 of 5 people
found this instruction helpful.
Was this instruction helpful to you?
Thank you for voting!
The upper broiler element had burnt and broken into.
I must compliment PartSelect on their quick responce and delivery of the item ordered. It arrived a day after I had ordered it. Trust me, the $40.00 I spent on the item was way cheaper than having a repair service fix it or having the entire oven replaced. I would highly recomend anyone to utilize PartSelect.
Parts Used:
-
William from Manteno, IL
-
Difficulty Level:Really Easy
-
Total Repair Time:15 - 30 mins
-
Tools:Wrench (Adjustable)
6 of 8 people
found this instruction helpful.
Was this instruction helpful to you?
Thank you for voting!
light bulb in water ice freezer door went bad
I didn't. Don't know how to get to light bulb to change it for this specific model
Parts Used:

-
Carl from RIVERSIDE, CA
-
Difficulty Level:Very Difficult
-
Total Repair Time:More than 2 hours
-
Tools:Screw drivers
8 of 14 people
found this instruction helpful.
Was this instruction helpful to you?
Thank you for voting!
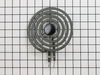
electric burner burned out
This is the second time PartSelect came through for me. If it hadn't been for you guys, I'd have had to buy a new Jenn-Air cooktop, because ours is nearly 30 years old. About two years ago, I bought a new two-burner cartridge, which installed without tools in about one minute. But a few weeks ago, we lost the burner in the other cartridge. I emailed PartSelect, and even though I gave them my obsolete model number, a helpful service rep managed to find me the part number of the correct burner, so I was able to place my order. Once the part arrived, there was no problem replacing the burner. This is a simple operation we've performed many times when we need to remove the burner for cleaning.
Parts Used:
-
Paul from Foley, AL
-
Difficulty Level:Really Easy
-
Total Repair Time:Less than 15 mins
6 of 9 people
found this instruction helpful.
Was this instruction helpful to you?
Thank you for voting!
did not heat properly
First I removed the two screws that hold the element in place. I then pulled the element out about 3 inches and disconnected the two wires, Removed the old element and installed the new one
Parts Used:
-
Ronald from Powhatan, VA
-
Difficulty Level:Really Easy
-
Total Repair Time:Less than 15 mins
-
Tools:Screw drivers
5 of 7 people
found this instruction helpful.
Was this instruction helpful to you?
Thank you for voting!