















RFG297AABPXAC Samsung Refrigerator - Instructions
Keep searches simple. Use keywords, e.g. "leaking", "pump", "broken" or "fit".
freezer was cold fridge was not
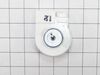
Took shelving out of freezer removed panel. Took second panel
out and removed motor. Whole repair took 45 minutes. Works perfect
out and removed motor. Whole repair took 45 minutes. Works perfect
Parts Used:
-
theodore from PUEBLO, CO
-
Difficulty Level:Really Easy
-
Total Repair Time:30 - 60 mins
-
Tools:Screw drivers
13 of 30 people
found this instruction helpful.
Was this instruction helpful to you?
Thank you for voting!
Ice maker stopped making ice and made a repeating clicking sound
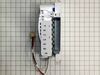
YouTube the video on how to replace the ice maker. Unplugged the fridge, one screw was removed to open a small cover panel to access where the ice maker was plugged in, unplugged the ice maker, pushed a small locking clip and pulled the old ice maker off the keyhole slots holding it in place removing it from the fridge. Did the steps in reverse and reinstalled the new one. Plugged the fridge back in and reset the fridge by holding the energy saver and alarm button on the front door simultaneously for 8-10 seconds until it beeped. Took a few seconds and the fridge reset
Parts Used:
-
Robert from AKRON, OH
-
Difficulty Level:Very Easy
-
Total Repair Time:Less than 15 mins
-
Tools:Screw drivers
2 of 2 people
found this instruction helpful.
Was this instruction helpful to you?
Thank you for voting!
The shelve had broke do to the weight of the milk gallon - the design is poor - it’s the second time we have had to replace! The shelve cracks under the continued weight - bad design!

-
CLAIRE from HGHLNDS RANCH, CO
-
Difficulty Level:Very Easy
-
Total Repair Time:Less than 15 mins
1 person
found this instruction helpful.
Was this instruction helpful to you?
Thank you for voting!
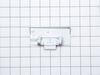
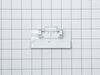
Installed caps on broken lower handle
Unscrewed broken caps and installed new ones
Parts Used:
-
Gary from SAUTEE, GA
-
Difficulty Level:Really Easy
-
Total Repair Time:30 - 60 mins
-
Tools:Screw drivers
1 person
found this instruction helpful.
Was this instruction helpful to you?
Thank you for voting!
Freezer handle had broken free from the left side of the door.
On both sides of the door there is a pop off cover that houses the broken mechanism. I popped off the cover and exposed the screws the attached the handle to the opening mechanism. removing those screws I removed the handle from the freezer door. I replaced the broken plastic piece on the handle . Reattached the repaired handle assembly to the door with the 4 screws. Reinstalled the cover.
Parts Used:
-
Kathleen from FLORISSANT, MO
-
Difficulty Level:Easy
-
Total Repair Time:Less than 15 mins
-
Tools:Screw drivers
1 of 2 people
found this instruction helpful.
Was this instruction helpful to you?
Thank you for voting!
Not making ice. Making ice slowly. Clicking sound when making ice.
(1) Set ice production to OFF from the front panel of the refridgerator. (2) Inside the fridge, remove the screw holding the panel covering the cable for the ice naker assembly. (3) Remove the panel. (4) Disconnect the power cable of ice maker. (5) Holding the assembly with one hand, release the locking clip of assembly housing, and slide assembly forward until it is free. (6) Remove the ice maker assembly. (7) Install the new assembly by reversing the previous steps. (8) Reset the ice maker by pressing the reset button and holding it for at least 8 seconds. The first time the ice maker is primed with water, there are 2 chimes. (1 High , 1 Low).
Parts Used:
-
Gregory from North Richland Hills, TX
-
Difficulty Level:Easy
-
Total Repair Time:Less than 15 mins
-
Tools:Screw drivers
Was this instruction helpful to you?
Thank you for voting!