















RF3615XWN1 Whirlpool Range - Instructions
Keep searches simple. Use keywords, e.g. "leaking", "pump", "broken" or "fit".
items in the oven were not baking properly. We discovered the bake elemnent wasn't working and looked defective in one part.
I removed the back panel, unplugged the wires, removed the 2 screws, replaced the element, plugged the wires back in and put the back panel back on. Now that I'm thinking about it, I guess I didn't even need to remove the back panel to replace the element.
Parts Used:

-
Douglas from Raymond, NH
-
Difficulty Level:Really Easy
-
Total Repair Time:15 - 30 mins
-
Tools:Nutdriver, Screw drivers
1 person
found this instruction helpful.
Was this instruction helpful to you?
Thank you for voting!
old heating element "popped"
Ordered the part Friday afternoon. It was delivered early on Saturday afternoon. Very impressed with the speed of the delivery! Power off, unscrew the old part, replace, screw the plate back on. Easy!
Parts Used:
-
Sally from Chesterfield, MO
-
Difficulty Level:Really Easy
-
Total Repair Time:15 - 30 mins
-
Tools:Pliers, Screw drivers
1 person
found this instruction helpful.
Was this instruction helpful to you?
Thank you for voting!
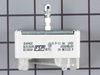
bunner was not shuting off automaticly
I used the replacement video from the web site. The replacement went great.
Parts Used:
-
Lee from GROVE CITY, PA
-
Difficulty Level:Really Easy
-
Total Repair Time:30 - 60 mins
-
Tools:Pliers, Screw drivers
1 person
found this instruction helpful.
Was this instruction helpful to you?
Thank you for voting!
I decided it was the switch that was bad as it would not turn on or anything.
After my husband replace it we noticed that our knob was worn to the point it would not turn on the new switch. I am sure the switch was o.k. so kept the old one and getting a knob to fix the issue.
Parts Used:
-
Christy from OROFINO, ID
-
Difficulty Level:Easy
-
Total Repair Time:30 - 60 mins
-
Tools:Nutdriver, Pliers
1 person
found this instruction helpful.
Was this instruction helpful to you?
Thank you for voting!
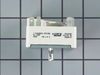
Cooktop on and cooktop hot indicator lights stayed on.
Range surface element control switch was bad. Replaced the switch and every thing works fine. Removed two Philips head screws in front and two Philips head screws in back of the range. Pulled the front panel away from the back of the range with the power off of course. Unplugged the wires and removed the two screws that held the switch in. Replaced the switch and refastened the control panel. Tested the switch and every thing worked fine.
Parts Used:
-
MICHAEL from FOUNTAIN INN, SC
-
Difficulty Level:Very Easy
-
Total Repair Time:15 - 30 mins
-
Tools:Screw drivers
1 person
found this instruction helpful.
Was this instruction helpful to you?
Thank you for voting!
8" FRONT BURNER STAYED ON HIGH HEAT/WOULD NOT REDUCE TEMPERTURE
REMOVE BACK OF RANGE, REMOVE BURNER KNOB. REMOVE SWITCH CONTROL REMOVE WIRES. REPLACE WIRES ON NEW SWITCH. INSERTED ALL WIRES REPLACE NEW SWITCH RE REPLACE ALL SCREWS. CHECK SWITCH. TURN BRAKER BACK ON. CHECK SWITCH FUNCTION. ALL IS FINE. PUT BACK ON RANGE SCREW IT IN PLACE. MOVE RANGE BACK IN IT POSITION.
Parts Used:
-
RICHARD from DELTONA, FL
-
Difficulty Level:Really Easy
-
Total Repair Time:15 - 30 mins
-
Tools:Screw drivers
1 person
found this instruction helpful.
Was this instruction helpful to you?
Thank you for voting!
Oven element caught on fire!!
My husband is an over-the-road driver, so I have to do all of the repairs myself. I went to the breaker box and turned off the power to the range. Then I removed 2 screws, pulled the element out about 3", and disconnected the wires. I then connected the wires to the new element, pushed it back in place, and replaced the screws. We had Parmesan Chicken for dinner and my children were thrilled!
Parts Used:
-
Sharon from Redding, CA
-
Difficulty Level:Really Easy
-
Total Repair Time:Less than 15 mins
-
Tools:Screw drivers
1 person
found this instruction helpful.
Was this instruction helpful to you?
Thank you for voting!
surface element out
Unplug from outlet and top remove back section of range and unplug wiring from switch, remove knob and unscrew two screws and remove old switch. Install new switch reinstall screws and plug switch plugs into new switch (will only go on the correct way). reattach back and plug into outlet. All done and surface element works perfectly.
Parts Used:
-
Edward from TAYLORS, SC
-
Difficulty Level:Really Easy
-
Total Repair Time:15 - 30 mins
-
Tools:Screw drivers
1 person
found this instruction helpful.
Was this instruction helpful to you?
Thank you for voting!
Right front burner would only stay on high
Turned off breaker, pulled stove from wall, took off knob, unscrewed and pull off backing from stove, unscrewed heat control part, unplugged wires, plugged into new part, installed part, replaced stove backing, replaced knob, pushed stove back in place and turned on breaker. It worked fine.
Parts Used:
-
Brian from YORK HAVEN, PA
-
Difficulty Level:Really Easy
-
Total Repair Time:15 - 30 mins
-
Tools:Screw drivers
1 person
found this instruction helpful.
Was this instruction helpful to you?
Thank you for voting!
Burner wouldn't regulate temperature
Turned off power to range. Took back panel off to reveal all controls. Pulled off knob of bad control. Removed 2 screws from the front of the control. Pulled off wiring from back of old control. Took new control reversed procedure. Reinstalled back panel turned power on and tested new control. Total time about 20 minutes
Parts Used:
-
Michael from THE VILLAGES, FL
-
Difficulty Level:Really Easy
-
Total Repair Time:15 - 30 mins
-
Tools:Screw drivers
1 person
found this instruction helpful.
Was this instruction helpful to you?
Thank you for voting!
Element temperature inconsistent
Turn off power to the stove (unplug or turn off breaker)
Remove back panel screws (Phillips) and back panel
Unplug switch
Remove knob and attaching screws (Phillips)
Remove and replace switch
Reinstall screws for switch and plugs in the back
Snap off the end of the stem if it's too long and reinstall knob
Reinstall back panel and turn power back on
*important: the large element has an updated switch and you may need to snap off the end of the stem with pliers! It's too long and there are no instructions for this included!*
Remove back panel screws (Phillips) and back panel
Unplug switch
Remove knob and attaching screws (Phillips)
Remove and replace switch
Reinstall screws for switch and plugs in the back
Snap off the end of the stem if it's too long and reinstall knob
Reinstall back panel and turn power back on
*important: the large element has an updated switch and you may need to snap off the end of the stem with pliers! It's too long and there are no instructions for this included!*
Parts Used:
-
Nathan from WHITE RIV JCT, VT
-
Difficulty Level:Easy
-
Total Repair Time:15 - 30 mins
-
Tools:Pliers, Screw drivers
1 person
found this instruction helpful.
Was this instruction helpful to you?
Thank you for voting!
Oven wouldn't heat
First I removed the two screws that hold the element in place. I then pulled the element out about 3 inches and disconnected the two wires fom the old element .. connected them to the new element ... put the screws back ...and tested. problem solved
Parts Used:
-
Don from Rutland, VT
-
Difficulty Level:Really Easy
-
Total Repair Time:Less than 15 mins
-
Tools:Screw drivers
1 person
found this instruction helpful.
Was this instruction helpful to you?
Thank you for voting!
bottom element burnt out
removed 2 screws . pulled out the 2 wires and disconect them. took out the element. Put the new element in and hooked the wires up. placed the metal bracket to the back and put in the 2 screw and turned it on and it worked like new.
Brenda
Brenda
Parts Used:
-
brenda from las vegas, NV
-
Difficulty Level:Really Easy
-
Total Repair Time:Less than 15 mins
-
Tools:Screw drivers
1 person
found this instruction helpful.
Was this instruction helpful to you?
Thank you for voting!
The original bake element cracked, causing sparks and a small, brief fire on the crack. Next, the element would not heat.
First I turned off the circuit breaker to the oven. Then, I removed the two screws that hold the element in place. I then pulled the element out about 3 inches to disconnect the two wires. The connectors were tight, so required a little wiggling to disconnect the wires.
Upon receipt of the replacement element, I turned off the circuit breaker to the oven. Then, I reconnected the element wires, pushed the connect wires into the back of the oven, and rescrewed the unit in place. With the circuit breaker turned back on, I tested the oven. It worked great. Very easy!
Upon receipt of the replacement element, I turned off the circuit breaker to the oven. Then, I reconnected the element wires, pushed the connect wires into the back of the oven, and rescrewed the unit in place. With the circuit breaker turned back on, I tested the oven. It worked great. Very easy!
Parts Used:
-
Ronald from Lawrenceville, GA
-
Difficulty Level:Really Easy
-
Total Repair Time:Less than 15 mins
-
Tools:Screw drivers
1 person
found this instruction helpful.
Was this instruction helpful to you?
Thank you for voting!
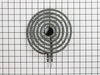
Oven Wouldn't Heat
Of course, power off first, then I removed the old one and inserted the new one, make sure everything in right place, then turn on power, simple as 1-2-3.
Parts Used:
-
DAVID from PETALUMA, CA
-
Difficulty Level:Really Easy
-
Total Repair Time:Less than 15 mins
2 of 4 people
found this instruction helpful.
Was this instruction helpful to you?
Thank you for voting!