















REGS37BFW2 Frigidaire Wall Oven - Instructions
Keep searches simple. Use keywords, e.g. "leaking", "pump", "broken" or "fit".
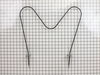
oven burner was burned out.
First I removed the two screws that hold the element in place. I then pulled the element out about 3 inches and disconnected the two wires. I cleaned up the bottom of the oven since it is so much easier to clean while empty. Plugged the two wires onto the new burner, slid it back into position and refastened the screws.
The hardest part was getting one of the screws out since it had been rounded over and the phillips slots were worn too, like somebody had failed to remove it earlier. All I needed was a pliers to grip it.
The hardest part was getting one of the screws out since it had been rounded over and the phillips slots were worn too, like somebody had failed to remove it earlier. All I needed was a pliers to grip it.
Parts Used:
-
Robert from Ocean View, AL
-
Difficulty Level:Really Easy
-
Total Repair Time:Less than 15 mins
-
Tools:Nutdriver, Pliers, Screw drivers
0 of 1 people
found this instruction helpful.
Was this instruction helpful to you?
Thank you for voting!
Oven wouldn't heat.
I removed the 2 screws. Pulled the heat elemnet out. Disconnected the 2 wires. Then I connected the 2 wires to the new element. Pushed it back in. Tightened the screws and was sone.
Parts Used:
-
Mike from Hayward, WI
-
Difficulty Level:Easy
-
Total Repair Time:Less than 15 mins
-
Tools:Screw drivers
0 of 1 people
found this instruction helpful.
Was this instruction helpful to you?
Thank you for voting!
Lower heating element not working
Loosened two nuts , removed old element. New element snapped into terminal tightned nuts . 0 minutes tops.
Parts Used:
-
Michael from Burkburnett, TX
-
Difficulty Level:Really Easy
-
Total Repair Time:Less than 15 mins
-
Tools:Wrench set
0 of 1 people
found this instruction helpful.
Was this instruction helpful to you?
Thank you for voting!
heating element burned out
Just took the back of the stove off and removed old one and put new one in. Very simple.
Parts Used:
-
Peggy from Lykens, PA
-
Difficulty Level:Really Easy
-
Total Repair Time:Less than 15 mins
-
Tools:Screw drivers
0 of 1 people
found this instruction helpful.
Was this instruction helpful to you?
Thank you for voting!
Oven baking element would not heat up.
First, trip the circuit breaker for your stove. Second I removed the two screws ( 1/4" nut driver makes this go quickly ) that hold the element in place. I then pulled the element out about 3 inches ( double check the electricity is off with your tester )and disconnected the two wires from each side of the element. Press connectors on new element and slide back in.
Parts Used:
-
Anthony from River Forest, IL
-
Difficulty Level:Really Easy
-
Total Repair Time:Less than 15 mins
-
Tools:Nutdriver
0 of 1 people
found this instruction helpful.
Was this instruction helpful to you?
Thank you for voting!
baking element broke in half due to liquid dripping onto it.
Removed back of stove, removed screws holding old element. attached new element in same place, returned back to stove. My wife pushed element from inside stove into holes, which was a help. Voila! It works great.
Parts Used:
-
Bernard from Boise, ID
-
Difficulty Level:Really Easy
-
Total Repair Time:Less than 15 mins
-
Tools:Screw drivers
0 of 1 people
found this instruction helpful.
Was this instruction helpful to you?
Thank you for voting!
Old heating element quit working, smoking, sparks
took out the screws at the back of the oven, removed the old element and put the new one in, replaced the screws. The new part was mostly the same size as the old one, some of the angles were different and the ends slightly different, but it fit and works great.
Parts Used:
-
Jenniffer from Gresham, OR
-
Difficulty Level:Really Easy
-
Total Repair Time:Less than 15 mins
-
Tools:Screw drivers
0 of 1 people
found this instruction helpful.
Was this instruction helpful to you?
Thank you for voting!
Bake element broke
-
Jeannette from West Jordan, UT
-
Difficulty Level:Difficult
-
Total Repair Time:1- 2 hours
-
Tools:Pliers, Screw drivers, Wrench set
0 of 1 people
found this instruction helpful.
Was this instruction helpful to you?
Thank you for voting!
Oven wouldn't heat
Turned off main power at electrical breaker. With pliers, removed two screws that hold element in place. Pulled element out about 3 to 4 inches. Disconnected two wires from element. With pliers, adjusted connections on new element connections from horizontal to vertical position. Connected two wires to connections of new element. Installed new element in oven with original two screws. Powered on main electrical breaker. Oven back in operation! Also, part arrived in 3 days! I'm a happy camper!
Parts Used:
-
Carl from Madison, AL
-
Difficulty Level:Easy
-
Total Repair Time:15 - 30 mins
-
Tools:Pliers
1 of 4 people
found this instruction helpful.
Was this instruction helpful to you?
Thank you for voting!
the oven element went out
took off the back of the stove..first Unplugged it! and undid the old unit, and put the new one on....easy peasy!..Thanks for your fast mailing!
Parts Used:
-
Beverly from Genoa, WV
-
Difficulty Level:Really Easy
-
Total Repair Time:15 - 30 mins
-
Tools:Pliers
0 of 1 people
found this instruction helpful.
Was this instruction helpful to you?
Thank you for voting!
Oven baking element was burned out.
Moved stove out from wall and cabinets, then unplugged the stove. Removed the oven racks, then removed the 2 screws securing the baking (lower) element to the rear wall of the oven. Pulled the element out a few inches and disconnected it from the stove wires. Removed old element. Removed screws from rear panel to gain access to wiring. Inserted new element and connected to wiring. Put element in place and replaced the 2 screws in rear wall. Put rear panel back in place and replaced panel screws. Plugged stove back in and moved back into place. Tested oven and it worked just fine. Parts Select did a great job of filling my order and promptly shipping it. I got it in 2 working days.
Parts Used:
-
Thomas C. from Mahnomen, MN
-
Difficulty Level:A Bit Difficult
-
Total Repair Time:15 - 30 mins
-
Tools:Nutdriver, Pliers, Screw drivers
0 of 1 people
found this instruction helpful.
Was this instruction helpful to you?
Thank you for voting!
Replaced the bake element
Removed the elments2 screws, unhooked the two wires, removed the rear cover from back. I then installed the new element, covered the termanals with electric tape replaced the rear cover screwed down the new element, tested.
Parts Used:
-
William from somerset, MA
-
Difficulty Level:Easy
-
Total Repair Time:15 - 30 mins
-
Tools:Screw drivers
0 of 1 people
found this instruction helpful.
Was this instruction helpful to you?
Thank you for voting!
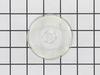
Lens cover for oven light broke.
Really a no brainer, but I do have to say that PartSelect customer service is excellent. My part was located and on it's way within a day and arrived a couple of days later.
Parts Used:
-
Amy from Corona, CA
-
Difficulty Level:Really Easy
-
Total Repair Time:Less than 15 mins
0 of 1 people
found this instruction helpful.
Was this instruction helpful to you?
Thank you for voting!
The old element disintegrated into little pieces
Please make sure the oven is off before working on oven.
Removed element by removing the 1/4 inch bolts. There were spade lugs attached to it end of element inside hole around insulation. Be careful as to not let spade lugs slip back into hole. I left it attached to broken elemnt piece until I was ready to install new one. That way it held it into place.
Cleaned out the oven of all the fragments with a rag and warm bucket of water... Installed new element. Turned on oven to about 200 degrees F. for about a half hour to dry out and bake out any impurities
Removed element by removing the 1/4 inch bolts. There were spade lugs attached to it end of element inside hole around insulation. Be careful as to not let spade lugs slip back into hole. I left it attached to broken elemnt piece until I was ready to install new one. That way it held it into place.
Cleaned out the oven of all the fragments with a rag and warm bucket of water... Installed new element. Turned on oven to about 200 degrees F. for about a half hour to dry out and bake out any impurities
Parts Used:
-
Steve from Sarasota, FL
-
Difficulty Level:Really Easy
-
Total Repair Time:Less than 15 mins
-
Tools:Socket set
0 of 2 people
found this instruction helpful.
Was this instruction helpful to you?
Thank you for voting!
heat element for oven burnt out
removed 2 screws removed clips on old heating element installed new element by placing clips on new part screwed element to back wall of oven total time about 5 min note this stove was 25 years old and part was still available sweet
Parts Used:
-
loren from dover, OH
-
Difficulty Level:Really Easy
-
Total Repair Time:Less than 15 mins
-
Tools:Nutdriver
0 of 2 people
found this instruction helpful.
Was this instruction helpful to you?
Thank you for voting!