















REGS37BFL0 Frigidaire Range - Instructions
Keep searches simple. Use keywords, e.g. "leaking", "pump", "broken" or "fit".
Oven would not heat
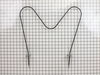
My husband completed this replacement in less then 5 minutes. He took out two nuts discounected the old element then replaced with the new element. Easy!
Parts Used:
-
Rebecca from Withams, VA
-
Difficulty Level:Really Easy
-
Total Repair Time:Less than 15 mins
-
Tools:Nutdriver, Screw drivers
0 of 1 people
found this instruction helpful.
Was this instruction helpful to you?
Thank you for voting!
Bake element would not heat.
Removed two screws that hold the element in place. Pulled it out a few inches-removed the wires
& re-connected to the new unit. Screwed it back in place & i was done. It took about 10 minutes. The new unit works fine. Saved a bunch of money by not calling a repair man. Thank you very much.
& re-connected to the new unit. Screwed it back in place & i was done. It took about 10 minutes. The new unit works fine. Saved a bunch of money by not calling a repair man. Thank you very much.
Parts Used:
-
Larry from Temple, PA
-
Difficulty Level:Really Easy
-
Total Repair Time:Less than 15 mins
-
Tools:Nutdriver
0 of 1 people
found this instruction helpful.
Was this instruction helpful to you?
Thank you for voting!
Oven baking element would not heat up.
First, trip the circuit breaker for your stove. Second I removed the two screws ( 1/4" nut driver makes this go quickly ) that hold the element in place. I then pulled the element out about 3 inches ( double check the electricity is off with your tester )and disconnected the two wires from each side of the element. Press connectors on new element and slide back in.
Parts Used:
-
Anthony from River Forest, IL
-
Difficulty Level:Really Easy
-
Total Repair Time:Less than 15 mins
-
Tools:Nutdriver
0 of 1 people
found this instruction helpful.
Was this instruction helpful to you?
Thank you for voting!
Broken element on my bottom oven
The only difficultly I had was to bend down the ends of the new element so they were straight. Easily done with a pair of pliers. Slide the connectors from the oven over the ends, and put them back into the holes for them in the oven.Correct size socket and it was installed in minutes. I turned the oven on, and there was my heat. I used an oven thermometer to check the heat, and it was perfect. Quick service and the element was exactly the correct size.
Parts Used:
-
Mary Louise from Swartz Creek, MI
-
Difficulty Level:Really Easy
-
Total Repair Time:Less than 15 mins
-
Tools:Pliers, Socket set
0 of 1 people
found this instruction helpful.
Was this instruction helpful to you?
Thank you for voting!
Element went out ...
Took the back off, and took the terminals off. Took out the old element and put the new one in and put the terminals on and screwed it back in and put the back on. And all done.
Parts Used:
-
DUSTIN from OGDEN, UT
-
Difficulty Level:Easy
-
Total Repair Time:Less than 15 mins
-
Tools:Pliers, Screw drivers
0 of 1 people
found this instruction helpful.
Was this instruction helpful to you?
Thank you for voting!
haeting element cracked
juist loosened nut and pulled element out about three inches, detached leads, reattached new leads and installed.
Parts Used:
-
paul from roslyn, PA
-
Difficulty Level:Really Easy
-
Total Repair Time:Less than 15 mins
-
Tools:Nutdriver
0 of 1 people
found this instruction helpful.
Was this instruction helpful to you?
Thank you for voting!
oven would not heat
took two screws out disconnected wires and connected new element ,screw back togather in about ten mins and started cooking dinner
Parts Used:
-
james from belton, TX
-
Difficulty Level:Really Easy
-
Total Repair Time:Less than 15 mins
-
Tools:Nutdriver
0 of 1 people
found this instruction helpful.
Was this instruction helpful to you?
Thank you for voting!
Original heating element broke due to dripped food.
Unplugged the appliance then removed the two screws holding the element in place. Pulled it out about 2-3 inches then pulled the wires off. The replacement element has 90 degree connectors as opposed to the original 180 degree connectors but that didn't affect installation and hasn't affected operation. Slide the wires on the new element, slide the element back in the oven, screw it back in and you're good to go. Trust me, easiest repair to do.
Parts Used:
-
Michael from Ottumwa, IA
-
Difficulty Level:Really Easy
-
Total Repair Time:Less than 15 mins
-
Tools:Socket set
0 of 1 people
found this instruction helpful.
Was this instruction helpful to you?
Thank you for voting!
The bake element shorted out.
After the oven cooled, removed the bake element withe a couple of screws, got on line and ordered the part. Two days later the new element arrived and we put the screws back in with the new element. Problem solved.
Parts Used:
-
Michael from Creston, NC
-
Difficulty Level:Really Easy
-
Total Repair Time:Less than 15 mins
-
Tools:Screw drivers
0 of 1 people
found this instruction helpful.
Was this instruction helpful to you?
Thank you for voting!
Lower unit broken, arcing
-
Mark from Edgartown, MA
-
Difficulty Level:Really Easy
-
Total Repair Time:Less than 15 mins
-
Tools:Nutdriver
0 of 1 people
found this instruction helpful.
Was this instruction helpful to you?
Thank you for voting!
Bake element broke
-
Jeannette from West Jordan, UT
-
Difficulty Level:Difficult
-
Total Repair Time:1- 2 hours
-
Tools:Pliers, Screw drivers, Wrench set
0 of 1 people
found this instruction helpful.
Was this instruction helpful to you?
Thank you for voting!
Oven wouldn't heat as element was burned out
I removed the two screws that hold the element in place. Then pulled the element out, disconnected the two wires. Reconnected the new elements wires, replaced the screws and the element was ready to go. Worked very well.
Parts Used:
-
Mary from Spencer, IA
-
Difficulty Level:Really Easy
-
Total Repair Time:30 - 60 mins
-
Tools:Pliers, Wrench (Adjustable)
0 of 1 people
found this instruction helpful.
Was this instruction helpful to you?
Thank you for voting!
My oven just didn't heat one day!
We tested all of the other "functions" of the oven to make sure that everything else worked fine, and we realized that the problem really had to be the element.
We ordered it and it came within 72 hours! We simply unscrewed the faulty element, made sure that the wires were handled carefully (circuit turned off!), and inserted the new element and rewired and screwed back into place the screws that were removed.
Simple as pie! You can do this! You don't need a service call for this one guys! Get BRAVE!!
We ordered it and it came within 72 hours! We simply unscrewed the faulty element, made sure that the wires were handled carefully (circuit turned off!), and inserted the new element and rewired and screwed back into place the screws that were removed.
Simple as pie! You can do this! You don't need a service call for this one guys! Get BRAVE!!
Parts Used:
-
Tiffany from Smithfield, NC
-
Difficulty Level:Really Easy
-
Total Repair Time:15 - 30 mins
-
Tools:Screw drivers, Socket set
0 of 1 people
found this instruction helpful.
Was this instruction helpful to you?
Thank you for voting!
Bake on the oven wont heat up, but the broil and the stovetop worked fine
I'm a stay at home mom so when the oven didn't heat up I through oh no I have to get a new one. Well who can afford to get a new oven right after christmas. So I played with it to see if the other parts still worked, when I found that they did, I googled the the Appliance name, that is when PartSelect showed up and they had a video on how to replace the bake element. It looked doable so I ordered the part and it really was a easy fix. It took less than 10min all I had to do was pull out the old element and put in the new element. Only trouble I had was, I had to bend the prongs alittle but that was no problem. Thankyou PartSelect
Parts Used:
-
Jakki from Loco, OK
-
Difficulty Level:Really Easy
-
Total Repair Time:Less than 15 mins
-
Tools:Wrench (Adjustable)
0 of 1 people
found this instruction helpful.
Was this instruction helpful to you?
Thank you for voting!
The old element disintegrated into little pieces
Please make sure the oven is off before working on oven.
Removed element by removing the 1/4 inch bolts. There were spade lugs attached to it end of element inside hole around insulation. Be careful as to not let spade lugs slip back into hole. I left it attached to broken elemnt piece until I was ready to install new one. That way it held it into place.
Cleaned out the oven of all the fragments with a rag and warm bucket of water... Installed new element. Turned on oven to about 200 degrees F. for about a half hour to dry out and bake out any impurities
Removed element by removing the 1/4 inch bolts. There were spade lugs attached to it end of element inside hole around insulation. Be careful as to not let spade lugs slip back into hole. I left it attached to broken elemnt piece until I was ready to install new one. That way it held it into place.
Cleaned out the oven of all the fragments with a rag and warm bucket of water... Installed new element. Turned on oven to about 200 degrees F. for about a half hour to dry out and bake out any impurities
Parts Used:
-
Steve from Sarasota, FL
-
Difficulty Level:Really Easy
-
Total Repair Time:Less than 15 mins
-
Tools:Socket set
0 of 2 people
found this instruction helpful.
Was this instruction helpful to you?
Thank you for voting!