















RBS330DR2WW General Electric Range - Instructions
Keep searches simple. Use keywords, e.g. "leaking", "pump", "broken" or "fit".
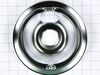
drip pans worn out and rusted
just replaced drip pans. your company response was quick and delivery prompt. being an outdated range, am glad I could fine size I needed.
Parts Used:

-
nancy from abita springs, LA
-
Difficulty Level:Really Easy
-
Total Repair Time:Less than 15 mins
Was this instruction helpful to you?
Thank you for voting!
Drip pan stained
-
Thomas from BURNSIDE, IL
-
Difficulty Level:Really Easy
-
Total Repair Time:Less than 15 mins
Was this instruction helpful to you?
Thank you for voting!
Could not find the proper fitting drip pans.
Got the right ones from you"could not get them at Sears.com". All is well, wife is happy again.
Parts Used:
-
Cary from hermitage, TN
-
Difficulty Level:Really Easy
-
Total Repair Time:Less than 15 mins
Was this instruction helpful to you?
Thank you for voting!
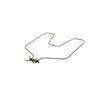
Old bake element burned out
Turned off circuit breaker, removed screws holding old element in with nut drivers, pulled out old element about 3-4" to reach terminals connected to back of element, removed spade lug terminals with needle nose pliers. Reconnected terminals to new element and screwed new element in place with nut drivers. Turned on circuit breaker and oven. New element works perfectly. Took about 8-10 minutes. Very easy to do.
Parts Used:
-
Thomas from Hamilton, VA
-
Difficulty Level:Really Easy
-
Total Repair Time:Less than 15 mins
-
Tools:Nutdriver, Pliers
Was this instruction helpful to you?
Thank you for voting!
Broken bake element
-
Marcus from Lagrange, GA
-
Difficulty Level:Really Easy
-
Total Repair Time:Less than 15 mins
-
Tools:Pliers
Was this instruction helpful to you?
Thank you for voting!
My old drip pans were no longer cleanable
Pretty simple really. Just pulled out the heating coils/elements, lifted out the old drip pans, dropped in the new ones and "plugged" the coils back in and Presto! New drip pans,
Parts Used:
-
Keith from Oklahoma City, OK
-
Difficulty Level:Really Easy
-
Total Repair Time:Less than 15 mins
Was this instruction helpful to you?
Thank you for voting!
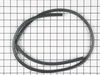
Replace oven gasket
I used the pliers to remove the old pins, and popped then new pins in place...super simple!
Parts Used:
-
Jenny from Muskego, WI
-
Difficulty Level:Really Easy
-
Total Repair Time:Less than 15 mins
-
Tools:Pliers
Was this instruction helpful to you?
Thank you for voting!
Bake Element burnt out
-
Greg from Chicopee, MA
-
Difficulty Level:Really Easy
-
Total Repair Time:Less than 15 mins
-
Tools:Socket set
Was this instruction helpful to you?
Thank you for voting!
lower burner quit working.
easy, less then 15 min. but take off door first makes alot easier. and don't forget to unplug, like i did. just a few sparks but no damage thank god.
Parts Used:
-
Robert from Rock Falls, IL
-
Difficulty Level:Easy
-
Total Repair Time:Less than 15 mins
-
Tools:Nutdriver, Screw drivers
Was this instruction helpful to you?
Thank you for voting!
Heating element not working
Saw the brief video and as stated took less than five minutes to replace. It took longer to clean up the floor under the oven than to replace heating element.
Parts Used:
-
Stuart from Yelm, WA
-
Difficulty Level:Really Easy
-
Total Repair Time:Less than 15 mins
-
Tools:Nutdriver
Was this instruction helpful to you?
Thank you for voting!
burned out
-
mary from morton, WA
-
Difficulty Level:Really Easy
-
Total Repair Time:Less than 15 mins
-
Tools:Nutdriver
Was this instruction helpful to you?
Thank you for voting!
Burned out heating element
took 5 minutes with a nut driver and son. I had previously watch your video and went exactly as the video described and showed.
Parts Used:
-
David from Alice, TX
-
Difficulty Level:Really Easy
-
Total Repair Time:Less than 15 mins
-
Tools:Nutdriver
Was this instruction helpful to you?
Thank you for voting!
heating element blew apart
I watched the video on this website and it couldn't have been easier. The only thing I did differently was I took the door off for an easier reach. To take the door off, you open just a little and pull up. It makes it so much easier to get at the screws, and maked the repair a snap.
Parts Used:
-
Lori from Bellows Falls, VT
-
Difficulty Level:Really Easy
-
Total Repair Time:Less than 15 mins
-
Tools:Nutdriver
Was this instruction helpful to you?
Thank you for voting!
Wires to attach to bake element retracted into stove body
I had to remove the back panel on the stove to free up taped wires to get more length.
Parts Used:
-
Michael from Hamden, CT
-
Difficulty Level:Difficult
-
Total Repair Time:30 - 60 mins
-
Tools:Nutdriver, Pliers
Was this instruction helpful to you?
Thank you for voting!
bakinf element not working
-
Jerry from Dallas, GA
-
Difficulty Level:A Bit Difficult
-
Total Repair Time:1- 2 hours
Was this instruction helpful to you?
Thank you for voting!