















RBS277PVB00 Whirlpool Wall Oven - Instructions
Keep searches simple. Use keywords, e.g. "leaking", "pump", "broken" or "fit".
Loose terminal caused block to overheat and break
Removed all terminals and block mounting screws. Repaired one burnt terminal and reassembled. Replacement part was an exact fit and reassembly whnet very well.
Parts Used:

-
Dana from Black Mountain, NC
-
Difficulty Level:Really Easy
-
Total Repair Time:Less than 15 mins
-
Tools:Nutdriver, Screw drivers
6 of 10 people
found this instruction helpful.
Was this instruction helpful to you?
Thank you for voting!
Broken heat element.

-
David from CARY, NC
-
Difficulty Level:Very Easy
-
Total Repair Time:15 - 30 mins
-
Tools:Pliers, Screw drivers
4 of 4 people
found this instruction helpful.
Was this instruction helpful to you?
Thank you for voting!
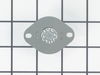
every time I would try to do the self clean mode on my drop in range the thermostat blows. Last time it was still under warranty. I took the part number from the repair man's invoice to order the new part.
My husband took the back off and replaced it. The repairman suggested pulling the range out into the floor to run the self clean mode. I have owned several such ranges and have never had to do that and won't now. Easy Clean Oven Cleaner will be the next thing I use.
Parts Used:
-
joyce from thomasville, NC
-
Difficulty Level:Really Easy
-
Total Repair Time:Less than 15 mins
-
Tools:Screw drivers
5 of 8 people
found this instruction helpful.
Was this instruction helpful to you?
Thank you for voting!
Oven will not maintain set temp
Remove rear panel - remove sensor from inside - unplug from rear - reverse to install - did not fix problem
Parts Used:

-
Sam from TINLEY PARK, IL
-
Difficulty Level:Easy
-
Total Repair Time:30 - 60 mins
-
Tools:Screw drivers
3 of 3 people
found this instruction helpful.
Was this instruction helpful to you?
Thank you for voting!
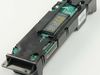
Oven gave f2E3 code. Locked. Bottom burner wouldn’t come on and broiler burner stayed on
Turned off the breaker. Removed the door and side trims. Slid out the oven and removed the metal casements. Removed the front control board by unplugging each wire and carefully replaced them back into the exact same places on the new board. Be sure each plug is firmly seated. Then put everything back together and slid the oven back into the wall.
Parts Used:
-
Rhonda from CHICO, CA
-
Difficulty Level:Really Easy
-
Total Repair Time:30 - 60 mins
-
Tools:Screw drivers
3 of 3 people
found this instruction helpful.
Was this instruction helpful to you?
Thank you for voting!
Oven would not heat

-
George from LIBERTY HILL, TX
-
Difficulty Level:Really Easy
-
Total Repair Time:30 - 60 mins
-
Tools:Screw drivers
3 of 3 people
found this instruction helpful.
Was this instruction helpful to you?
Thank you for voting!
Interior glass on oven door.
Thanks to video provided by PartSelect the repair was fast and easy. My second experience with an appliance repair with parts and video from PartSelect. I am a happy customer.
Parts Used:

-
Colie from Gainesville, GA
-
Difficulty Level:Very Easy
-
Total Repair Time:30 - 60 mins
-
Tools:Screw drivers
2 of 2 people
found this instruction helpful.
Was this instruction helpful to you?
Thank you for voting!
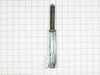
The oven door would not open properly. The hinges needed replacement.
I followed the instructions per a YouTube video. My older model was slightly different in parts used in the video, but the general idea was the same. Very happy with current repair / parts. The door now opens smooth as glass, and I even got a chance to clean some internal parts inside the door.
https://youtu.be/tAypQqC5cxo?si=YoDaVMHtalPP3mhO
https://youtu.be/tAypQqC5cxo?si=YoDaVMHtalPP3mhO
Parts Used:

-
James from FRESNO, CA
-
Difficulty Level:Really Easy
-
Total Repair Time:30 - 60 mins
-
Tools:Screw drivers
2 of 2 people
found this instruction helpful.
Was this instruction helpful to you?
Thank you for voting!
Inner door glass was cracked
My oven (late 90's/early 2000's model) didn't have the flip-down hinge locks shown in the video. It seems Whirlpool/Kitchenaid changed the hinges even though they didn't change the model number of the oven. With my style hinges, you have to put Allen wrenches or bent nails in the holes just behind the hinge pins. Then close the door almost all the way and lift it out to separate the hinges. Spring force holds the nails in tightly until you replace the door. This video was very helpful:
https://www.youtube.com/watch?v=p7oRZdIN6m0
Also, my door had 3 different kinds of sheet metal screws. Two of them have similar heads but different threads. Keep track of which is which for when you put everything back together.
https://www.youtube.com/watch?v=p7oRZdIN6m0
Also, my door had 3 different kinds of sheet metal screws. Two of them have similar heads but different threads. Keep track of which is which for when you put everything back together.
Parts Used:
-
Richard from ANNAPOLIS, MD
-
Difficulty Level:A Bit Difficult
-
Total Repair Time:30 - 60 mins
-
Tools:Screw drivers
2 of 2 people
found this instruction helpful.
Was this instruction helpful to you?
Thank you for voting!
Oven would not heat
1. Disconnect AC power 2. Remove back with several sheet metal screws. 3. Remove wires from Limit Thermostat. 4. Check Limit Thermostat continuity -- if open then Limit Thermostat is faulty. 5. Remove Limit Thermostat with two screws. 6. Install new thermostat
Parts Used:
-
Ray from GOLD CANYON, AZ
-
Difficulty Level:Really Easy
-
Total Repair Time:15 - 30 mins
-
Tools:Screw drivers
2 of 2 people
found this instruction helpful.
Was this instruction helpful to you?
Thank you for voting!
Had to replace the bake element
Cut the power. Undid the screws to the element. Popped off the old element replaced with new,put screws back in turned power back on and Shazam it was up and going
Parts Used:
-
Roxanne from MARTELL, NE
-
Difficulty Level:Very Easy
-
Total Repair Time:15 - 30 mins
-
Tools:Screw drivers
2 of 2 people
found this instruction helpful.
Was this instruction helpful to you?
Thank you for voting!
Oven temperature did match target temp entered on control panel.
I found that what was keeping the old temp sensor electrical connection attached to the stove-side connection was a little tab. It wasn't obvious that that was the thing that was keeping the connection secure but there weren't any other alternatives. So pushing the tab up with the metal probe (just a narrow rigid metal wire) allowed me to pull the connection apart.
All this takes place way at the back of the oven so its difficult to fiddle with a screwdriver and the retaining screws at arms length. Putting a bit of scotch tape around the screw to keep it attached to the screwdriver kept it from falling off. My hand was a bit shaky extended like that so that was the way to go.
Bottom line, if your oven won't reach or hold the temp you dial in on the control panel it's the temperature sensor. Now if I set it for 300 deg. that's what I get.
All this takes place way at the back of the oven so its difficult to fiddle with a screwdriver and the retaining screws at arms length. Putting a bit of scotch tape around the screw to keep it attached to the screwdriver kept it from falling off. My hand was a bit shaky extended like that so that was the way to go.
Bottom line, if your oven won't reach or hold the temp you dial in on the control panel it's the temperature sensor. Now if I set it for 300 deg. that's what I get.
Parts Used:
-
Richard from EVANSTON, WY
-
Difficulty Level:Really Easy
-
Total Repair Time:15 - 30 mins
-
Tools:Screw drivers
2 of 2 people
found this instruction helpful.
Was this instruction helpful to you?
Thank you for voting!
Worn out bake element
I was able to remove the old element and planned it with what little time off that I could. This would have been maybe 20-30 minute repair at the most. HOWEVER! I was extremely irritated screws were not included? When I called to ask if they were missing they said they didn’t come with the element. Cost me a very annoying trip to the hardware store. Not sure if I missed it on the site that they don’t provide screws - would have been nice to know that before I started. Still scratching my head as to why screws wouldn’t be included? My old ones were as beat up as the element I replaced. I was so irritated I was looking for a spot to leave feedback. Product is fine. Shipping was fine. Sending these products out as they do? Zero stars on that.
Parts Used:
-
janet from OLD ORCHD BCH, ME
-
Difficulty Level:Easy
-
Total Repair Time:15 - 30 mins
-
Tools:Screw drivers
2 of 3 people
found this instruction helpful.
Was this instruction helpful to you?
Thank you for voting!
Bottom element not working properly
Verify power is off to the oven, turned main power supply off for the oven at the breaker panel, located the securing screws for the defective element, used a Phillips screw driver to remove the screws, pulled the element slightly out unit wires are exposed, verify 0 volts at the element wiring terminals, used pliers to remove the wires to complete the uninstalling process, reinstall the element in the reverse order, restored power at the breaker panel
Parts Used:
-
Stephen from CONYERS, GA
-
Difficulty Level:Very Easy
-
Total Repair Time:Less than 15 mins
-
Tools:Pliers, Screw drivers
2 of 3 people
found this instruction helpful.
Was this instruction helpful to you?
Thank you for voting!
The bottom bake element died
Well, the instructions on the computer site were very easy to understand, however, the difficulty lay in the fact that we were 2 78 yr old people and getting to the inside the oven, lifting up the element so that we could see where it should be connected and get it connected was a task. We had to get down on our knees and then get back up. That was a chore within itself. But, the instructions were easy and clear.
Bottom line if us old people can do it, anyone can.
Bottom line if us old people can do it, anyone can.
Parts Used:
-
Judith from QUINCY, CA
-
Difficulty Level:A Bit Difficult
-
Total Repair Time:30 - 60 mins
-
Tools:Screw drivers
2 of 3 people
found this instruction helpful.
Was this instruction helpful to you?
Thank you for voting!