















RBS245PRB05 Whirlpool Wall Oven - Instructions
Keep searches simple. Use keywords, e.g. "leaking", "pump", "broken" or "fit".
Inner Glass Was Broken
I followed the instructions for installation on your site. I encountered two problems. I was unable to unscrew several screws. I had to used wd40 and slight encouragement from a soft hammer. Also, I was glad for the advice in one instruction about paying attention to the type of screw (flat or more flat). Otherwise, when I was ready to put everything back together, I would have had some problems. The flatter screws definitely had to be used in certain areas.
Parts Used:

-
Jane A. from Lake Forest, IL
-
Difficulty Level:A Bit Difficult
-
Total Repair Time:30 - 60 mins
-
Tools:Pliers, Screw drivers
Was this instruction helpful to you?
Thank you for voting!
Oven would not heat after self cleaning operation
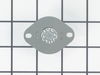
Removed trim strip from each side of oven, removed one screw from each side hat held oven in place and slid oven out of wall. Finally found the thermostat located on the back side of the oven after removing the sheet metal on back. replaced the thermostat and reversed the procedure. Only difficult part was locating the thermostat. I thought it was on top, when in fact it was on the back. Pretty easy, really, and saved some cash in the process.
Parts Used:
-
Bruce from Des Moines, IA
-
Difficulty Level:Easy
-
Total Repair Time:30 - 60 mins
-
Tools:Screw drivers
Was this instruction helpful to you?
Thank you for voting!
Lower heating elememt was not working and required replacement
1. REMEMBERED TO SHUT OFF THE APPLICABLE 240V BREAKER. 2. Carefully removed the 2 screws holding the element to the oven structure 3. Carefully extracted the 2 wires from the holes at the rear. 4. Carefully removed the wires from the old element 5. Attached the wire sockets to the new element. 6. Carefully eased the wires back through the holes at the rear 7. Attached the 2 screws through the element holding clamp to the rear wall of the oven. Everything went better than I had expected.
Parts Used:

-
Derek from Sun Lakes, AZ
-
Difficulty Level:Really Easy
-
Total Repair Time:15 - 30 mins
-
Tools:Pliers, Screw drivers
Was this instruction helpful to you?
Thank you for voting!