















RB757WC2WW Hotpoint Range - Instructions
Keep searches simple. Use keywords, e.g. "leaking", "pump", "broken" or "fit".
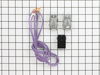
Two blocks kept shorting out.
After watching the video and ordering the parts and searching for the right size socket (which took most of the time) and finding medical tape as I had no electrical tape I took of the back unhooked the terminals and following the wires to determine which ones needed to be replaced I followed the video instructions on reverse as my son had spliced new terminal blocks into the old wires I taped each new wire to the one it was replacing and pulled it through the back of the stove and into the front attached the new wires to the new block and pushed the clips on the other end of the wires to the knob boxes. I rolled up the excess wire and taped it securely with medical tape so it wouldn't unravel and be in the way when I reattached the back shield on the stove. After I repeated the process for the second terminal (I had two that kept shorting out) I reassembled the stove plugged it back into the wall and used both burners that night to cook dinner! I have had no problems with those burners since then. Really if you watch the video first and follow the instructions you should have no problems. It is really quite simple if someone hasn't tried to repair the problems without replacing the wires. Splicing new blocks into old wires just doesn't work. If I have this problem again, which I hope I don't, I will be confident in my ability to fix the problem myself. Thank you parts select for repair video and the parts.
Parts Used:
-
Evelyn from FRANKLIN, NH
-
Difficulty Level:Easy
-
Total Repair Time:1- 2 hours
-
Tools:Socket set
1 person
found this instruction helpful.
Was this instruction helpful to you?
Thank you for voting!
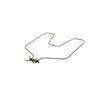
The element broke in 2....
Pull out wires & replace element by putting wires back in then tighten...done!!!!
Parts Used:
-
jannis from PHILLIPSBURG, NJ
-
Difficulty Level:Really Easy
-
Total Repair Time:30 - 60 mins
-
Tools:Screw drivers
1 person
found this instruction helpful.
Was this instruction helpful to you?
Thank you for voting!
burner terminal block was worn out
I unhooked the main power cord, unhooked the worn out block terminal cut the tape that was holding all the wires together. Removed the back panel and followed the wires unhooked the 2 wires and installed the new block terminal. Tied all the wires back, attached the back panel and plugged the power cord back into the outlet. i tested the burner to see if it was working. The burner is working great, instructions were easy to follow and my wife is happy. Thank you
Parts Used:
-
Mario from RENO, NV
-
Difficulty Level:Really Easy
-
Total Repair Time:30 - 60 mins
-
Tools:Nutdriver, Pliers
1 person
found this instruction helpful.
Was this instruction helpful to you?
Thank you for voting!
Replaced the outlet the one of the top burners on top of my stove, it went very well.
I followed the instructions on the video, the only thing they left out is where the wires go through to the back of the stove being that there are sharp edges. A role of glass tape would have been handy to replace the old tape. Thanks for asking, I hope this helps someone else.
Parts Used:
-
Charles from MECHANIC FLS, ME
-
Difficulty Level:Easy
-
Total Repair Time:30 - 60 mins
-
Tools:Screw drivers
1 person
found this instruction helpful.
Was this instruction helpful to you?
Thank you for voting!
The lower,BAKE, element had burned in half almost causing a fire.
Slide the rang out to access the 240V plug & unplugging it. Removed the sheetmetal cover from the rear of the range to access the slip on wire plugs to prevent damaging the insulation. The insulation would be damaged if pulling them through the opening in the oven wall with the plugs attached to the element. Removed the racks from the oven. Unscrewed the retaining screws holding the element to the rear wall of the oven, lifted damaged element out and reversed the process for instillation. Perfect opportunity to clean underneath and behind the range.
Parts Used:
-
Joseph from DIAMOND SPGS, CA
-
Difficulty Level:Very Easy
-
Total Repair Time:15 - 30 mins
-
Tools:Nutdriver, Pliers
1 person
found this instruction helpful.
Was this instruction helpful to you?
Thank you for voting!
burner was not heating
-
lucille from HAPPY CAMP, CA
-
Difficulty Level:Very Easy
-
Total Repair Time:15 - 30 mins
-
Tools:Screw drivers
1 person
found this instruction helpful.
Was this instruction helpful to you?
Thank you for voting!
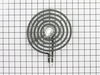
Replaced burner and it worked perfectly!
All I had to do was to plug the burner in and it worked.
Parts Used:
-
Marie from ROYSTON, GA
-
Difficulty Level:Really Easy
-
Total Repair Time:Less than 15 mins
1 person
found this instruction helpful.
Was this instruction helpful to you?
Thank you for voting!
Change bulb

-
Louis from LEAGUE CITY, TX
-
Difficulty Level:Really Easy
-
Total Repair Time:30 - 60 mins
-
Tools:Nutdriver
3 of 8 people
found this instruction helpful.
Was this instruction helpful to you?
Thank you for voting!
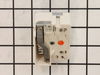
Surface element switch failed
Top front sloping sheet metal panel with all controls and plastic end caps has to come off. Need 2 people, one to hold it while other replaces switch. Problem was getting screw holes on bottom ends lined up and cuts from sheet metal edges. Ten minutes to get it apart, 40 to get it back together. New switch works fine.
Parts Used:
-
William W. from Seattle, WA
-
Difficulty Level:A Bit Difficult
-
Total Repair Time:30 - 60 mins
-
Tools:Screw drivers
1 of 2 people
found this instruction helpful.
Was this instruction helpful to you?
Thank you for voting!
Lower oven element burned into
Move range out from wall,unplug power supply,remove two screws from back wall of lower oven element unplug two wires,discard burned element.Install new element,plug two wires in,fasten two screws. Done
Parts Used:
-
Rickey from Childress, TX
-
Difficulty Level:Very Easy
-
Total Repair Time:Less than 15 mins
-
Tools:Nutdriver
2 of 5 people
found this instruction helpful.
Was this instruction helpful to you?
Thank you for voting!
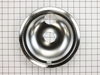
Drip bowls had deteriorated after years of use
Removed burners and existing drip bowls and installed new drip bowls and existing burners took approximately 15 minutes
Parts Used:
-
Stuart from UNION SPRINGS, NY
-
Difficulty Level:Very Easy
-
Total Repair Time:Less than 15 mins
1 of 2 people
found this instruction helpful.
Was this instruction helpful to you?
Thank you for voting!
Burnt Terminal Block
Unplug the range before opening the back panel and removed the wiring connection and replaced with the new one
Parts Used:
-
Bayani P. from DALY CITY, CA
-
Difficulty Level:Really Easy
-
Total Repair Time:15 - 30 mins
-
Tools:Screw drivers, Socket set
1 of 2 people
found this instruction helpful.
Was this instruction helpful to you?
Thank you for voting!
part replacement
-
charles from st marys, GA
-
Difficulty Level:Really Easy
-
Total Repair Time:Less than 15 mins
1 of 2 people
found this instruction helpful.
Was this instruction helpful to you?
Thank you for voting!
electric burner shorted out and fried the switch
Removed two screws holding the housing in place and loosened two more on the back it order to free it. Switch was held i place with two screws, removed those. Transfered wires one by one on the new switch, which was identical OEM part, and replaced the screws. VERY simple.
Parts Used:
-
David from Greenwood, IN
-
Difficulty Level:Really Easy
-
Total Repair Time:Less than 15 mins
-
Tools:Nutdriver, Screw drivers
1 of 2 people
found this instruction helpful.
Was this instruction helpful to you?
Thank you for voting!
Oven Wouldnt Bake Food Very Well It Took To Long To Bake
First I found the model number, but it's parts were under a different number. So I ordered what I thought was the right oven element, but it wasnt right . My husband couldnt get it to fit . Well he finaly found the right part number so we could order the right part. We returned the wrong part and got the right element. It went in perfectly and the oven is working just fine now. Remember to always look up the part number you need and then order it.
Parts Used:
-
SUZANNE from DAVID CITY, NE
-
Difficulty Level:Really Easy
-
Total Repair Time:15 - 30 mins
-
Tools:Screw drivers
1 of 2 people
found this instruction helpful.
Was this instruction helpful to you?
Thank you for voting!