















RB757BC2CT Hotpoint Range - Instructions
Keep searches simple. Use keywords, e.g. "leaking", "pump", "broken" or "fit".
Removal reinstalling
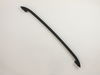
Removal old fashioned oven door handle took time after removing the oven door. New replacement handle was easy to install! Try to reinstall was long and finally got installed after 5 attempts due hinge on right side issue
Parts Used:
-
Thomas from HAMPSTEAD, NH
-
Difficulty Level:A Bit Difficult
-
Total Repair Time:More than 2 hours
-
Tools:Screw drivers, Socket set
1 person
found this instruction helpful.
Was this instruction helpful to you?
Thank you for voting!
Broiler Unit Failed
Used nut driver and removed the 4 nuts holding the broiler. Pulled electrical wires of old broiler Received new unit and it was just as easy to replace. Thank you for assistance.
Parts Used:

-
William from BOYERTOWN, PA
-
Difficulty Level:Really Easy
-
Total Repair Time:15 - 30 mins
-
Tools:Nutdriver
1 person
found this instruction helpful.
Was this instruction helpful to you?
Thank you for voting!
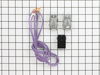
on off switch smoked and smelled hot
-
john from MILROY, PA
-
Difficulty Level:Really Easy
-
Total Repair Time:15 - 30 mins
-
Tools:Pliers, Screw drivers
1 person
found this instruction helpful.
Was this instruction helpful to you?
Thank you for voting!
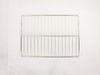
oven racks old and ugly
1. Open oven door
2. insert oven racks (perfect fit)
3. close oven door. Done and finished - man am I tired
2. insert oven racks (perfect fit)
3. close oven door. Done and finished - man am I tired
Parts Used:
-
Claudene from ORCUTT, CA
-
Difficulty Level:Very Easy
-
Total Repair Time:Less than 15 mins
1 person
found this instruction helpful.
Was this instruction helpful to you?
Thank you for voting!
Replaced the outlet the one of the top burners on top of my stove, it went very well.
I followed the instructions on the video, the only thing they left out is where the wires go through to the back of the stove being that there are sharp edges. A role of glass tape would have been handy to replace the old tape. Thanks for asking, I hope this helps someone else.
Parts Used:
-
Charles from MECHANIC FLS, ME
-
Difficulty Level:Easy
-
Total Repair Time:30 - 60 mins
-
Tools:Screw drivers
1 person
found this instruction helpful.
Was this instruction helpful to you?
Thank you for voting!
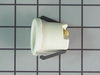
BASE OF BULB BROKE OFF & WELDED TO SOCKET
PULL RANGE OUT FROM WALL & ALSO REMOVED OVEN DOOR BY SLIDING UP. WORKING FROM INSIDE OVEN & ALSO BEHIND I REPLACED PART . ALWAYS " UNPLUG " RANGE BEFORE YOU START.
Parts Used:
-
NEIL from ROCKY POINT, NY
-
Difficulty Level:Easy
-
Total Repair Time:30 - 60 mins
-
Tools:Nutdriver, Pliers
1 person
found this instruction helpful.
Was this instruction helpful to you?
Thank you for voting!
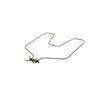
The element broke in 2....
Pull out wires & replace element by putting wires back in then tighten...done!!!!
Parts Used:
-
jannis from PHILLIPSBURG, NJ
-
Difficulty Level:Really Easy
-
Total Repair Time:30 - 60 mins
-
Tools:Screw drivers
1 person
found this instruction helpful.
Was this instruction helpful to you?
Thank you for voting!
burner terminal block was worn out
I unhooked the main power cord, unhooked the worn out block terminal cut the tape that was holding all the wires together. Removed the back panel and followed the wires unhooked the 2 wires and installed the new block terminal. Tied all the wires back, attached the back panel and plugged the power cord back into the outlet. i tested the burner to see if it was working. The burner is working great, instructions were easy to follow and my wife is happy. Thank you
Parts Used:
-
Mario from RENO, NV
-
Difficulty Level:Really Easy
-
Total Repair Time:30 - 60 mins
-
Tools:Nutdriver, Pliers
1 person
found this instruction helpful.
Was this instruction helpful to you?
Thank you for voting!
The bottome heater element of my oven burned out.
I used pliers to remove the hex bolts from the old burner element and pulled out the terminals by hand. I ordered my part and was slightly concerned because the part number was different (this due to my oven being so old I guess). After reading another repair story on this site, when I got my new part, I turned off the electricity to the range at the fuse box vs. unplugging the oven from the wall - because if I had pulled out the oven to access the plug, I would have had to re-caulk along the edges where it connects with my counter tops. I then slid the terminals into the female parts; this was a bit tricky because the female parts had receded behind the insulation in the hole in the back of the oven where they are located. I used small needle-nosed pliers to grab them and pull them forward enough to slide the new terminals in (by hand). I then put in the old hex bolts and used the pliers to tighten them. Flipped the fuse box switch and tried it out - worked great!
Parts Used:
-
Mary from ALOHA, OR
-
Difficulty Level:Really Easy
-
Total Repair Time:15 - 30 mins
-
Tools:Pliers
1 person
found this instruction helpful.
Was this instruction helpful to you?
Thank you for voting!
Lower oven element burned into
Move range out from wall,unplug power supply,remove two screws from back wall of lower oven element unplug two wires,discard burned element.Install new element,plug two wires in,fasten two screws. Done
Parts Used:
-
Rickey from Childress, TX
-
Difficulty Level:Very Easy
-
Total Repair Time:Less than 15 mins
-
Tools:Nutdriver
2 of 5 people
found this instruction helpful.
Was this instruction helpful to you?
Thank you for voting!
Change bulb

-
Louis from LEAGUE CITY, TX
-
Difficulty Level:Really Easy
-
Total Repair Time:30 - 60 mins
-
Tools:Nutdriver
3 of 8 people
found this instruction helpful.
Was this instruction helpful to you?
Thank you for voting!
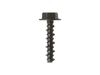
Missing screw to range door handle
The part that was ordered based on the shamanic wasn't the part that was needed for the repair. It was to short. I took the other screw for the other side and that screw was an inch longer than the screw that was ordered thru your company. I then went too a jar that I placed extra screws, nuts and bolts which l keep in my garage . I found a same length screw but a different head and it works perfectly fine. When I ordered the part from your company most of the parts did not have a photo of the part on file, or a description like how long the part is. I still ordered it because it should fit the make and model number that was posted on the shamanic that was showed to me on line.
Parts Used:
-
Stanley from TRENTON, NJ
-
Difficulty Level:Very Easy
-
Total Repair Time:Less than 15 mins
1 of 2 people
found this instruction helpful.
Was this instruction helpful to you?
Thank you for voting!
lower element burned out
after removing element.I order part. part was inserted without problems . It was correct fit. I am now baking again. Thank you the quick services on the order.
Parts Used:
-
Charlean from Lyon, MS
-
Difficulty Level:Really Easy
-
Total Repair Time:Less than 15 mins
-
Tools:Pliers
1 of 2 people
found this instruction helpful.
Was this instruction helpful to you?
Thank you for voting!
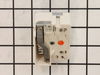
electric burner shorted out and fried the switch
Removed two screws holding the housing in place and loosened two more on the back it order to free it. Switch was held i place with two screws, removed those. Transfered wires one by one on the new switch, which was identical OEM part, and replaced the screws. VERY simple.
Parts Used:
-
David from Greenwood, IN
-
Difficulty Level:Really Easy
-
Total Repair Time:Less than 15 mins
-
Tools:Nutdriver, Screw drivers
1 of 2 people
found this instruction helpful.
Was this instruction helpful to you?
Thank you for voting!
Burnt Terminal Block
Unplug the range before opening the back panel and removed the wiring connection and replaced with the new one
Parts Used:
-
Bayani P. from DALY CITY, CA
-
Difficulty Level:Really Easy
-
Total Repair Time:15 - 30 mins
-
Tools:Screw drivers, Socket set
1 of 2 people
found this instruction helpful.
Was this instruction helpful to you?
Thank you for voting!