















RB171TW Magic Chef Refrigerator - Instructions
Keep searches simple. Use keywords, e.g. "leaking", "pump", "broken" or "fit".
Condenser fan motor froze up
Unplug fridge, unpluged fan motor from plug socket, removed bracket screws, removed fan retainer clip from shaft. removed screws holding fan to bracket
Parts Used:

-
Douglas from Mesa, AZ
-
Difficulty Level:Easy
-
Total Repair Time:15 - 30 mins
-
Tools:Nutdriver, Pliers
2 of 4 people
found this instruction helpful.
Was this instruction helpful to you?
Thank you for voting!
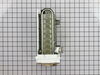
Ice maker was leaking
-
Raymond from Kenilworth, UT
-
Difficulty Level:Really Easy
-
Total Repair Time:Less than 15 mins
-
Tools:Nutdriver
1 person
found this instruction helpful.
Was this instruction helpful to you?
Thank you for voting!
Ice Maker didn't make ice
Very easy to install the new ice maker. Removed the bottom screw holding the ice maker to the side of the freezer. Loosened the top two screws. The old ice maker came off just like that. Unplugged the power supply from the freezer and removed the whole apparatus.
I saved the wiring harness, screws, cover, and metal arm from the old ice maker. Installed these on the new one and mounted the new ice maker in the freezer. Done.
The only issue I had was that the water supply hose got kinked when I pushed the fridge back into place. Once that was resolved, the new ice maker started happily making ice.
I saved the wiring harness, screws, cover, and metal arm from the old ice maker. Installed these on the new one and mounted the new ice maker in the freezer. Done.
The only issue I had was that the water supply hose got kinked when I pushed the fridge back into place. Once that was resolved, the new ice maker started happily making ice.
Parts Used:
-
Kevin from Whitehouse, OH
-
Difficulty Level:Really Easy
-
Total Repair Time:Less than 15 mins
-
Tools:Nutdriver
1 person
found this instruction helpful.
Was this instruction helpful to you?
Thank you for voting!
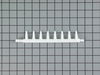
Ice maker ejector arm broke into.
-
Mary L. from Millsboro,, DE
-
Difficulty Level:Really Easy
-
Total Repair Time:Less than 15 mins
-
Tools:Screw drivers
16 of 46 people
found this instruction helpful.
Was this instruction helpful to you?
Thank you for voting!
Not all ice cubes were coming out of tray. Water was freezing from maker into cube catcher
Remove bottom screw loosen 2 top screws unplug connector from back of icebox. Lift up and pull forward. Swap front cover full bucket stop bar and wire (plugs in) reinstall 10 minute job
Parts Used:
-
David from NORTH HAVEN, CT
-
Difficulty Level:Really Easy
-
Total Repair Time:Less than 15 mins
-
Tools:Nutdriver, Screw drivers
1 person
found this instruction helpful.
Was this instruction helpful to you?
Thank you for voting!
Old Icemaker Leaked
-
Michael from SPANISH FORK, UT
-
Difficulty Level:Very Easy
-
Total Repair Time:Less than 15 mins
-
Tools:Nutdriver
1 person
found this instruction helpful.
Was this instruction helpful to you?
Thank you for voting!
non stick coating coming off in ice cubes / cubes wouldn't come out of tray
Five minutes with a phillips screw driver and the cube maker was changed. . . In the process, I failed to unplug the unit, and shorted the fill valve in the back. Again, five minutes with a nut driver and it was changed. No need for a PHD or the cost of a service technician for either job.
Parts Used:
-
Richard from WINAMAC, IN
-
Difficulty Level:Really Easy
-
Total Repair Time:Less than 15 mins
-
Tools:Nutdriver, Screw drivers
1 person
found this instruction helpful.
Was this instruction helpful to you?
Thank you for voting!
not making ice
the diagnosis was the most difficult step.. and trusting that the one visible nut was the only thing holding it on.. (there are 2 other clips that you need to use a little force on to detach). remove the ice maker (one nut, 2 clips, detach plug).. then remove the 3 screws holding on the 'face' , pry face off, you will see where the 'contact' has burned/melted/worn away. replace unit. 80% of the time, this is the problem (according to my research)
Parts Used:
-
Joseph from MILFORD, CT
-
Difficulty Level:Really Easy
-
Total Repair Time:Less than 15 mins
-
Tools:Nutdriver
1 person
found this instruction helpful.
Was this instruction helpful to you?
Thank you for voting!
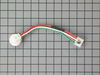
Ice maker dripping
Bought ice maker and new harness. Had to buy harness because of water damage. Took out the three screws that attached the ice maker and removed old leaky ice maker. Detached old harnees. Attaced new harness to new ice maker and put on back on with the three screws. Had ice in about 30 minutes. So easy to do!
Parts Used:
-
frank from new city, NY
-
Difficulty Level:Really Easy
-
Total Repair Time:15 - 30 mins
-
Tools:Screw drivers
2 of 4 people
found this instruction helpful.
Was this instruction helpful to you?
Thank you for voting!
Ice Tray leaked
The video of the installation was the best help I have ever had. Rather that vague written instructions that are usually so poorly written they are of no help, the video showed exactly how to do it. I wish everyone provided videos like this!
Parts Used:
-
Donald from Livermore, CA
-
Difficulty Level:Really Easy
-
Total Repair Time:15 - 30 mins
-
Tools:Nutdriver, Screw drivers
1 person
found this instruction helpful.
Was this instruction helpful to you?
Thank you for voting!
Leaking ice maker
Arrived soon than expected. Unplugged some wires, removed face plate, 3 screws--install and do reverse.
Easier than I would think---Saved $150- to have someone else do it.
Works fine.
Easier than I would think---Saved $150- to have someone else do it.
Works fine.
Parts Used:
-
GEORGE from SAN DIEGO, CA
-
Difficulty Level:Really Easy
-
Total Repair Time:15 - 30 mins
-
Tools:Pliers, Screw drivers
1 person
found this instruction helpful.
Was this instruction helpful to you?
Thank you for voting!
ice maker quit
Removed the elec connection (after unplugging app) found it easier to remove from appliance. Remove the three screws ( do not temove,....just loosen, the top two) bottom must be removed! Insert the power connection, exchange the tilt up rod, line up the water connection and place back on the two top screws. Tighten and relpace the bottom screw. I found out the hard way.... you cant't see the two top screws . The slots on the ice maker just fit over the screw heads.... it's cold in there!!!
Hopoe this helps..
Cape Cod
Hopoe this helps..
Cape Cod
Parts Used:
-
William from Mashpee, MA
-
Difficulty Level:A Bit Difficult
-
Total Repair Time:15 - 30 mins
-
Tools:Nutdriver
1 person
found this instruction helpful.
Was this instruction helpful to you?
Thank you for voting!
No problems.
Removed two screws on top. Then one under the ice maker ,held on to it while I unpluged the white flat plug. Then installed new one in reverse. Of course re-connect power wires on.
I turned power off at fuse box.
First batch of ice in an hour or so.
I turned power off at fuse box.
First batch of ice in an hour or so.
Parts Used:
-
Dennis from Goshen, OH
-
Difficulty Level:Really Easy
-
Total Repair Time:Less than 15 mins
-
Tools:Screw drivers
1 of 2 people
found this instruction helpful.
Was this instruction helpful to you?
Thank you for voting!
Ice maker leaked
It was real easy. I unpluged the fridge. Took out the three screws that held the icemaker to the wall. Unpluged the wire harness. Removed the old icemaker and reversed the order to install the new one. Everything lined up perfectly.
Parts Used:
-
Christopher from Ringwood, NJ
-
Difficulty Level:Really Easy
-
Total Repair Time:Less than 15 mins
-
Tools:Nutdriver
1 of 2 people
found this instruction helpful.
Was this instruction helpful to you?
Thank you for voting!
Ice make would turn but would not make any ice
First i removed the top two screws that help the ice maker in place then remove the bottom screw, then unplug unit from freezer, removed ice maker for freezer, took out wire harnes, put wire harnes in new ice maker, plug new unit in place the unit in freezer and put in the bottom screw, them align the top two screw and but them in and was done. Check ice maker in two hours and there was new ice being made.
Parts Used:
-
Kevin from Taylorsville, UT
-
Difficulty Level:Really Easy
-
Total Repair Time:Less than 15 mins
-
Tools:Nutdriver
1 of 2 people
found this instruction helpful.
Was this instruction helpful to you?
Thank you for voting!