


QAS740RM3SS Range - Overview
Models starting with QAS740RM3SS
Click on the best match to narrow your results.
Keep searches simple, eg. "belt" or "pump".

Light Bulb - 40W
PartSelect #: PS217532
Manufacturer #: 40A15
This 40-Watt light bulb is sold individually.
It is specially designed to withstand extreme temperatures, so this bulb is compatible with a variety of appliance types including refrigerators, ranges,...
$20.37
In Stock

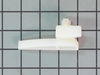
RECEPTACLE PUSH-IN
PartSelect #: PS752188
Manufacturer #: WB08T10026
This part is the replacement light socket for your oven. The oven light socket provides power to the light, and at the same time holds the light bulb in place.
$16.47
In Stock

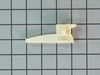
Drawer Glider - Left Side
PartSelect #: PS751895
Manufacturer #: WB02K10062
Introducing the Genuine Replacement Drawer Glide specifically designed for General Electric Range/stove/ovens. This is a crucial element that supports your broil or storage drawer, effortlessly allowi...
$16.76
In Stock


Element Radiant 5.5 IN
PartSelect #: PS2370248
Manufacturer #: WB30T10145
This surface element is designed to deliver heat to a specific cooking zone on the top of an electric range, providing consistent and efficient performance for everyday meal preparation. Located benea...
$110.22
In Stock

LIGHT INDICATOR
PartSelect #: PS1018167
Manufacturer #: WB27T10668
We understand how difficult it can be when your washer isn't performing like it used to. That's why we want to introduce you to this genuine Whirlpool CNTRL-ELEC appliance part. This isn't just a part...
$20.65
In Stock

Handle Spacer
PartSelect #: PS221948
Manufacturer #: WB01K10020
This spacer is located between the handle and the outside door panel. They are sold individually, and are usually recommended to be purchased in pairs.
$15.00
In Stock

SPRING RADIANT ELEMENT
PartSelect #: PS16542086
Manufacturer #: WB09X40389
This part is the replacement spring for the radiant element in your range. It is black in color, curved in shape, and is approximately 1 inch by 1/2 an inch. The radiant element spring is found beneat...
$16.05
In Stock


Common Symptoms of models starting with QAS740RM3SS
[Viewing 2 of 2]

Keep searches simple. Use keywords, e.g. "leaking", "pump", "broken" or "fit".
Interior light needed replaced
Unplugged the appliance for safety. Removed two 1/4" screws that held the assembly in place. Carefully removed the wire guard that retains the glass shield. Unscrewed old light bulb and replaced with new part. Reversed the steps after cleaning glass cover.
Parts Used:

-
Leo from TWIN FALLS, ID
-
Difficulty Level:Really Easy
-
Total Repair Time:Less than 15 mins
-
Tools:Nutdriver
22 of 43 people
found this instruction helpful.
Was this instruction helpful to you?
Thank you for voting!
Twice I ordered the oven light bulb & each time the light bulb was defected
I had to call for a appointment for repair with GE Appliance because I thought then it . .was something electrical. The technician came out & checked everything out, turned out it was not electrical, The technician went out to his truck got a light bulb from his truck, put it in & it worked. It cost me $121.00 for trip charge from GE appl
... Read more
iance for a light bulb that worked, your light bulbs were defective twice. Very disappointed with your products, cost me alot of money for a good light bulb thru GE appliance
Read less
Parts Used:
-
Barbara from BELLEVUE, WA
-
Difficulty Level:Very Difficult
-
Total Repair Time:Less than 15 mins
15 of 32 people
found this instruction helpful.
Was this instruction helpful to you?
Thank you for voting!
Replace Oven light socket and light bulb in kitchen Range
1) Turn off power at circuit breaker panel
2) Slide out Range from wall
3) Unplug Range
4) Remove back panel and unplug electrical connections to socket
5) From front of oven, remove glass cover over old oven light bulb and remove flange that holds socket and bulb
6) Remove old socket from mounting flange and disc ... Read more ard.
7) Place new socket into mounting flange
8) Screw mounting flange and new socket into the oven from front. Reattach electrical connections from back.
9) Screw in new light bulb from front
10) Replace existing glass cover over new light bulb and snap wire holder in place
11) Replace back panel
11) Plug in range
12) Slide range back to original position
13) Turn on power
Works like a charm! Thanks for having the parts after 30 years!
Read less
Parts Used:
-
Ronald from TUCSON, AZ
-
Difficulty Level:A Bit Difficult
-
Total Repair Time:30 - 60 mins
-
Tools:Pliers, Screw drivers, Socket set, Wrench set
6 of 6 people
found this instruction helpful.
Was this instruction helpful to you?
Thank you for voting!