Your coupon for will be reflected when you check out!
✖
Your coupon for
✖
Hello!
You're visiting the PartSelect site in U.S.
Would you like to shop on the Canadian site?
Stay on this site
Go to Canadian site
✖
Model Number Locations
1Select Category Type
Select Category Type
2Select Product Type
Select Product Type
3Select {MODEL} Type
Select {MODEL} Type
Sample Model Number Tags
Model numbers can be made up of numbers (1005400, for example) or a combination of letters and numbers (LAT1000AAE). The model number will most likely appear on either a paper sticker or a metal plate. Your appliance's model number tag may look similar to the sample model number tags shown here (model number highlighted in yellow):
Model has been saved to My Models. If you're not signed in, your lists are available on this device and will expire within 30 days.
Model has been saved to My Models.
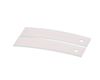
This authentic, white Drum Bearing Slide, also known as the bearing drum slide, glide, or pad, is a plastic, easy-to-install part for your dryer. It replaces the dryer's front drum slide to allow for ...
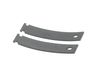
This original equipment manufacturer Drum Bearing Slide is a plastic, green, easy-to-install part for your dryer. It replaces the dryer's front drum slide to allow for easier movement. You'll know if...
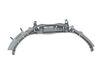
This Front Drum Bearing (Top Bearing, Dryer Drum Front Support Bearing, Drum Support Bearing, Dryer Drum Glide Bearing) holds the drum bearing and slides for the drum to turn on. The front drum bearin...
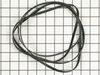
This Drive Belt is 89.5" long and comes in black, featuring four ribs on the inside for a better grip. This is a long belt that wraps all the way around the dryer drum, around a tension pulley, and th...
This is a lint filter screen that is used for many dryers. It has a metal screen with a white plastic frame, and is approximately 13 inches wide. This part is sold individually. The lint filter traps ...
This light bulb, also known as a drum lamp, illuminates and lights up the dryer drum when the door is open. If the light bulb in the dryer is burnt out or lighting is inconsistent, replacing it can so...
Restore reliable operation to your GE dryer with this genuine OEM push-to-start switch, designed specifically for use with a range of GE dryer models. This switch activates the dryer when you press an...
TThe door strike for your dryer is mounted on the dryer frame that the door shuts onto. It fits into the door catch on the door and keeps the door closed. If the door strike is damaged or missing, the...
The GE Complete Duct Trap Assembly is a crucial component for dryers, designed to enclose and support the lint screen in the exhaust air duct. It is important to unplug the dryer before replacing this...
$199.90
In Stock
Order now and your part arrives by Apr 10
Questions And Answers for PTMP920EMWS0
Be the first to ask our experts a question about this model!
✖
Ask a Question
Ask our experts a question on this model and we'll respond as soon as we can.
Removed the front Dryer panel. Left drum in place and lifted it up slightly to get access to motor drive. Slipped belt in place and put panel back on. This was a first attempt ever at fixing an appliance and it was no big deal.
First I really had to hunt for the proper way to get my dryer drum accessible for the repair. With my model it was as simple as removing two screws to take off the top panel (located by opening the dryer door), and then removing two other screws inside the front panel at the top. The front will then be able to swing to the left side (th
... Read moree door switch wires are on this side for this model). Simply remove the drum bearing by gently pulling it off. My slides were in such poor shape for less than 4 years old!! One of them had completely disintegrated! These slides have a small whole on one end which attaches to a small nub at the edge of a slot while the other side just slid into a slot at the other end. No need to even take out the drum!! The hardest part of the job was to get into the dryer!
The end repair was very simple and took minimal effort. The time and difficulty was all in the testing. I disassembled the dryer and removed the drum and then hard wired each thermo-fuse to determine where the fault was. After test all of those I was stumped. When I opened the door the light would not come on so I assumed it was a pow
... Read moreer fault closer to the source. However after all of my testing I couldn't find anything wrong. I then removed the light bulb and realized it was burned out which led me to the door switch being the fault. I removed the switch and soldered the three wire together and the dryer started right up! All I had to do was order a new $15 part, unsolder the wires and plug them in. Would have been so much simpler if that light bulb hadn't of been burned out causing me to over think my diagnosis. This was my first major appliance repair and I did it with only the help of the parts diagram provided on the website.