















PT9800SH7SS General Electric Wall Oven - Instructions
Keep searches simple. Use keywords, e.g. "leaking", "pump", "broken" or "fit".
Replace bulb under microwave
Part Select sent the wrong part I did not realize it until prong broke off one of the bulbs. They sent 130v instead of 120v. Return bulbs awaiting resolution.
Parts Used:

-
Andrew from COLUMBIA, MD
-
Difficulty Level:A Bit Difficult
-
Total Repair Time:Less than 15 mins
-
Tools:Screw drivers
2 of 5 people
found this instruction helpful.
Was this instruction helpful to you?
Thank you for voting!
Old knob broke
-
Carol from MUNSTER, IN
-
Difficulty Level:Very Easy
-
Total Repair Time:Less than 15 mins
1 of 2 people
found this instruction helpful.
Was this instruction helpful to you?
Thank you for voting!
Microwave’s Halogen Light Bulb burned out.
Our Microwave’s Halogen Light Bulb burned out.
We looked in our manual and were able to take the cover off to get to the bulb, but we were unable to unscrew the builb and the bulb in the manual did not match the size of the one you offer (size and part number were different)
We called 1-888-738-4871.
Gentleman who answered was very knowledgeable: answered all of our questions (PULL THE OLD BULB OUT) and assisted us by ordering replacement bulbs.
We (more importantly my wife) were very pleased with the result.
We looked in our manual and were able to take the cover off to get to the bulb, but we were unable to unscrew the builb and the bulb in the manual did not match the size of the one you offer (size and part number were different)
We called 1-888-738-4871.
Gentleman who answered was very knowledgeable: answered all of our questions (PULL THE OLD BULB OUT) and assisted us by ordering replacement bulbs.
We (more importantly my wife) were very pleased with the result.
Parts Used:
-
PETER from NEW YORK, NY
-
Difficulty Level:Really Easy
-
Total Repair Time:30 - 60 mins
-
Tools:Screw drivers
1 of 3 people
found this instruction helpful.
Was this instruction helpful to you?
Thank you for voting!
Went well.
Changed the Temperature Sensor as you suggested, but the problem of 40 minutes to reach a temperature of 375 degrees F. remained the same.
Parts Used:
-
Salih Hindas / from SPRNGFLD GDNS, NY
-
Difficulty Level:Really Easy
-
Total Repair Time:15 - 30 mins
-
Tools:Screw drivers
2 of 6 people
found this instruction helpful.
Was this instruction helpful to you?
Thank you for voting!
Burnt out lamp bulb
Remove oven light lens cover, remove the bulb and replace it with a new one.
Parts Used:

-
Carl from MENIFEE, CA
-
Difficulty Level:Really Easy
-
Total Repair Time:Less than 15 mins
5 of 15 people
found this instruction helpful.
Was this instruction helpful to you?
Thank you for voting!
Broken Probe Sensor
-
Michael from Tucson, AZ
-
Difficulty Level:Really Easy
-
Total Repair Time:Less than 15 mins
0 of 1 people
found this instruction helpful.
Was this instruction helpful to you?
Thank you for voting!
No heat

-
Edwin from New York, NY
-
Difficulty Level:Really Easy
-
Total Repair Time:15 - 30 mins
-
Tools:Screw drivers
0 of 1 people
found this instruction helpful.
Was this instruction helpful to you?
Thank you for voting!
Bulb burned out
-
Richard from SPRINGFIELD, MA
-
Difficulty Level:Really Easy
-
Total Repair Time:15 - 30 mins
-
Tools:Screw drivers
2 of 7 people
found this instruction helpful.
Was this instruction helpful to you?
Thank you for voting!
No heat.
-
Mack from Jacksonville, FL
-
Difficulty Level:Really Easy
-
Total Repair Time:Less than 15 mins
-
Tools:Pliers, Screw drivers
0 of 1 people
found this instruction helpful.
Was this instruction helpful to you?
Thank you for voting!
no night light
took out cover by removing cover. pulled out light bulbs replaced with new bulbs. replaced cover and tighten screw. very easy
Parts Used:
-
CURTIS from WINDSOR, WI
-
Difficulty Level:Really Easy
-
Total Repair Time:Less than 15 mins
-
Tools:Screw drivers
4 of 14 people
found this instruction helpful.
Was this instruction helpful to you?
Thank you for voting!
No heat on convection or bake. other functions operated fine
un plugged the oven. pulled the back cover off (3 screws). the heater terminations were there. removed heater wires. checked heater resistance with meter set on ohms reading was not correct. removed heater found a burned out place. installed new heater in reverse order of removal. works fine. If someone is a fare handy man this was a very simple task to do.
Parts Used:
-
lyle from crosby, TX
-
Difficulty Level:Easy
-
Total Repair Time:30 - 60 mins
-
Tools:Screw drivers
Was this instruction helpful to you?
Thank you for voting!
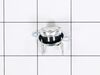
Could not be turned on
Removed outer cover and then replaced the T. C. O. located on the left upper side if the unit. Replaced outer cover, tested oven. Oven operates normally.
Parts Used:
-
Remer from Dothan, AL
-
Difficulty Level:Really Easy
-
Total Repair Time:1- 2 hours
-
Tools:Screw drivers
Was this instruction helpful to you?
Thank you for voting!
missing meat thermistor
-
John R from Asheville, NC
-
Difficulty Level:Really Easy
-
Total Repair Time:Less than 15 mins
Was this instruction helpful to you?
Thank you for voting!
circuit shortage shows, i thing it because i heat on the counter too long cause the thermotart not fumctional.
-
Rong from Portland, OR
-
Difficulty Level:Really Easy
-
Total Repair Time:Less than 15 mins
Was this instruction helpful to you?
Thank you for voting!
Powered Off completely
After reading reviews that there was no power what so ever and a fuse replacement will solve the problem, I tried it. Replacing the fuse is very easy (and I am not handy at all). All you have to do is remove the microwave cover from the top by removing two screws, slide the cover to the left and pulling the cover off. Then remove the grill in front of you, by removing one or two screws. The fuse is in front of you, use pliers and be firm but gentle. Replacing the fuse is easy but it did not solve my problem.
Parts Used:
-
Mohammad from Piscataway, NJ
-
Difficulty Level:Easy
-
Total Repair Time:Less than 15 mins
-
Tools:Screw drivers
Was this instruction helpful to you?
Thank you for voting!